通过python + pytest + requests + allure + Jenkins实现接口自动化测试
介绍
- python:编程语言
- pytest:第三方单元测试库
- requests:http接口测试第三方库
- allure:生成测试报告
- Jenkins:持续集成
一、全面认识requests模块以及常用的方法和底层原理
Requests模块适用于发送http请求以及接受http响应的python第三方库
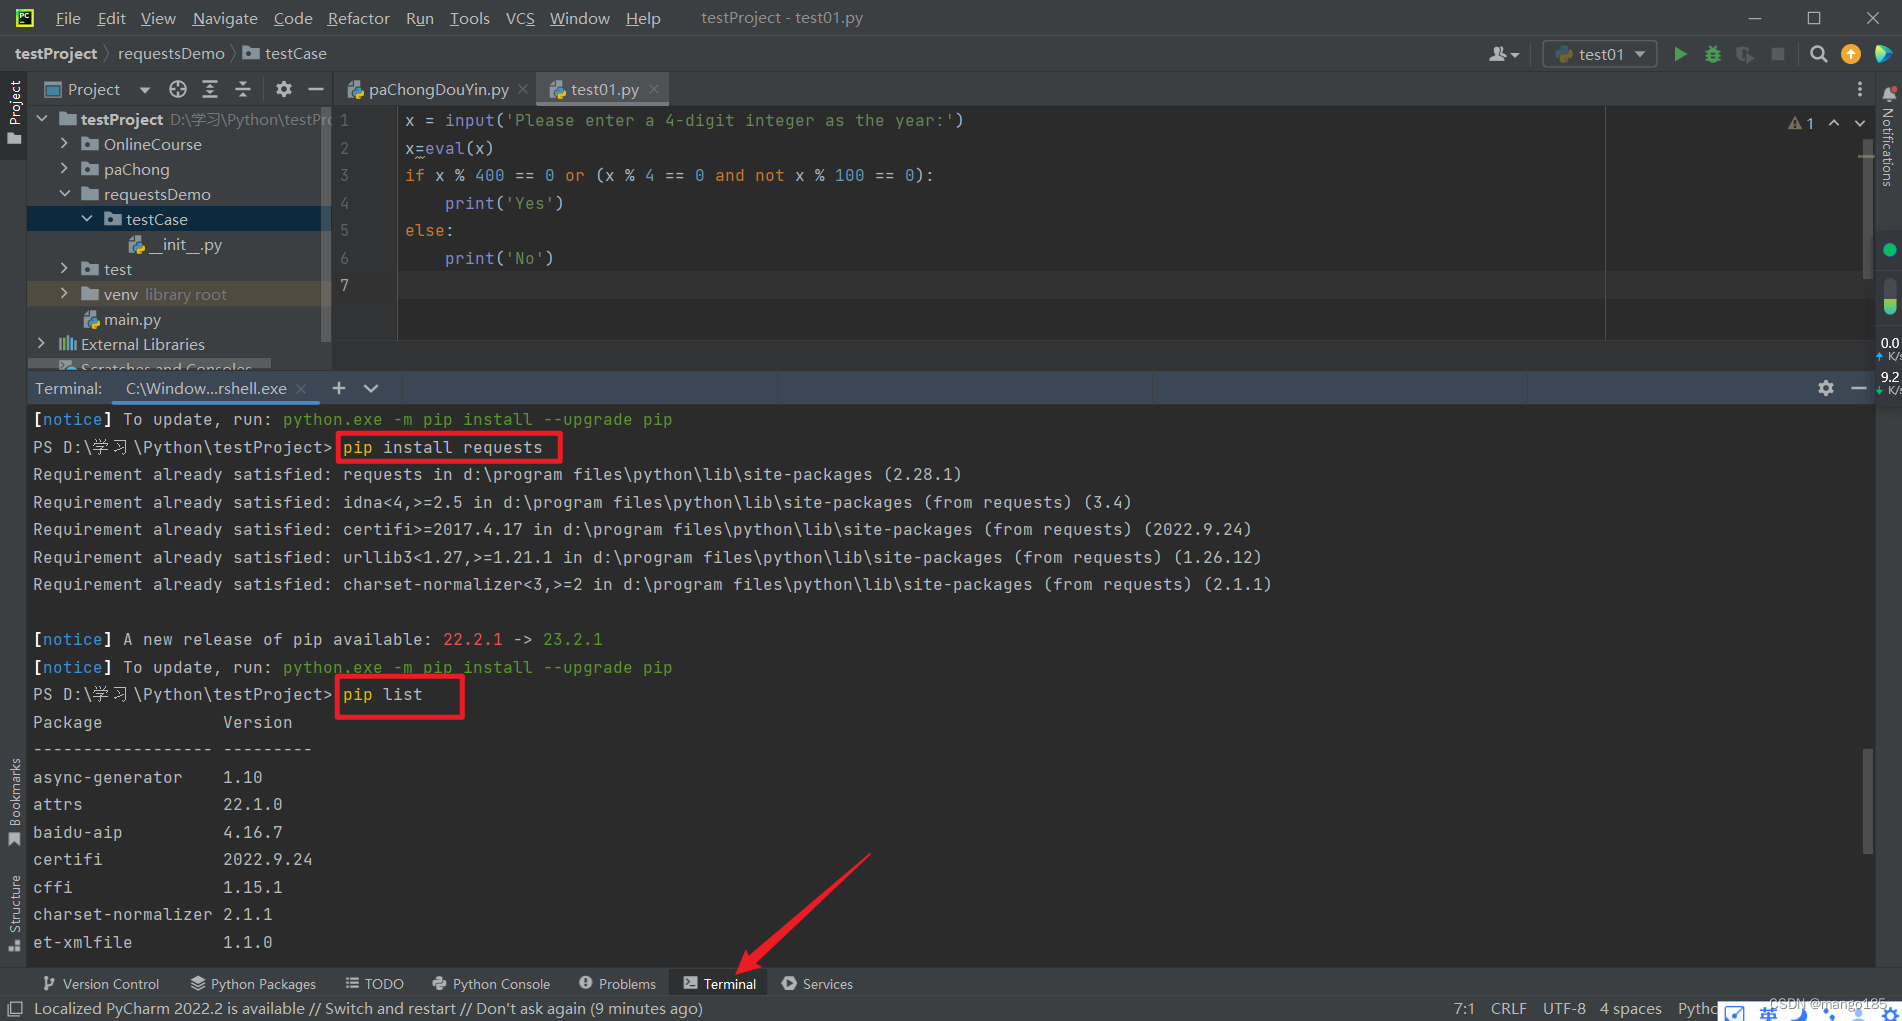
安装requests
1 | // 安装 |
详解requests
常用方法
1 | import requests |
CTRL + 鼠标左键查看具体方法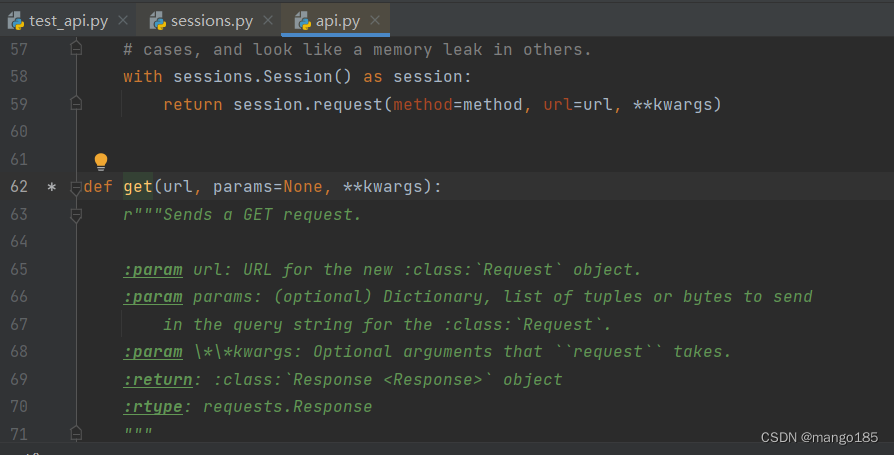
解析requests底层原理
1 | def get(url, params=None, **kwargs): |
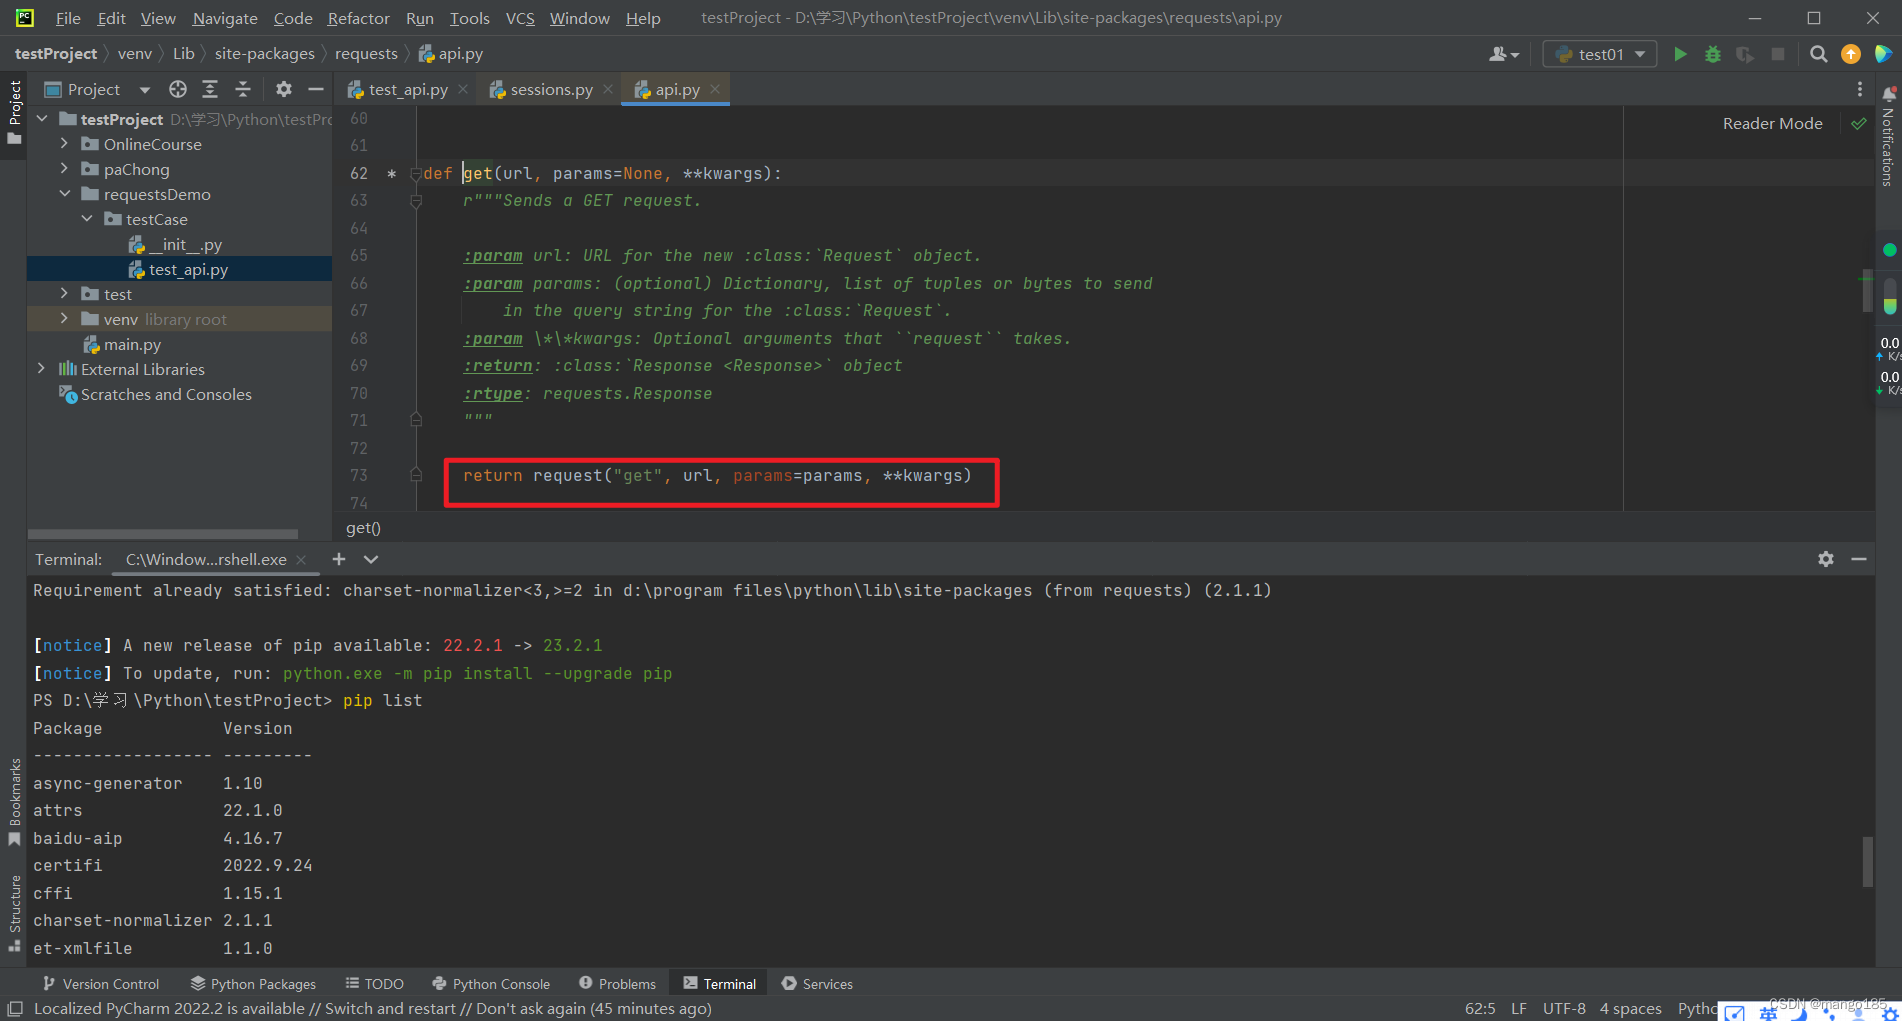
1 | def request(method, url, **kwargs): |
request方法底层调用的是session对象的request方法
1 | def request( |
response对象
1 | res.text 返回文本格式 |
二、测试框架:unittest和pytest
unittest和pytest框架的区别
https://blog.csdn.net/qishuzdh/article/details/125686523
pytest和unittest的区别:
- 安装需求不同
- pytest为第三方单元测试库,需额外安装;
- unittest为标准库,无需额外安装。
- 用例编写规则不同
- pytest编写规则较为简单,兼容性较好
- unittest需按照固定的格式编写,较为复杂。
pytest单元测试框架
pytest是一个非常成熟python用例测试框架,可以和很多的工具或框架(selenium、requests、appium、……)实现多种自动化测试
- 通过pytest的插件可以实现多种功能:
- pytest-html 生成html报告
- pytest-xdist 多线程
- pytest-ordering 标记测试用例的执行顺序
- pytest-rerunfailures 失败用例重跑
- pytest-base-url 管理基础路径
- allure-pytest 生成allure报告
- pytest
- requests
- pyyaml
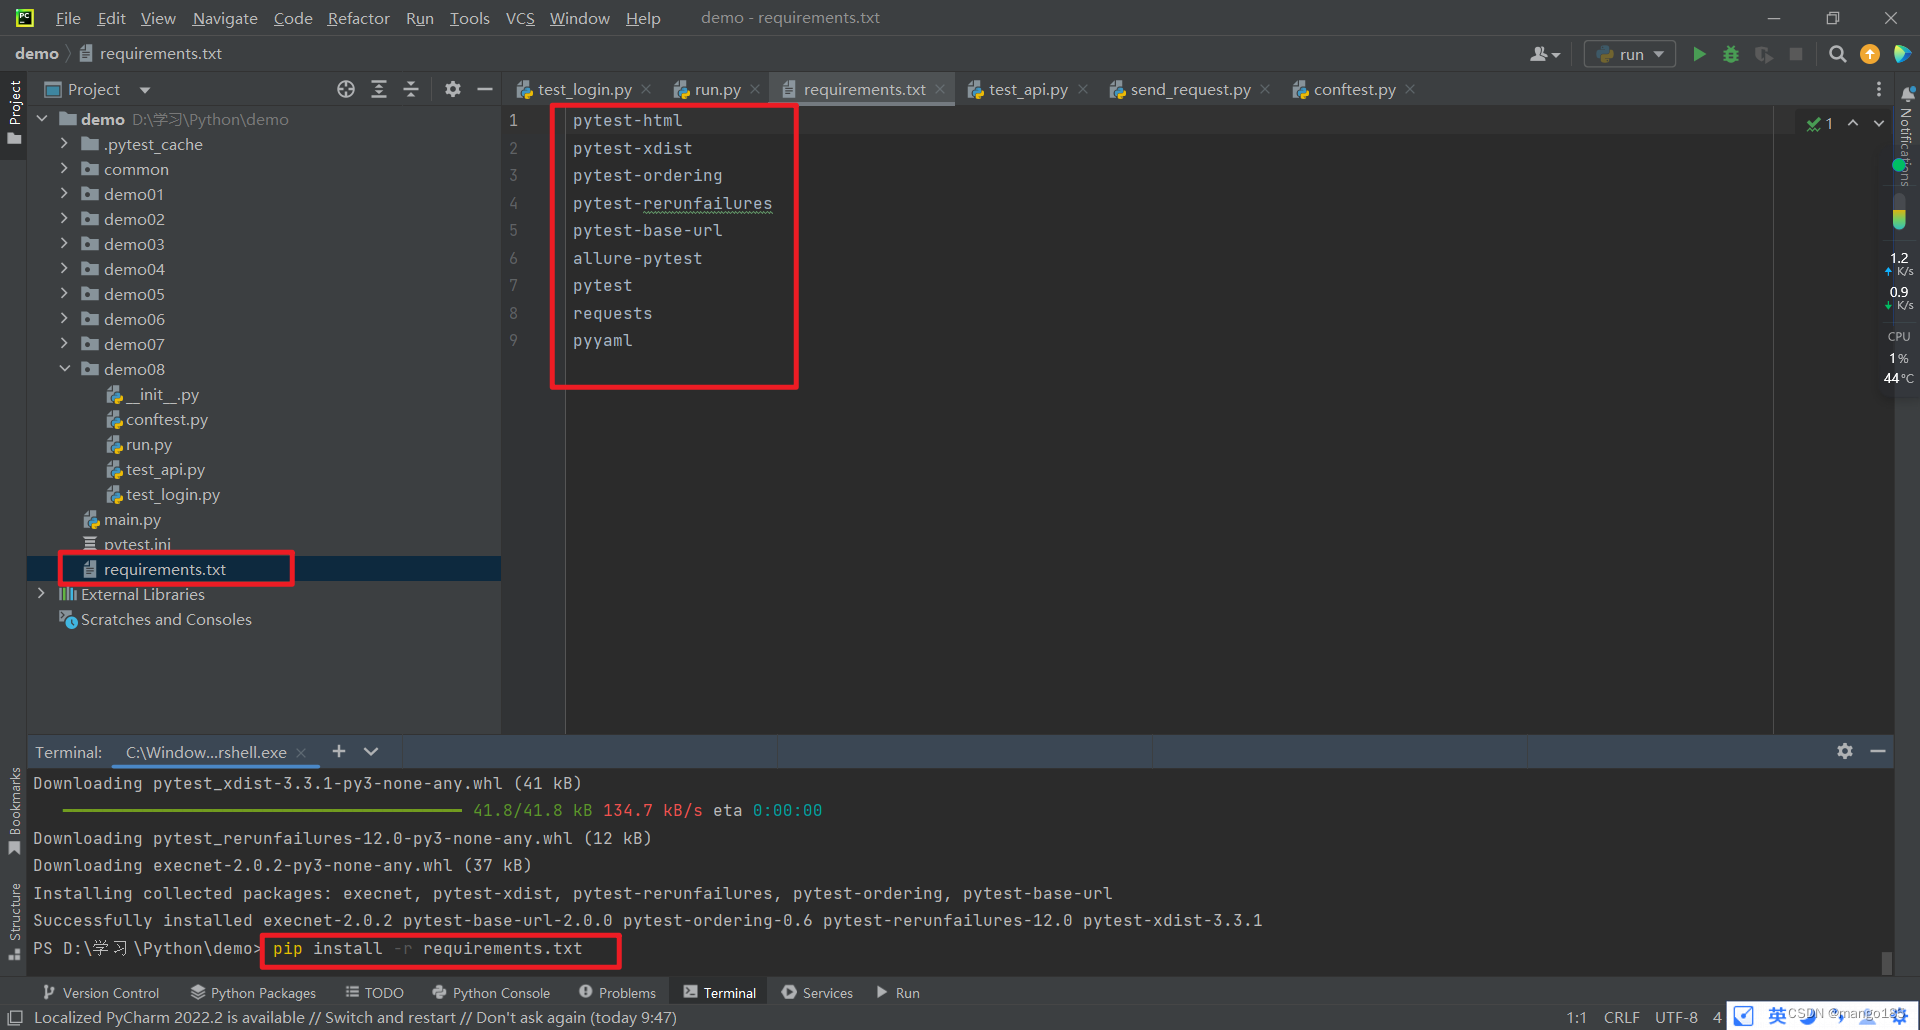
可以使用requirements.txt文件将所有的插件和模块放在一起,并通过下面的命令执行安装:
1 | pip install -r requirements.txt |
1 | pytest-html |
在所有用例的最外层写一个run.py文件,一次性执行所有用例:
1 | import pytest |
默认测试用例的规则:
- 模块名(py文件)必须以test_开头或_test结尾
- 类名必须Test开头
- 用例名必须以test_开头
1 | import pytest |
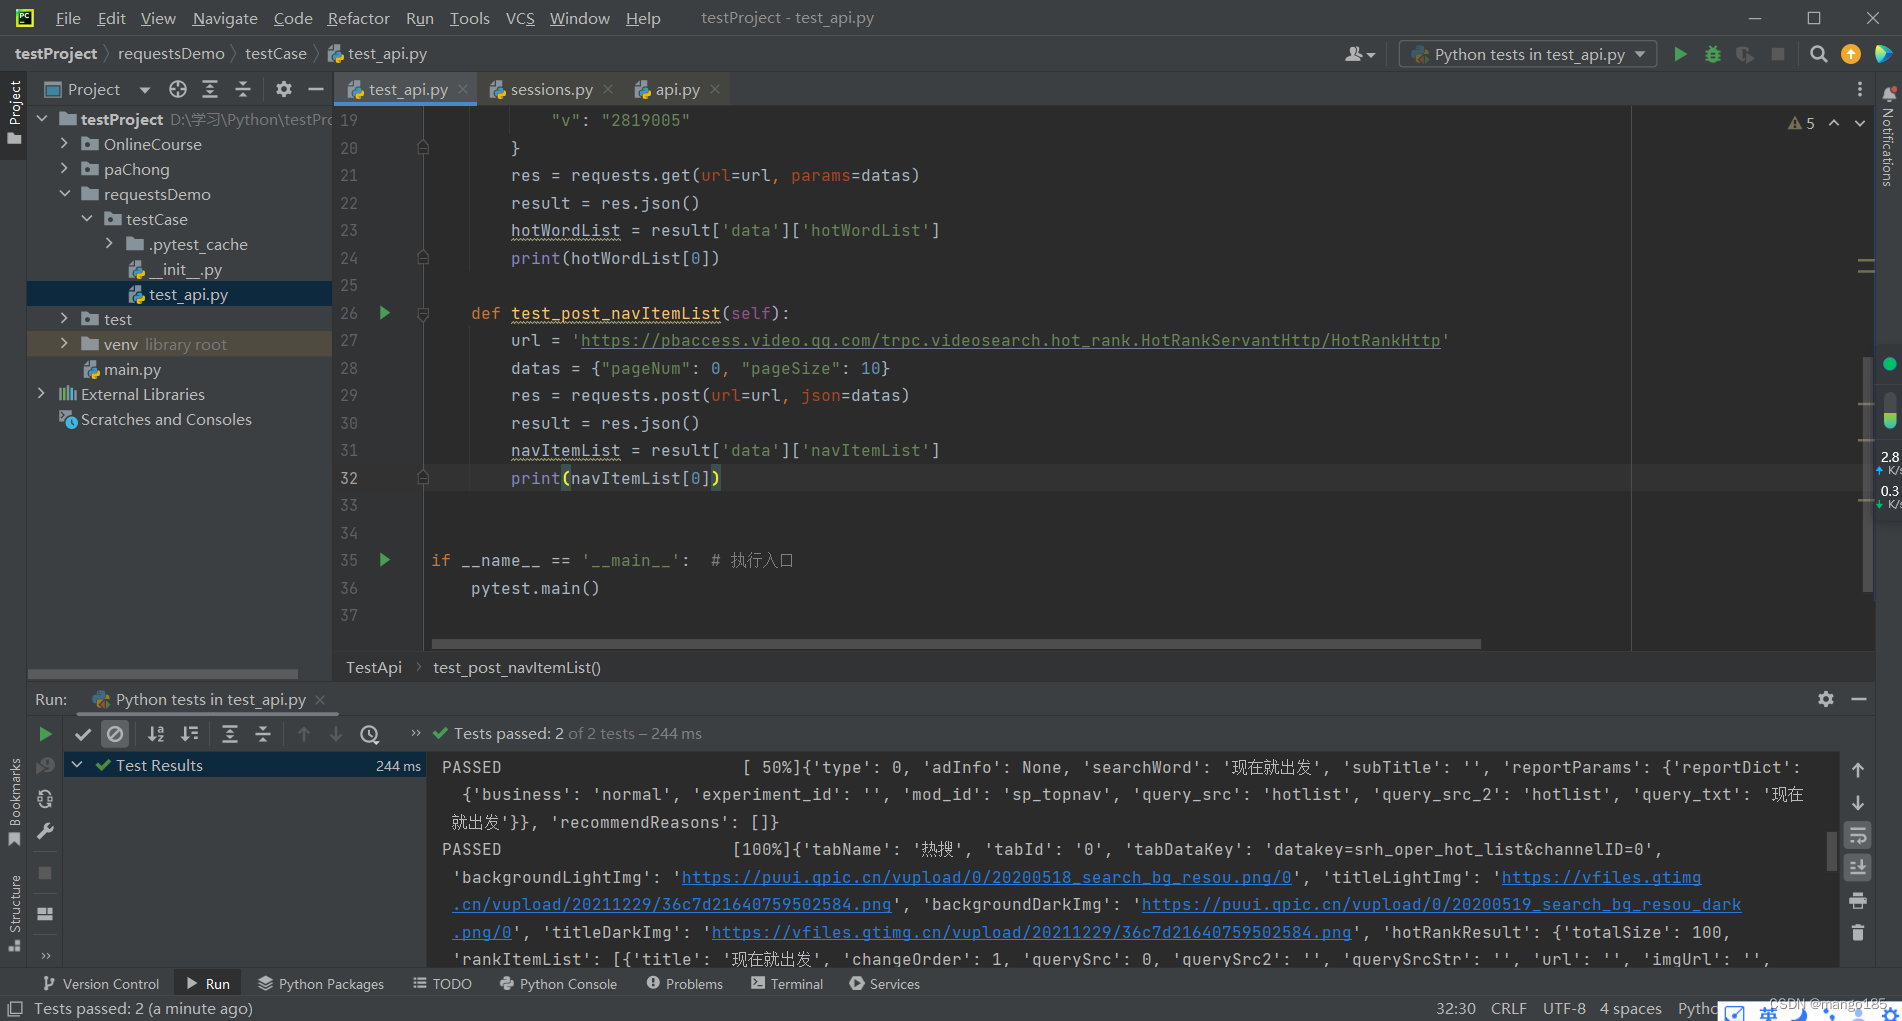
三、jsonpath的定义及在关联接口中的处理
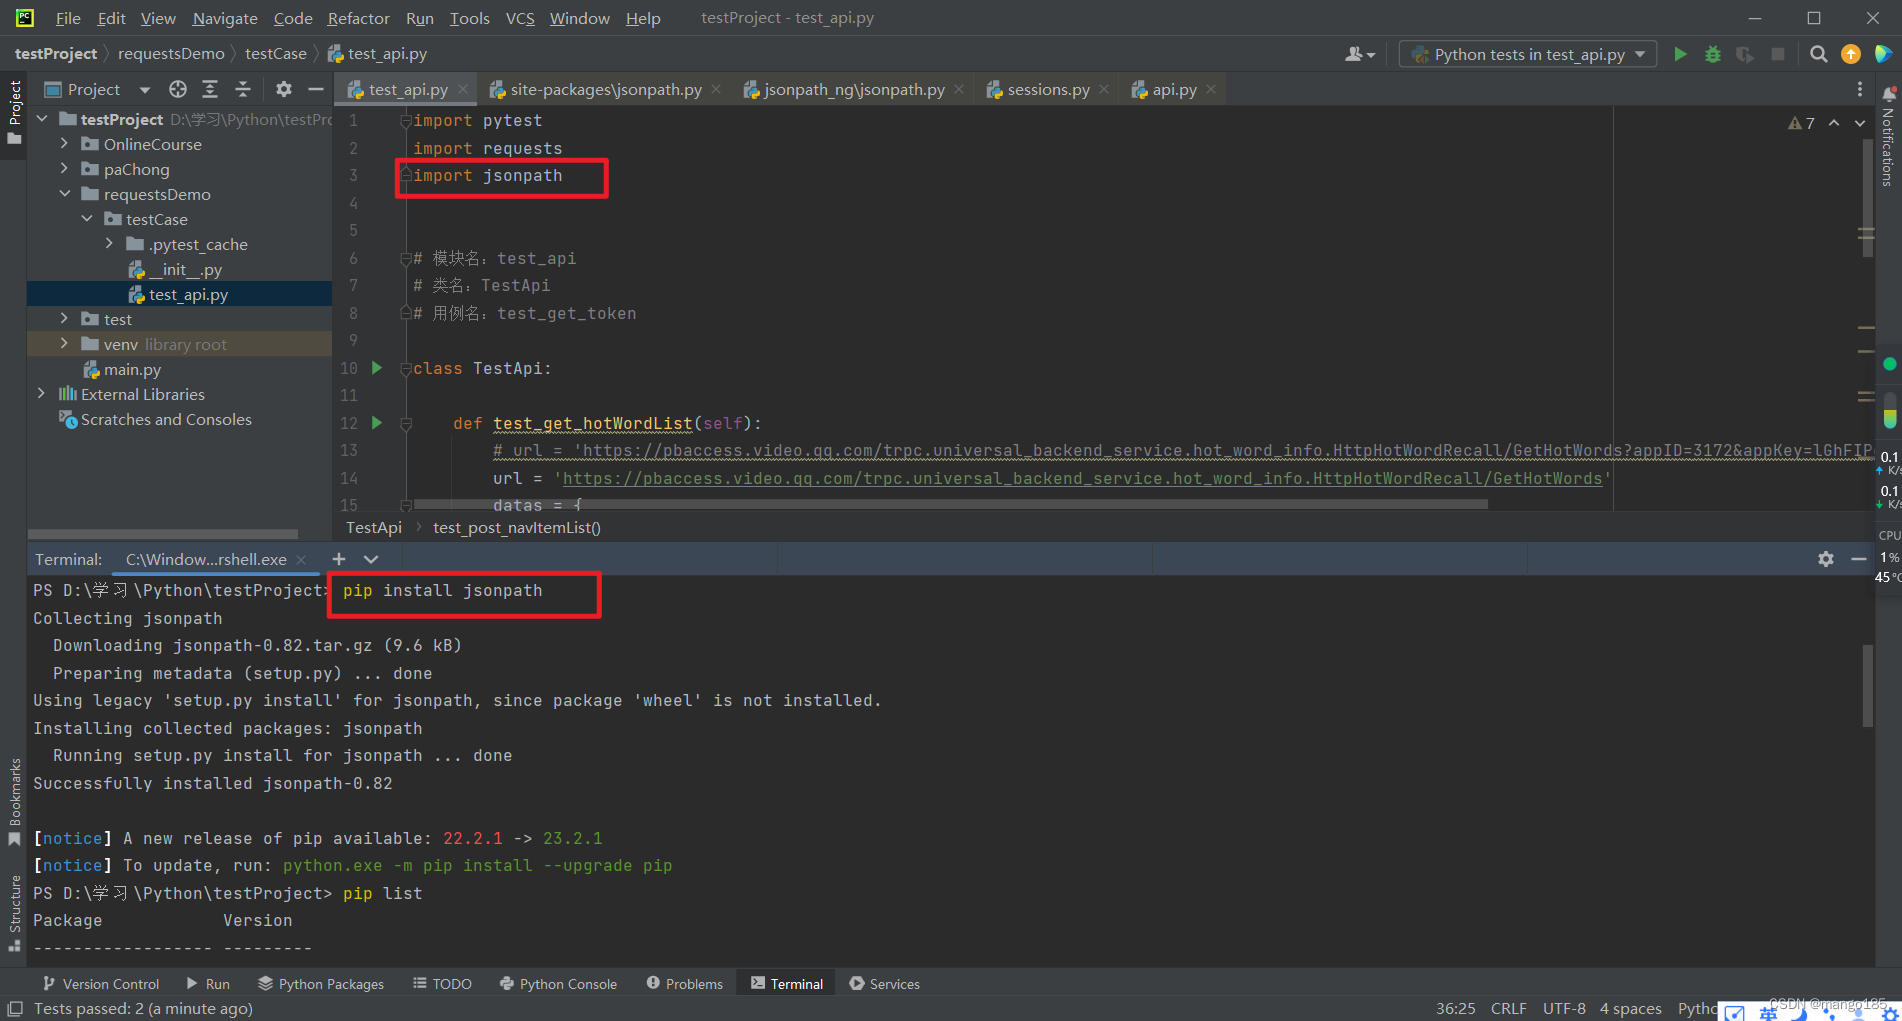
安装jsonpath
1 | pip install jsonpath |
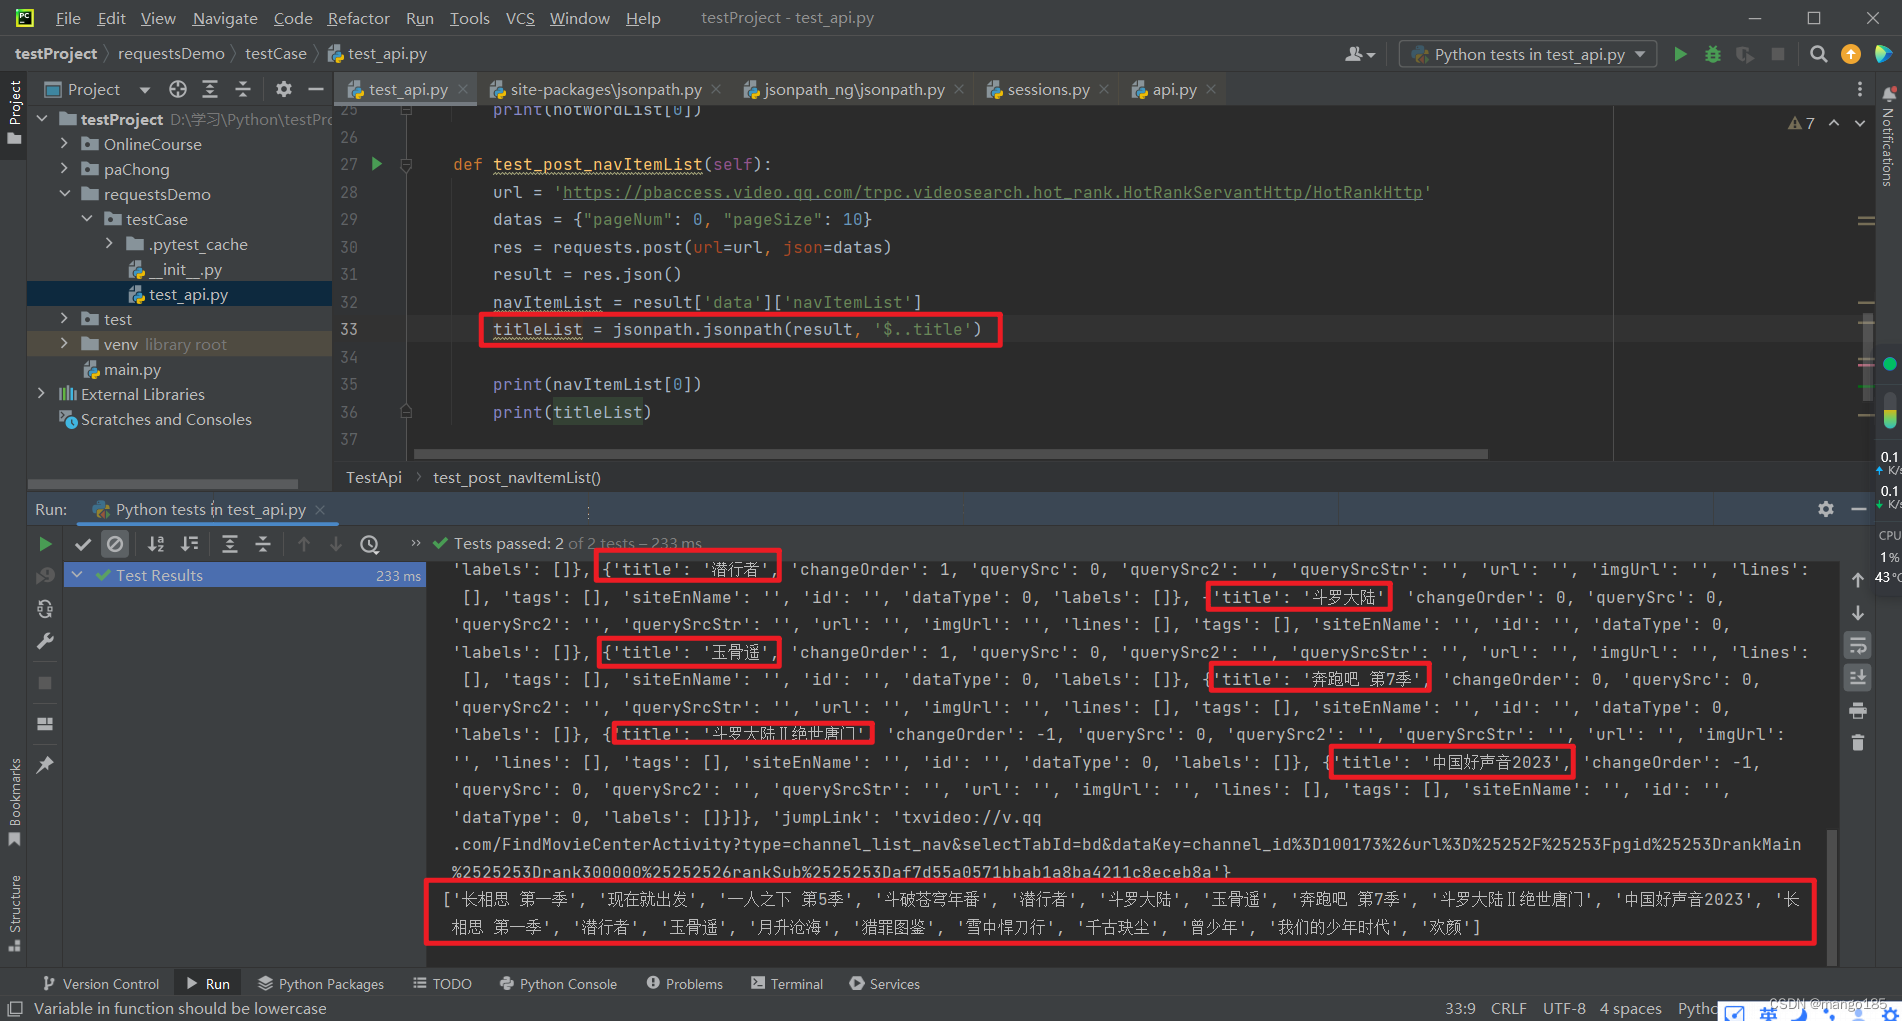
获取json中的某个字段
返回结果为list
1 | titleList = jsonpath.jsonpath(result, '$..title') result为json数据, title为要获取的字段 |
四、加密接口测试
传参的时候:只能使用密文请求,不能直接使用明文
可以使用固定语法,写一个加解密的类,通过密钥进行加解密
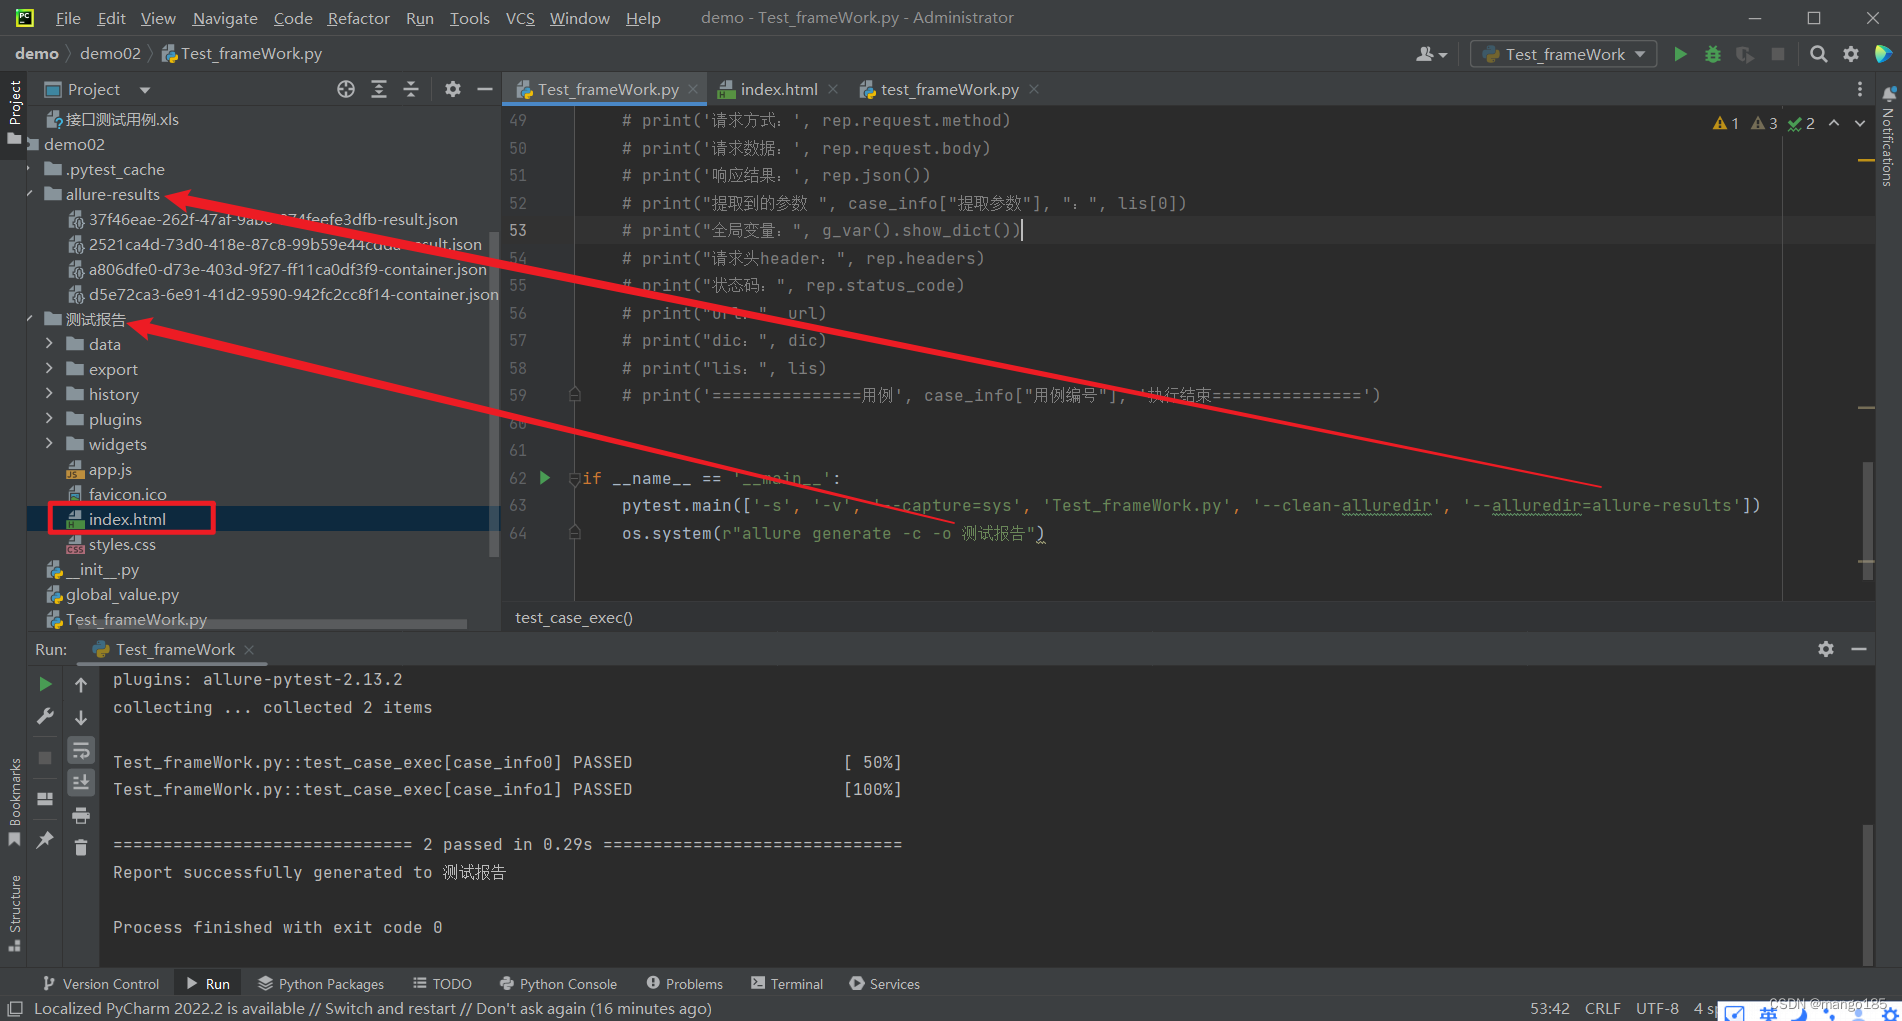
五、接口自动化框架封装:pytest + Excel实现数据驱动
作用
- 统计数据
- 异常处理
- 日志监控
实现逻辑
根据requests的底层原理,所有不同的接口都通过同一个函数实现
1 | def request(method, url, **kwargs): |
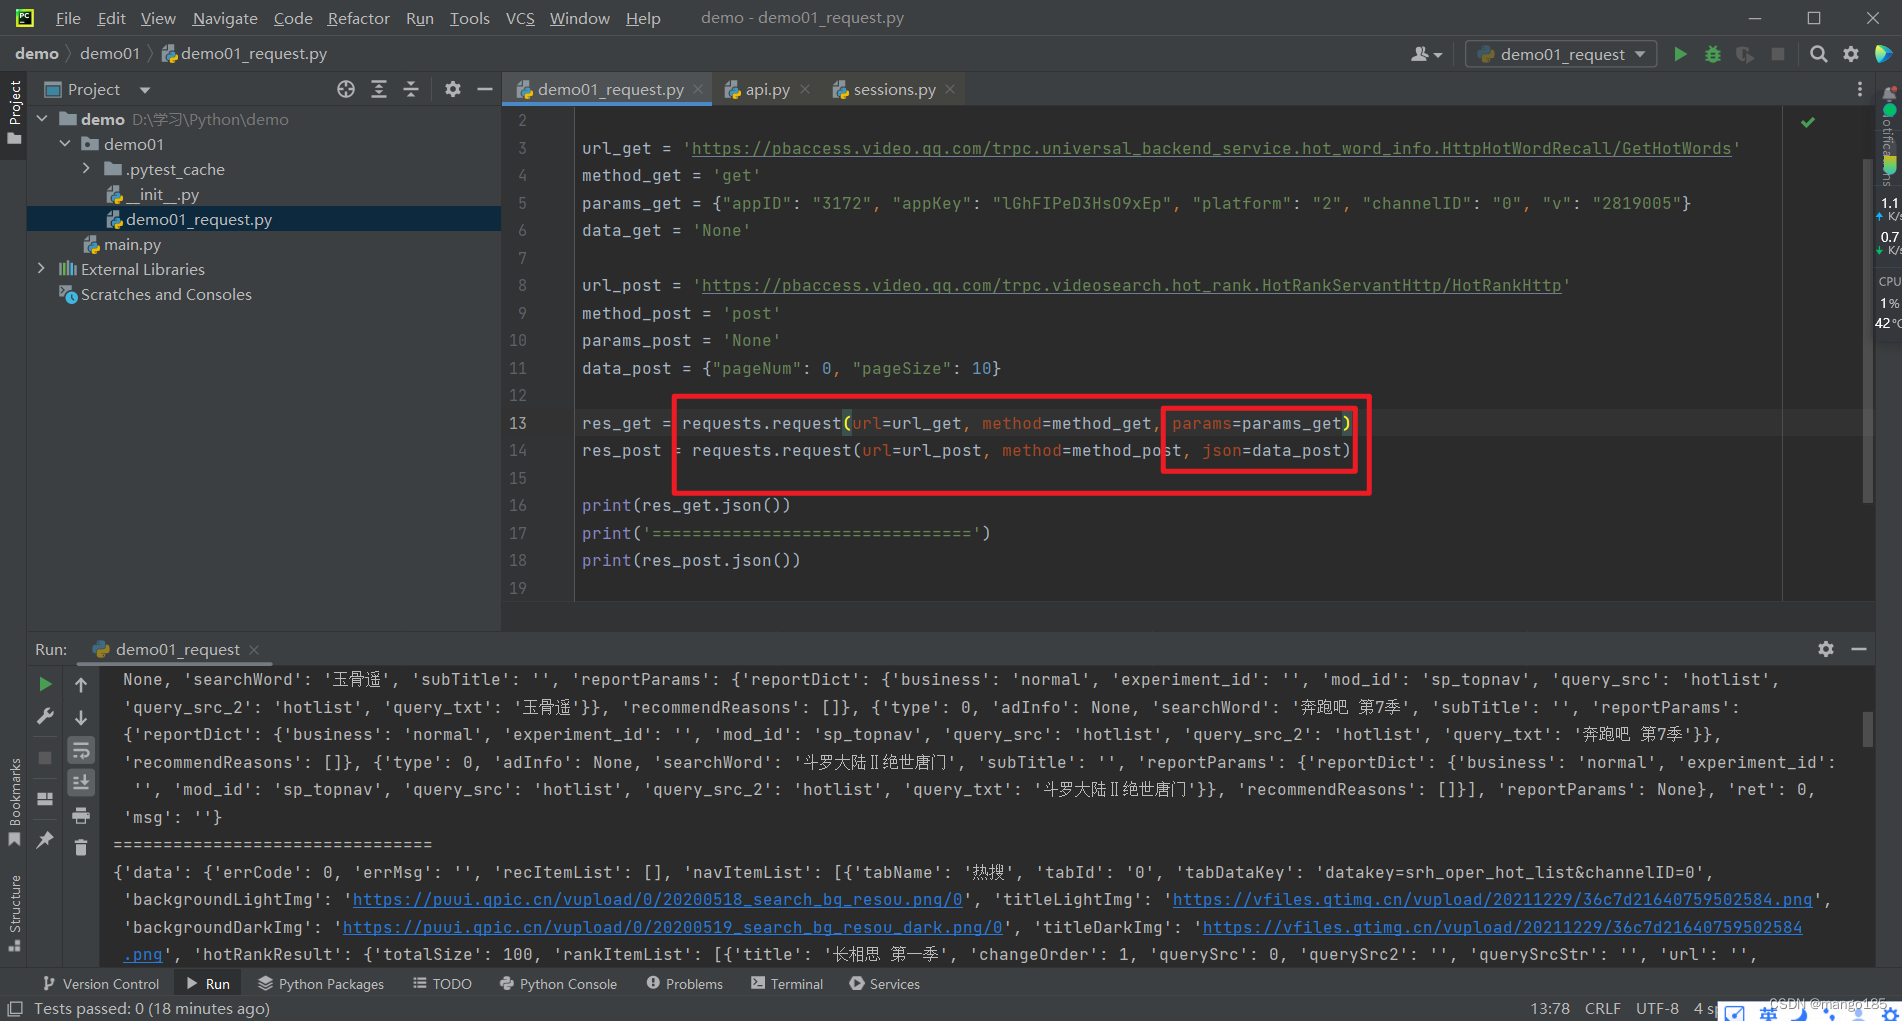
1 | rep = requests.request( |
逻辑思路
- 对不同的参数,驱动同一个代码,对不同的接口进行测试
- 将参数写成列表,循环调用执行
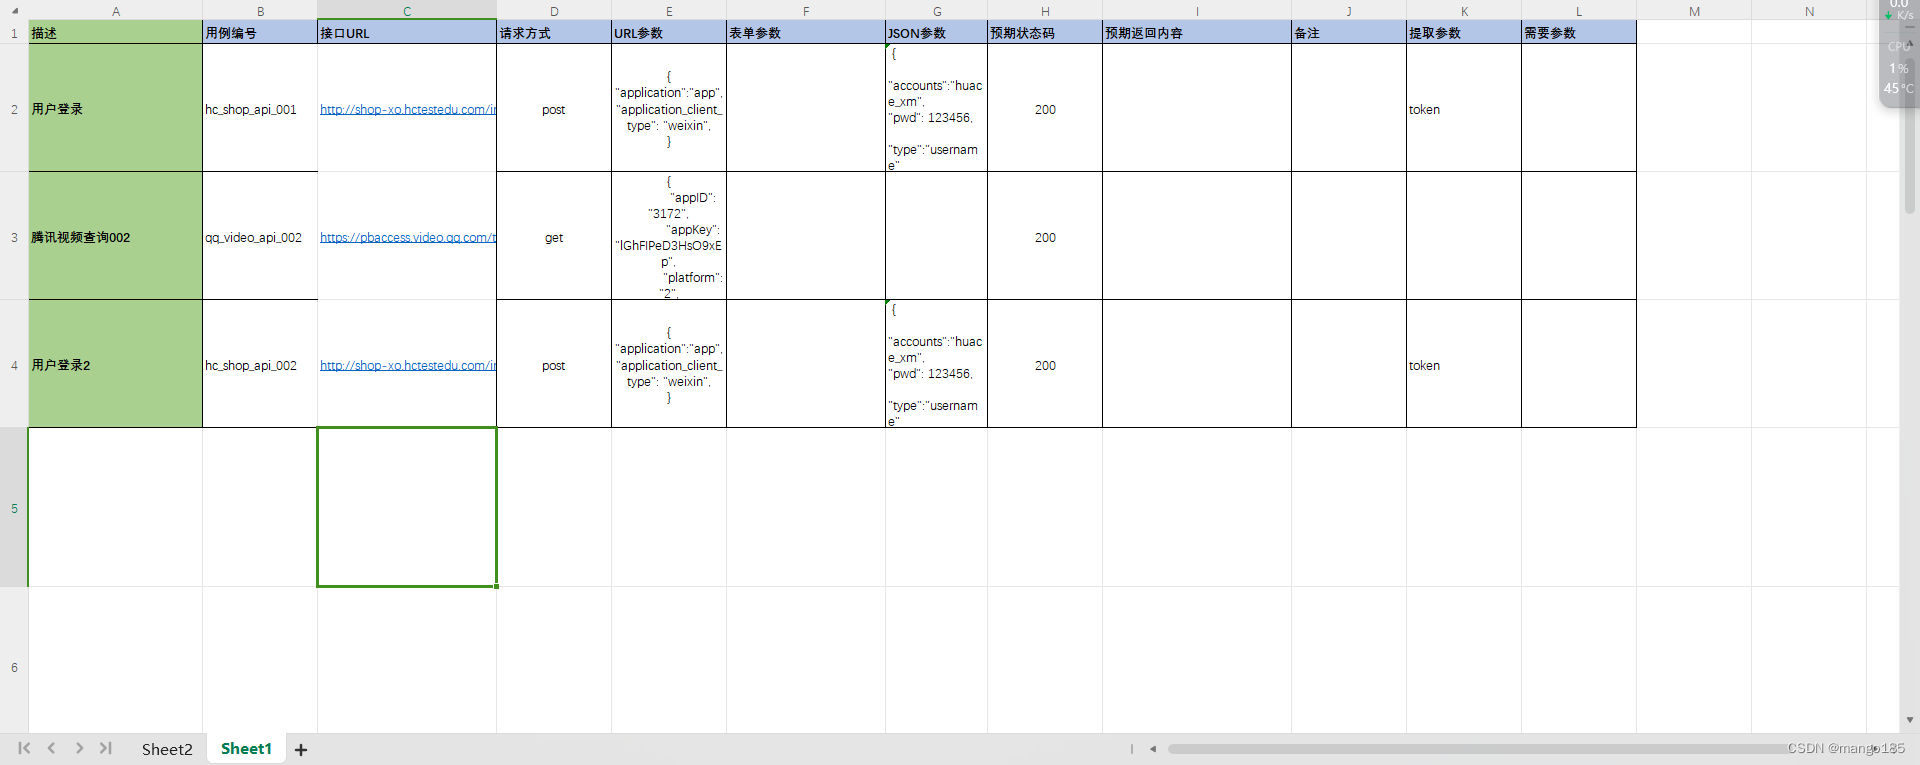
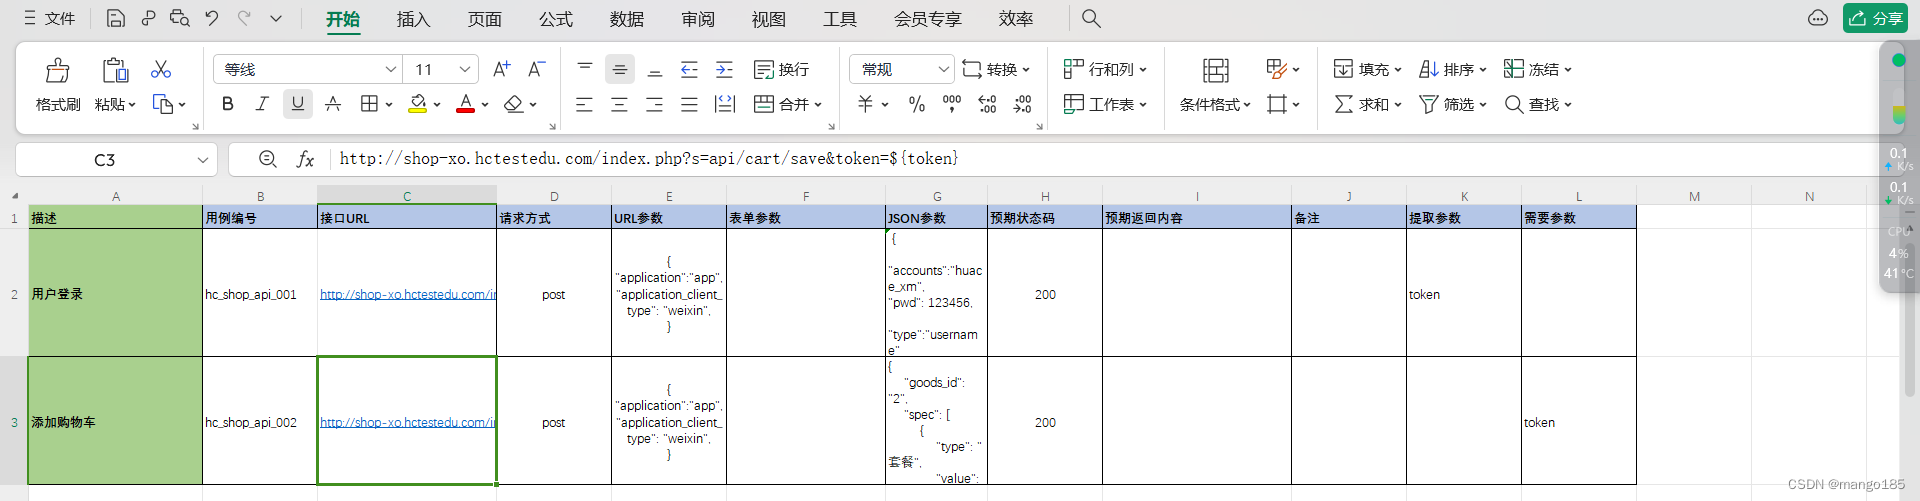
- 把不同的参数写到Excel文件中
步骤
- 打开Excel文件
- 把Excel的数据变成列表
- 循环调用函数
- 存在问题:1)流程失败 2)中间某次循环失败
- 可以使用pytest解决,有用例错了不会停止
简单封装实现
Excel文件
代码
1 | import pytest |
执行结果
关联接口提取参数
String的Template
1 | from string import Template |
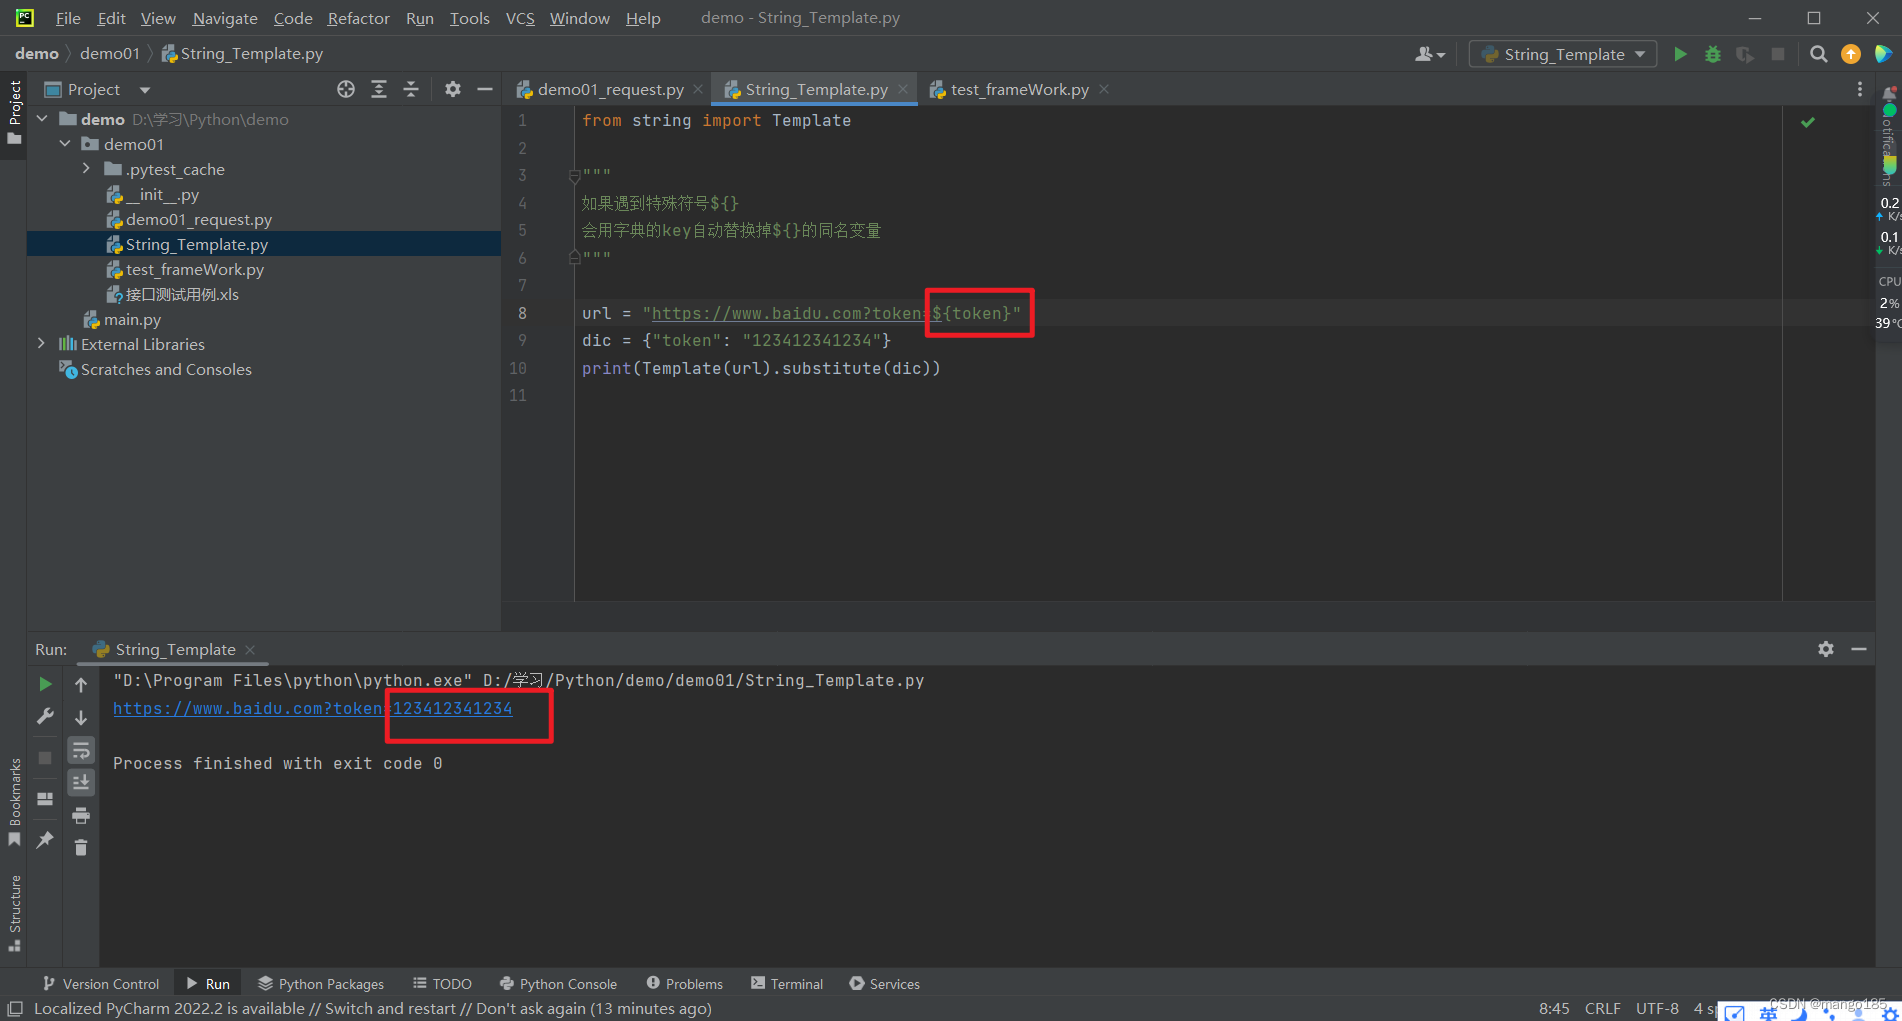
逻辑思路
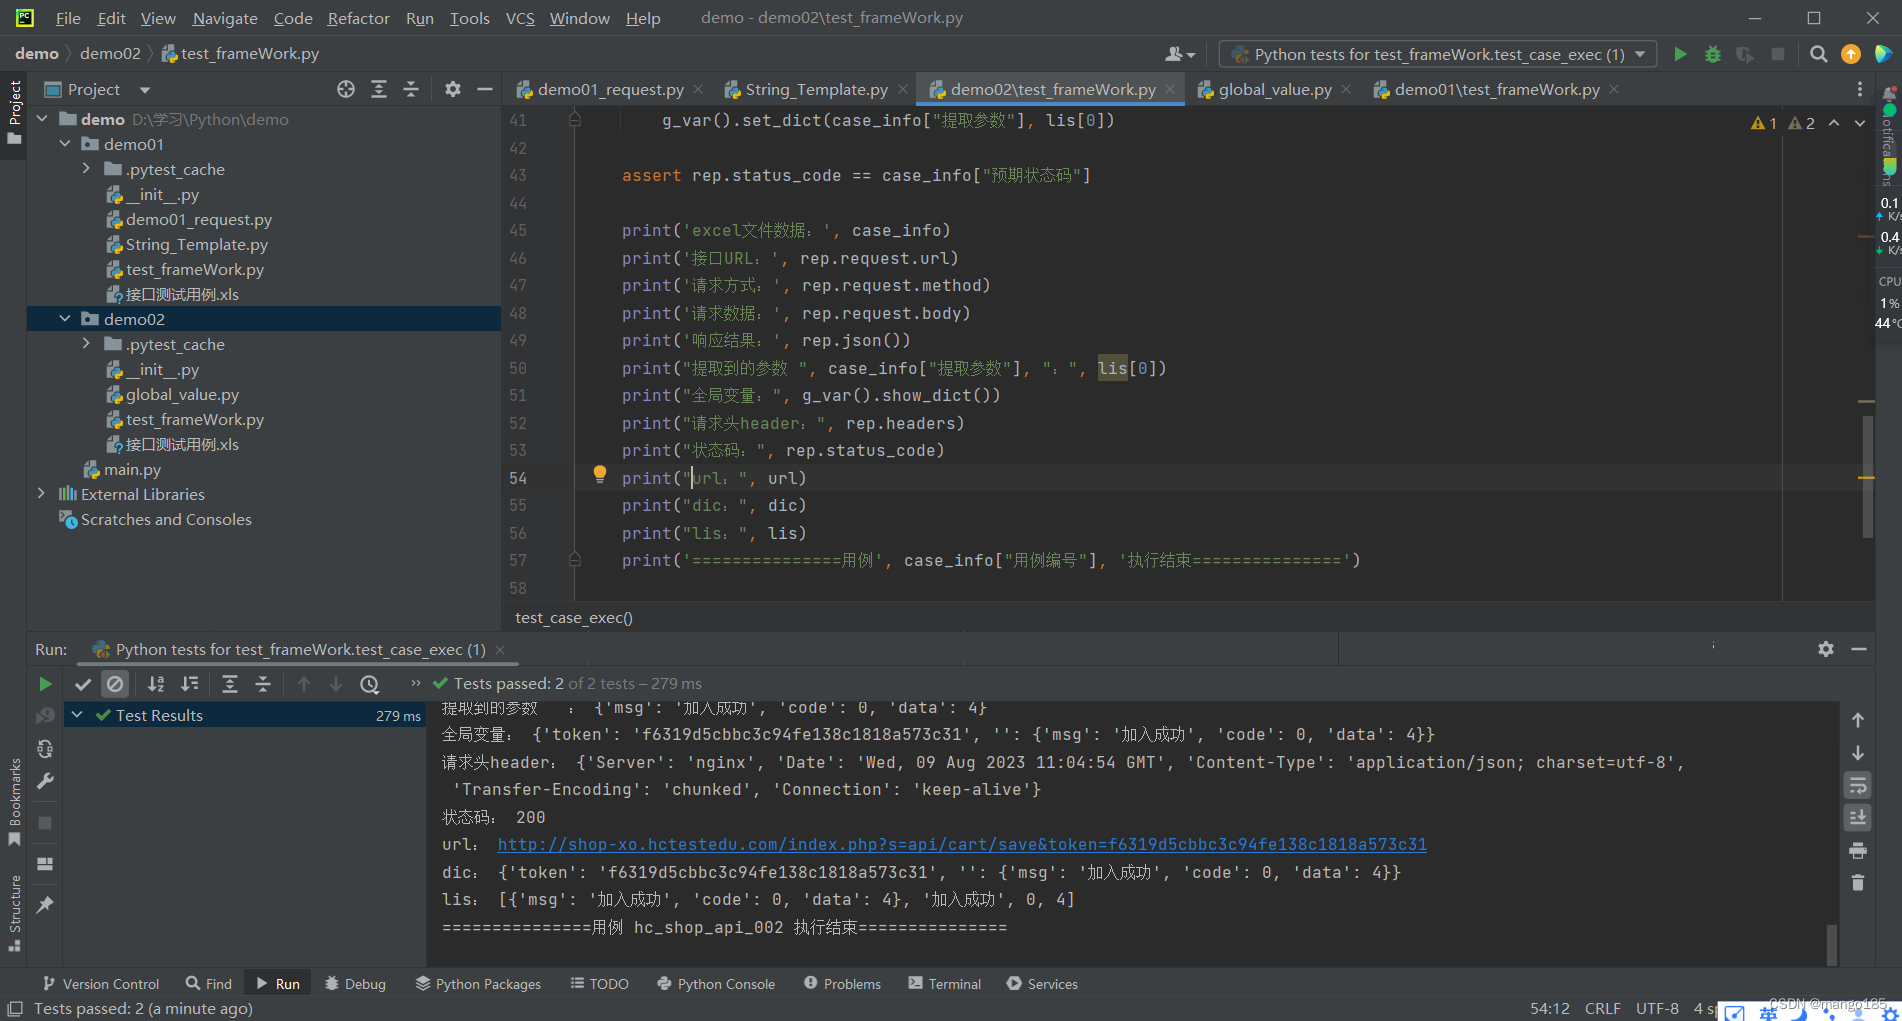
在Excel文件中添加接口用例执行后要提取出的字段和执行时需要的字段
单独写一个实现字段写入和提取的对象作为全局变量,防止数据污染
1 | class g_var(object): |
- 执行每一个用例前判断是否需要变量
- 执行每一个用例后判断是否存入变量
代码
1 | import jsonpath |
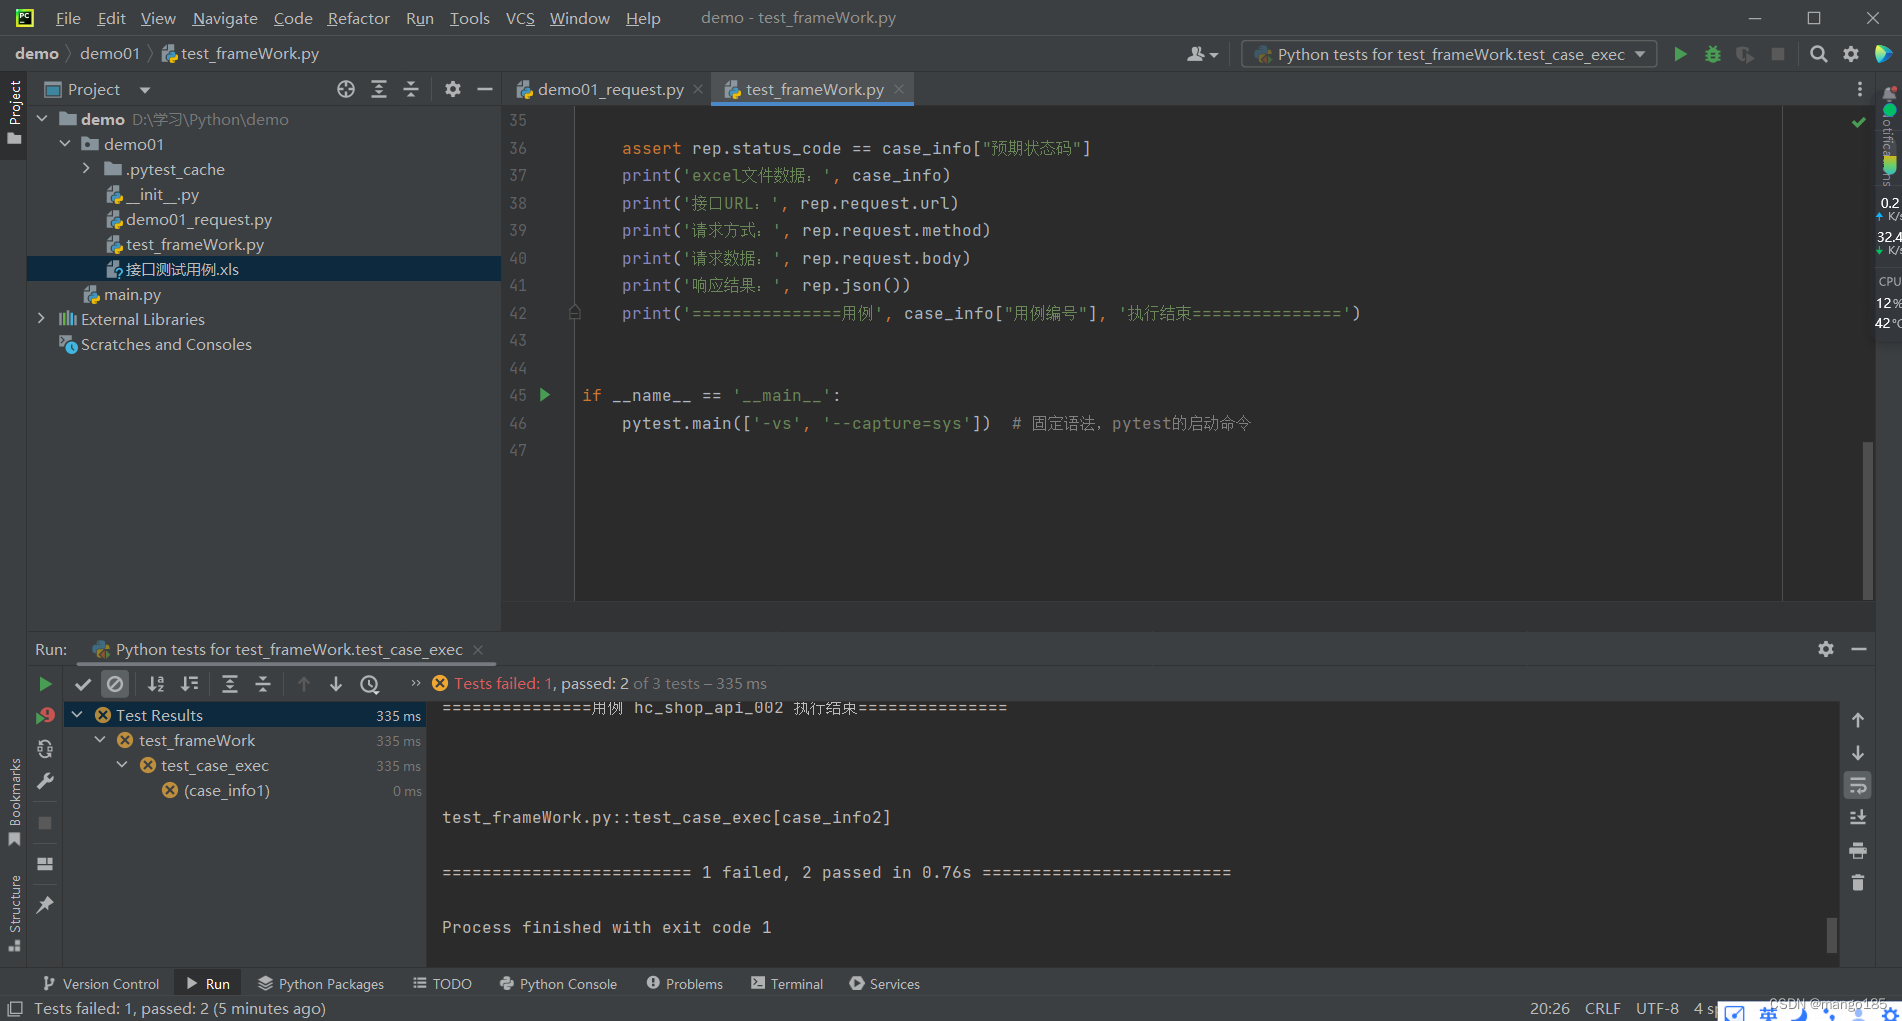
执行结果
六、框架中的断言处理assert
1 | assert rep.status_code == case_info["预期状态码"] |
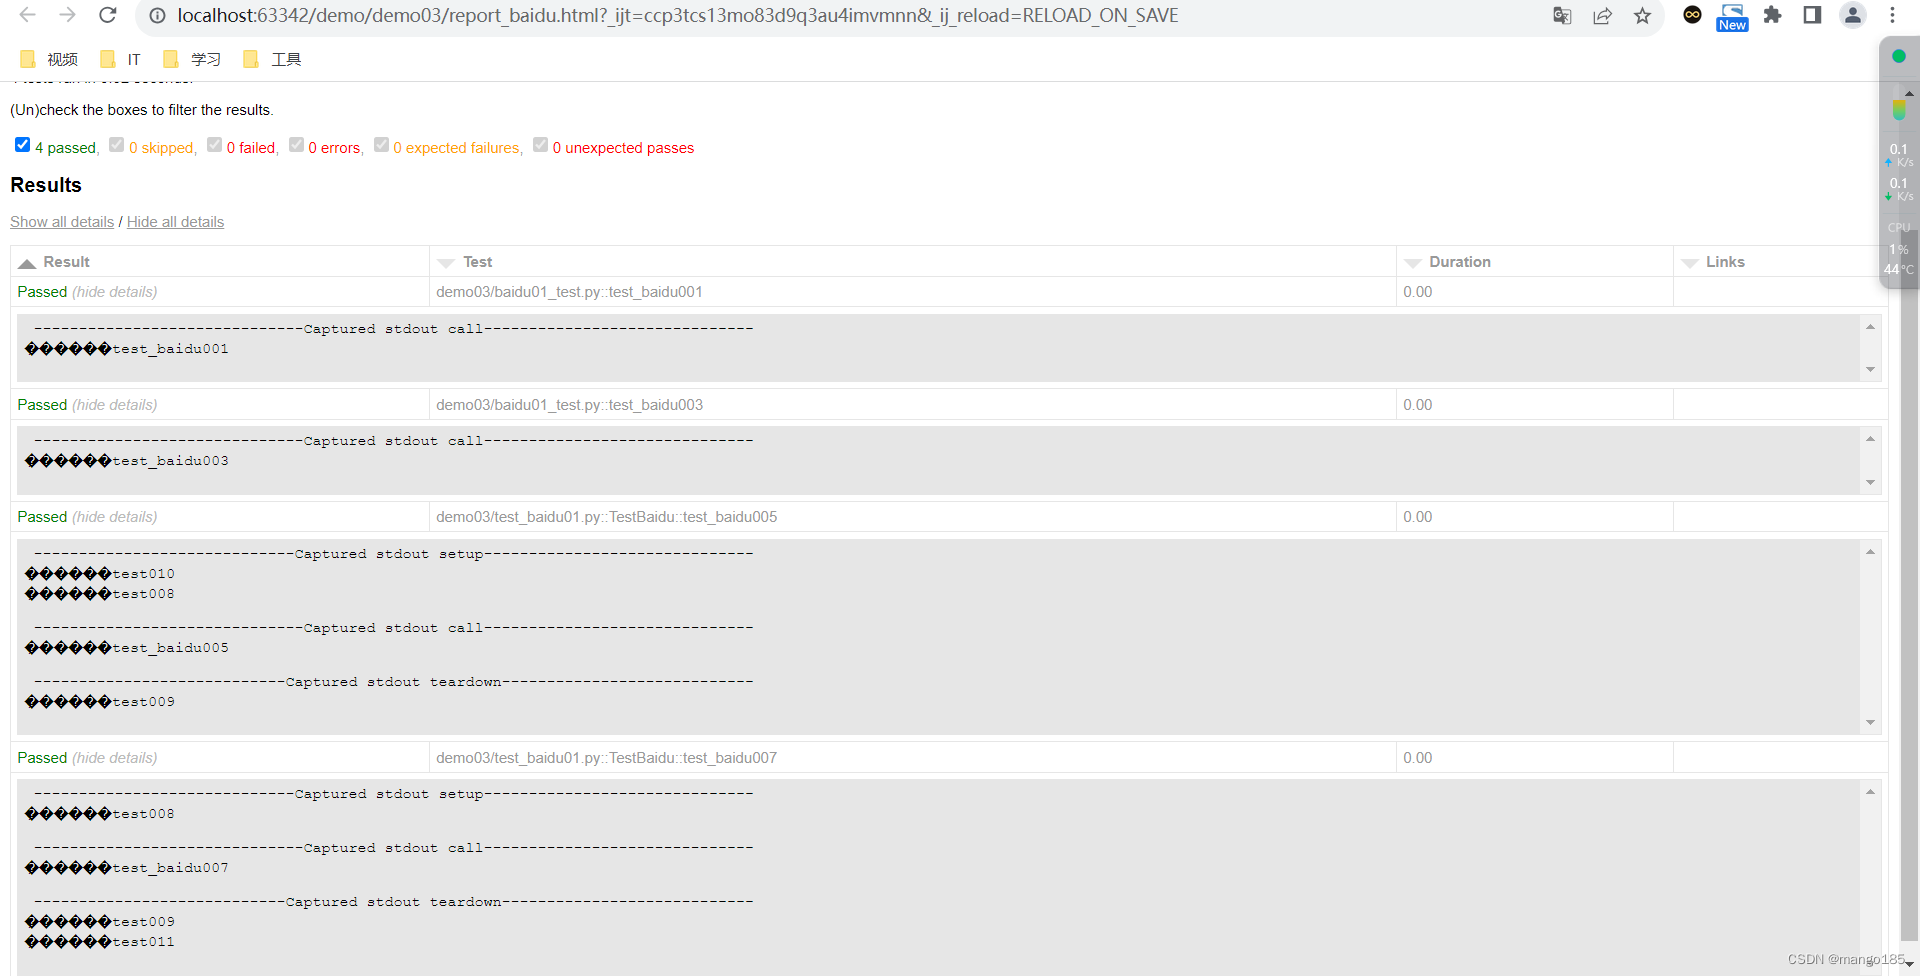
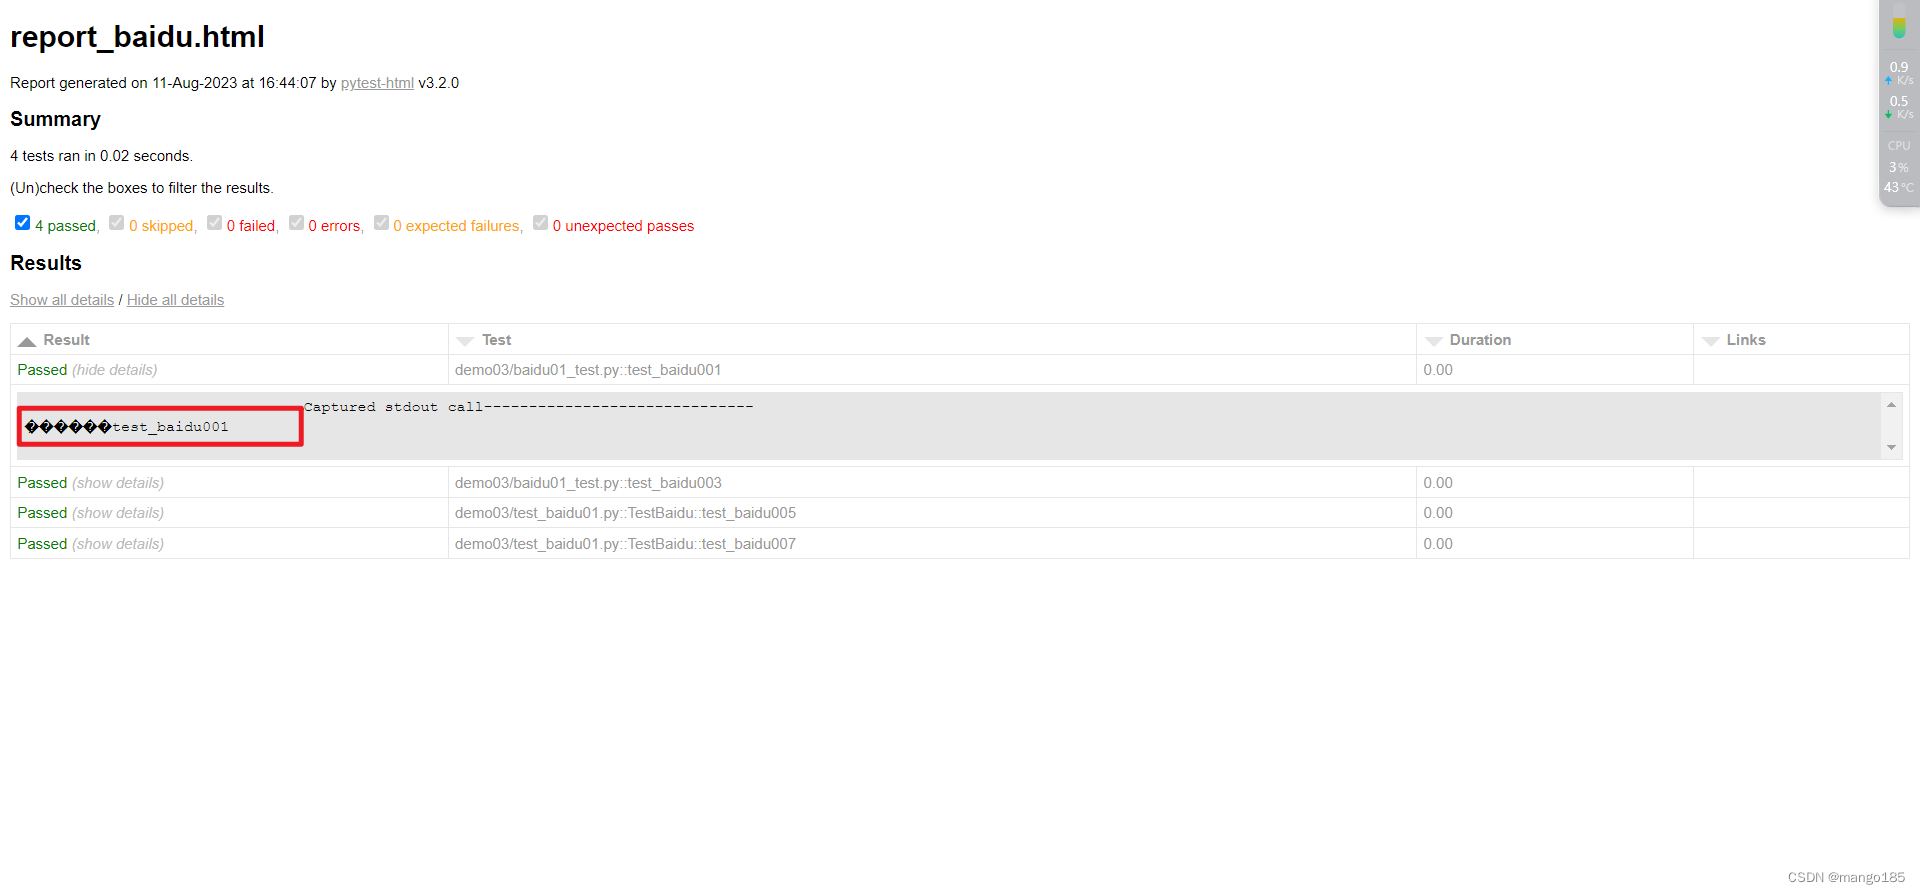
七、pytest-html报告
安装pytest-html
1 | pip install pytest-html |
生成html报告
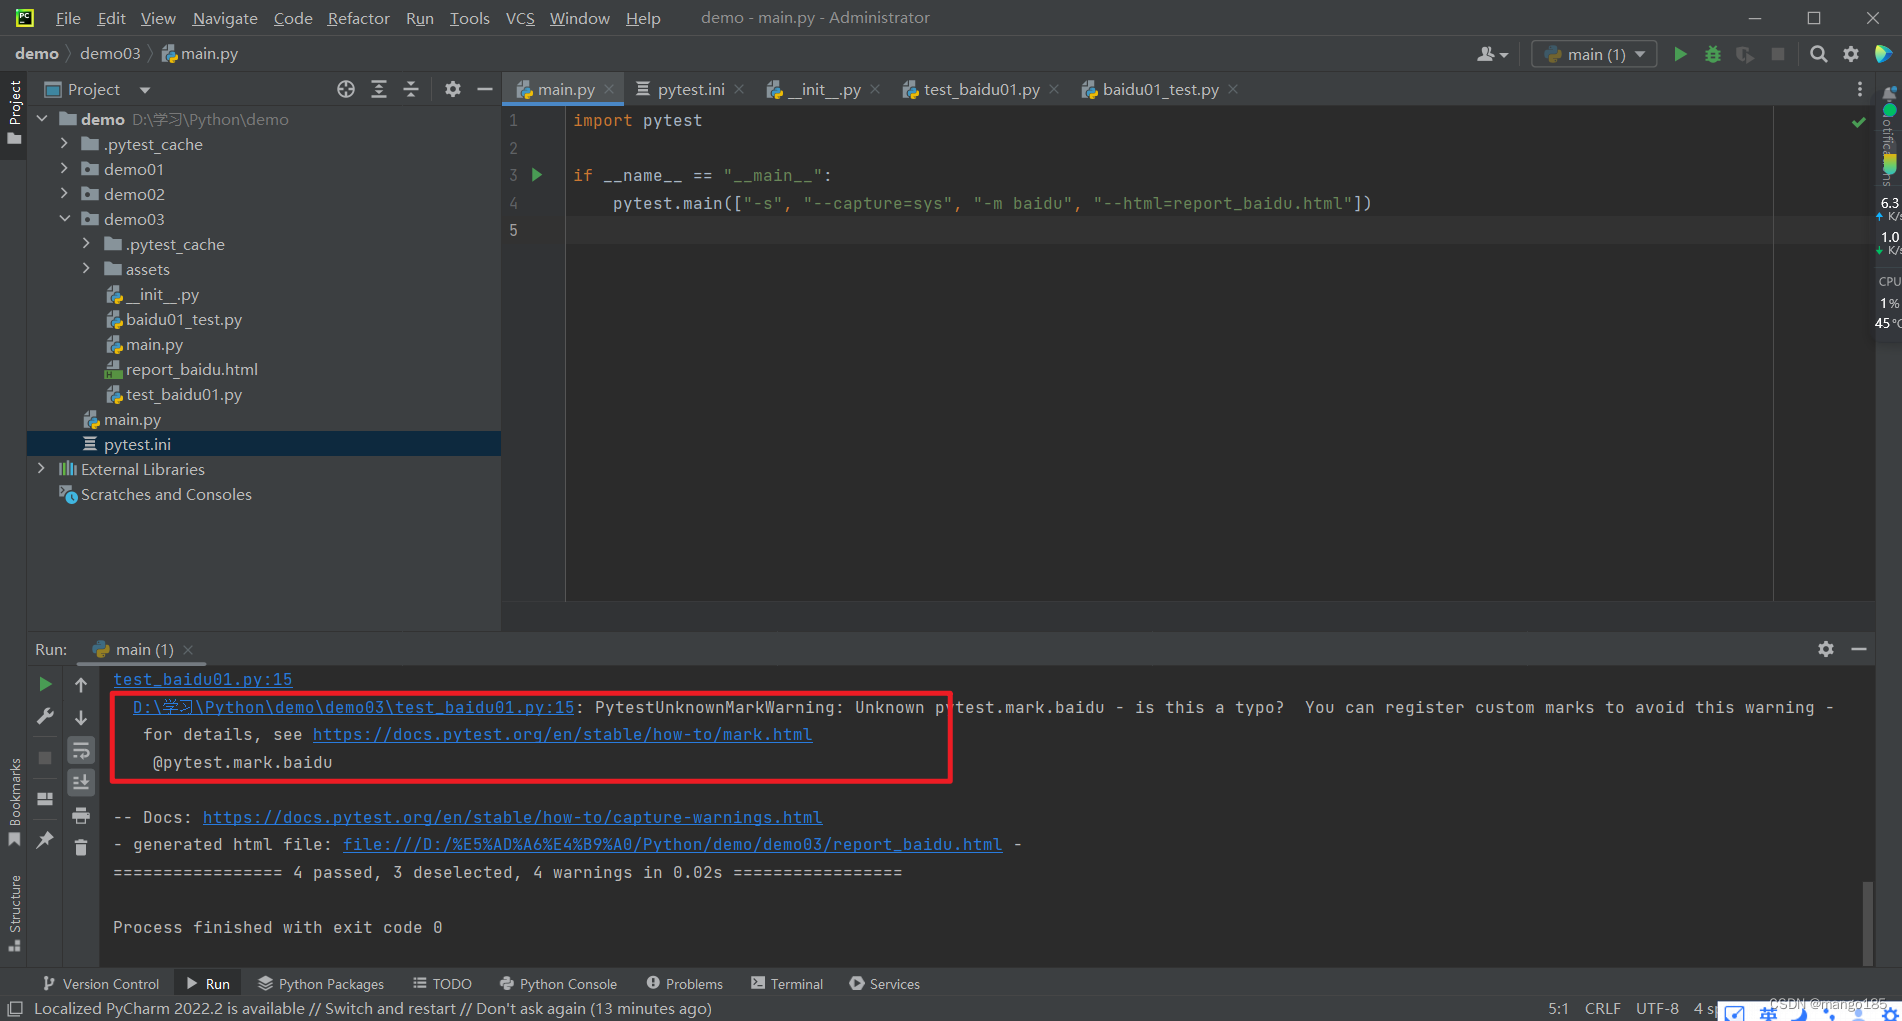
1 | import pytest |
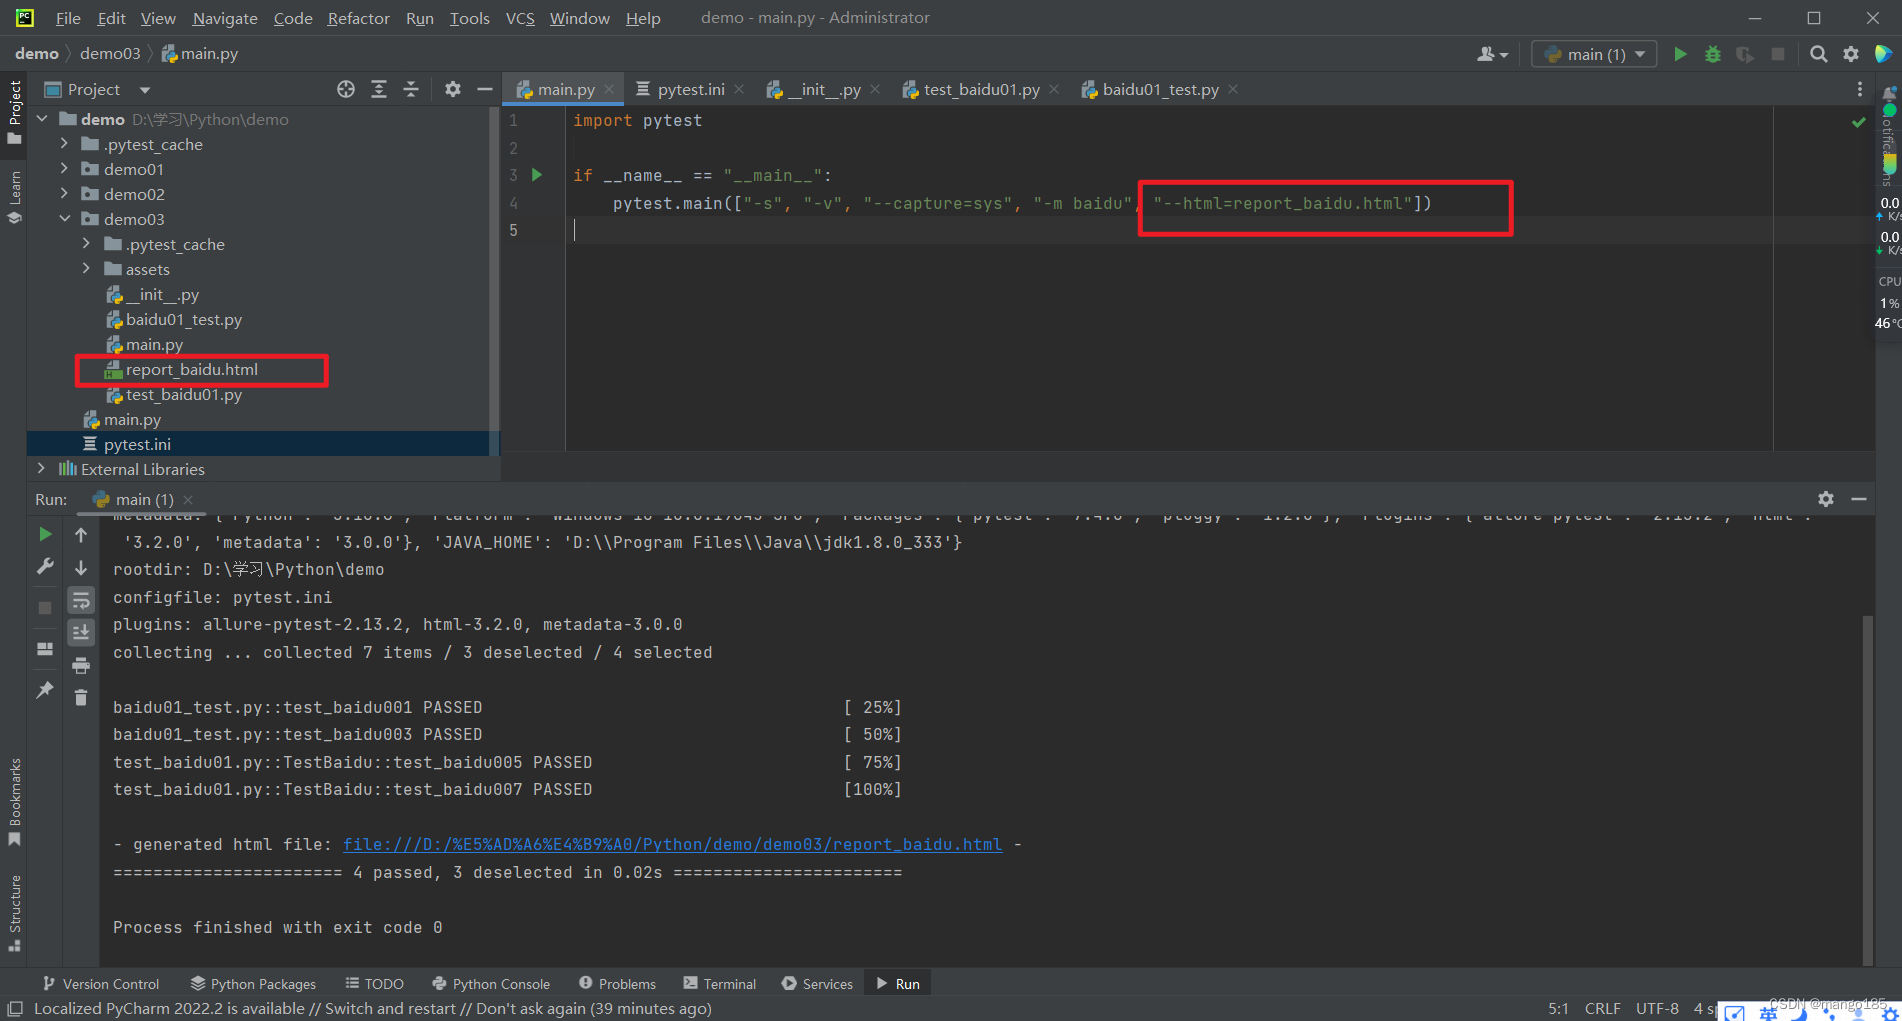
踩坑
不填写”–capture=sys”,html报告出现No log output captured的问题

html报告中出现乱码–未解决
八、pytest用例管理
使用pytest管理测试用例:
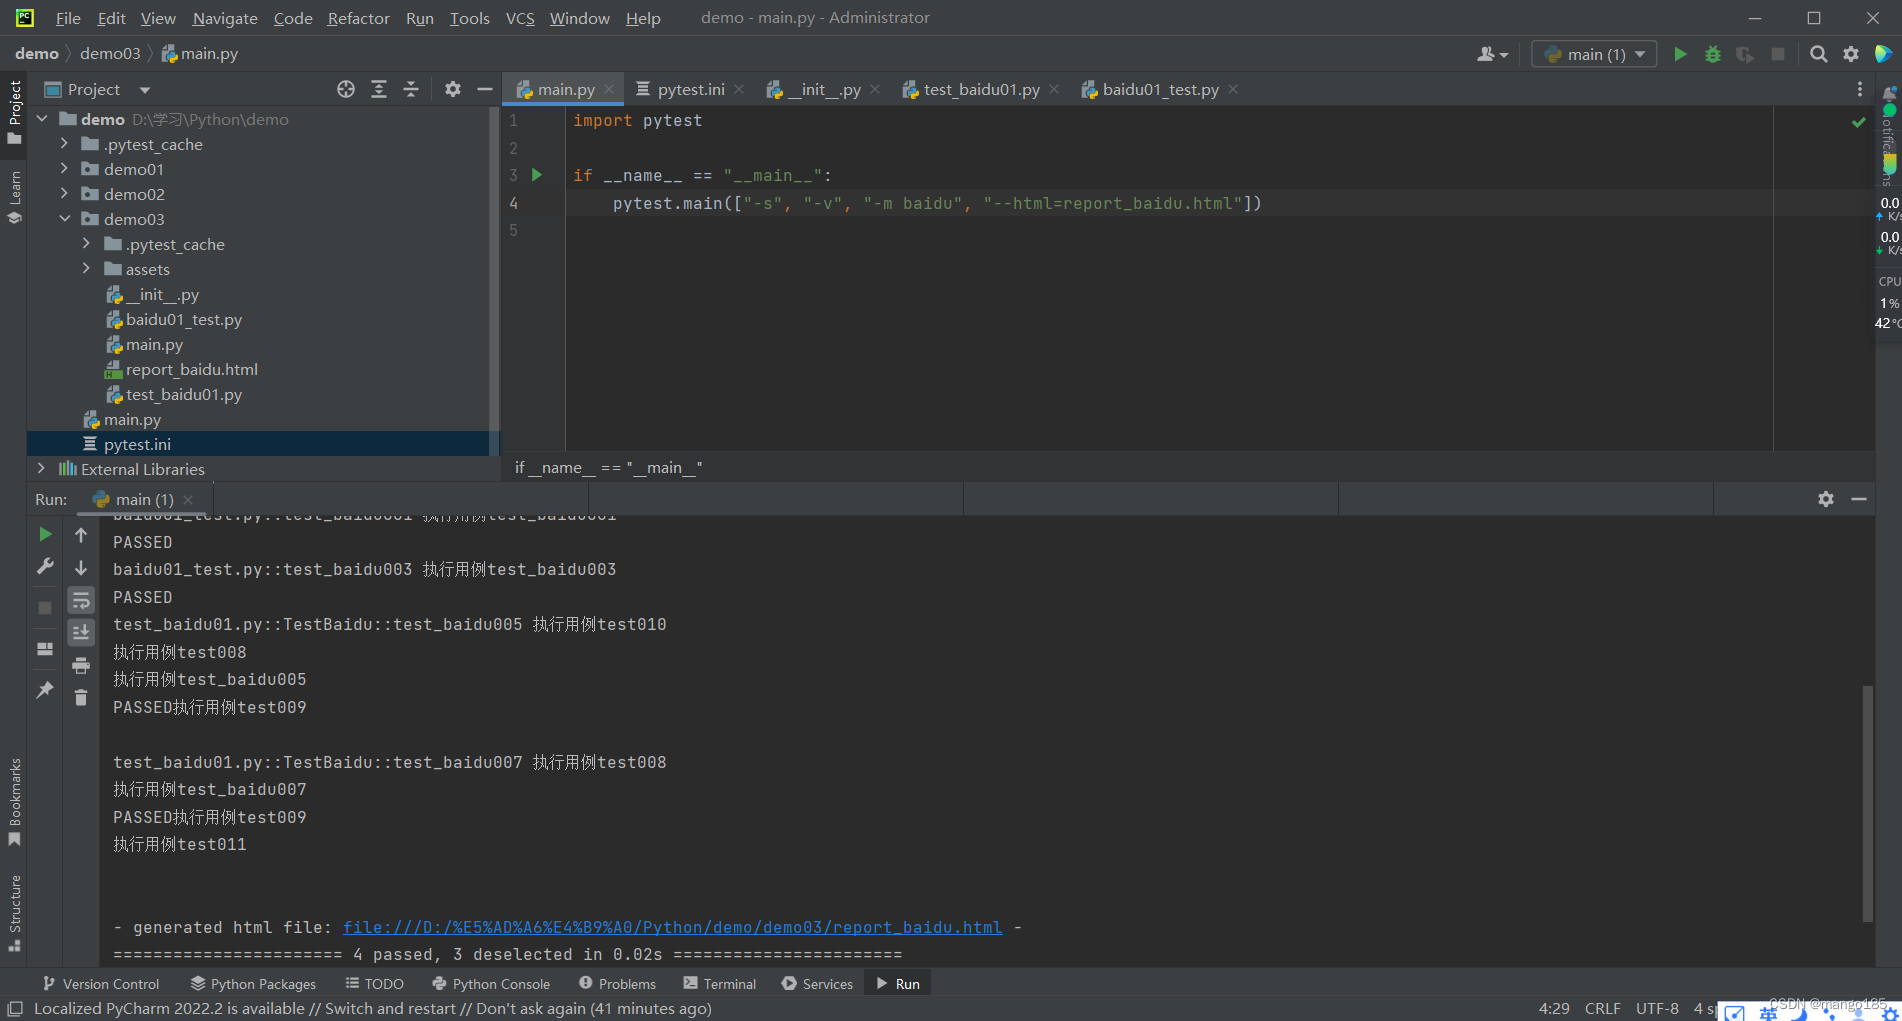
将pytest.main()写在一个单独的py文件中,执行此py文件时会执行所有和此文件同级的test_开头、_test结尾的py文件
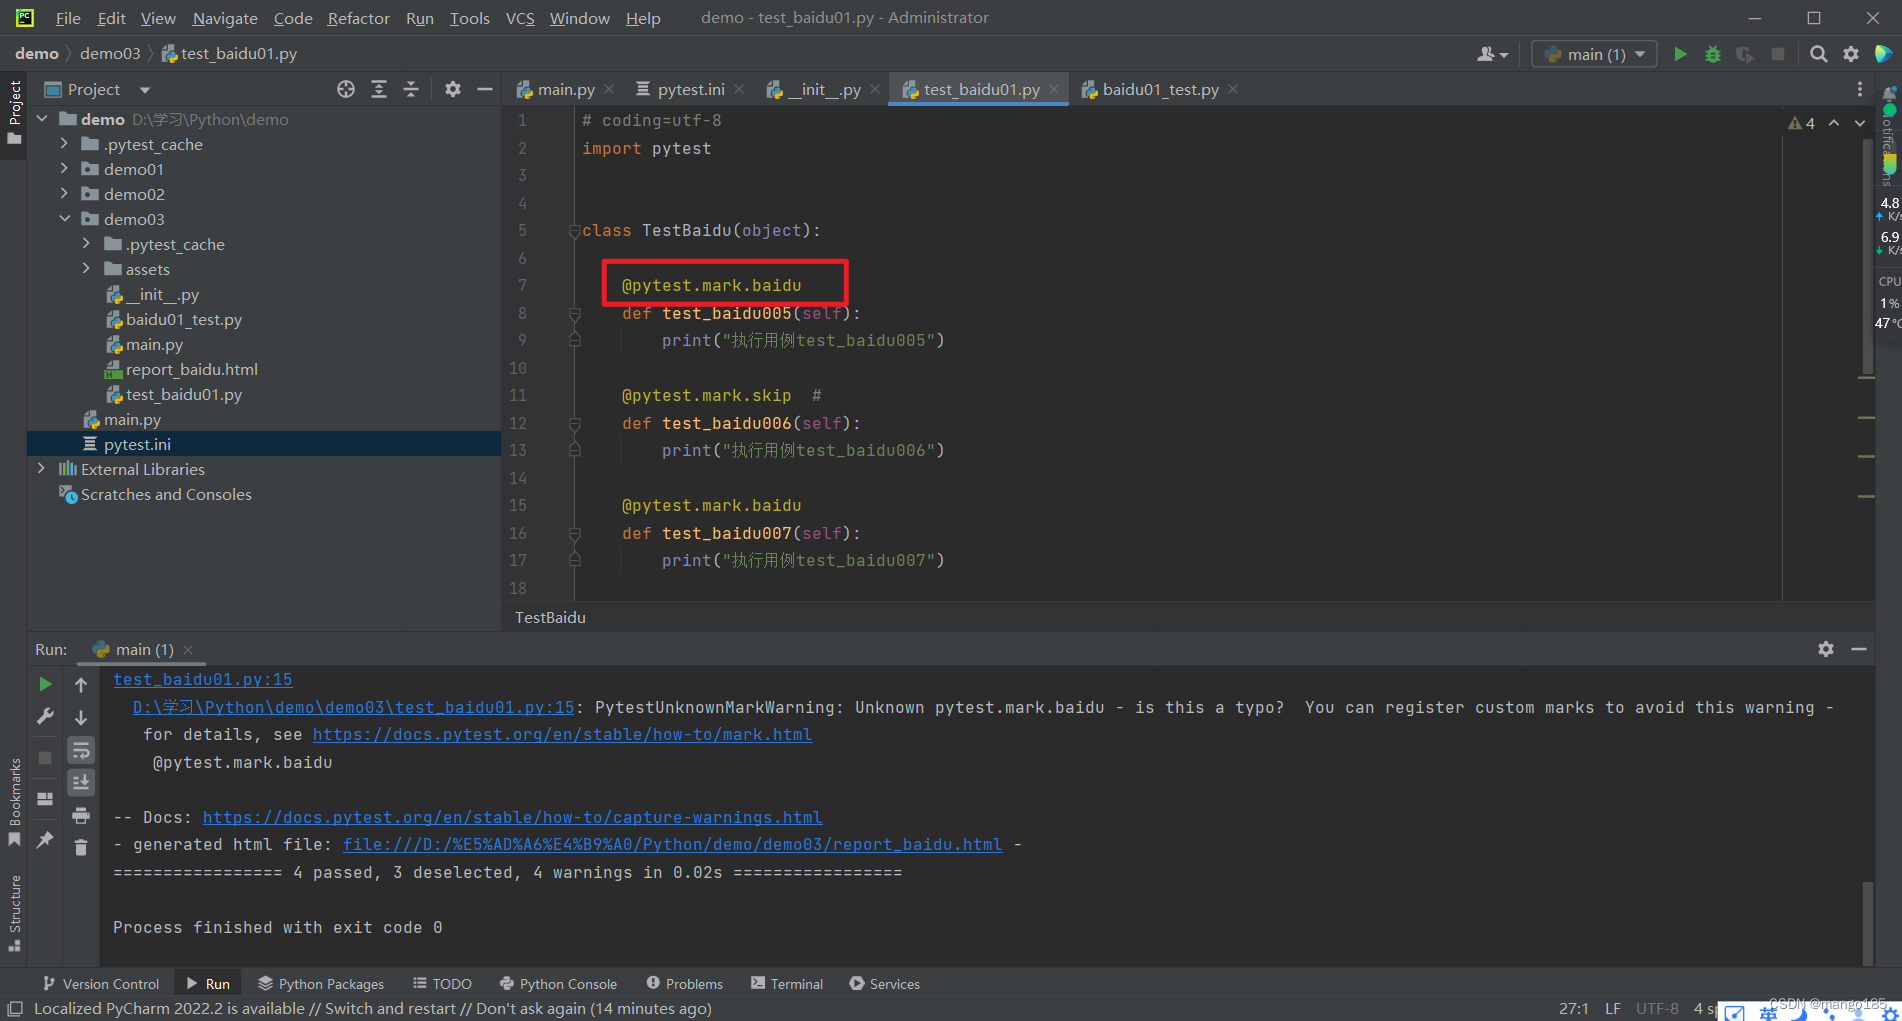
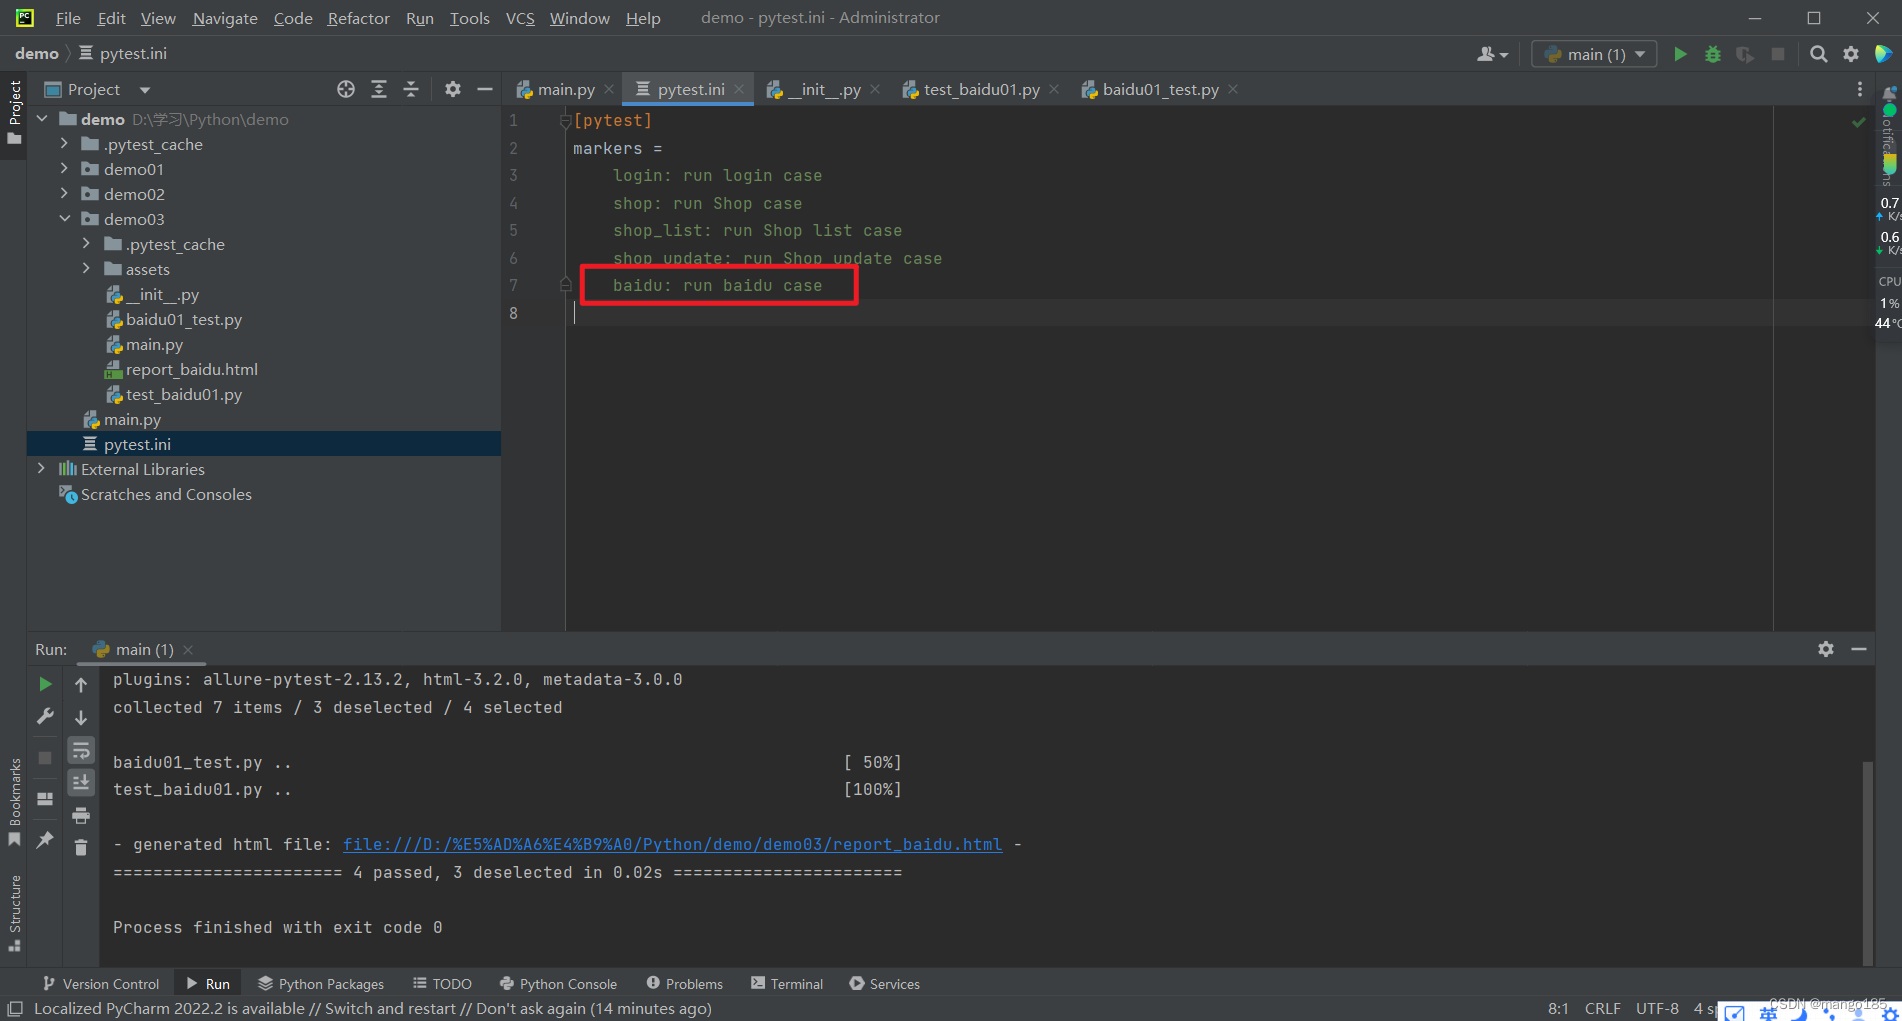
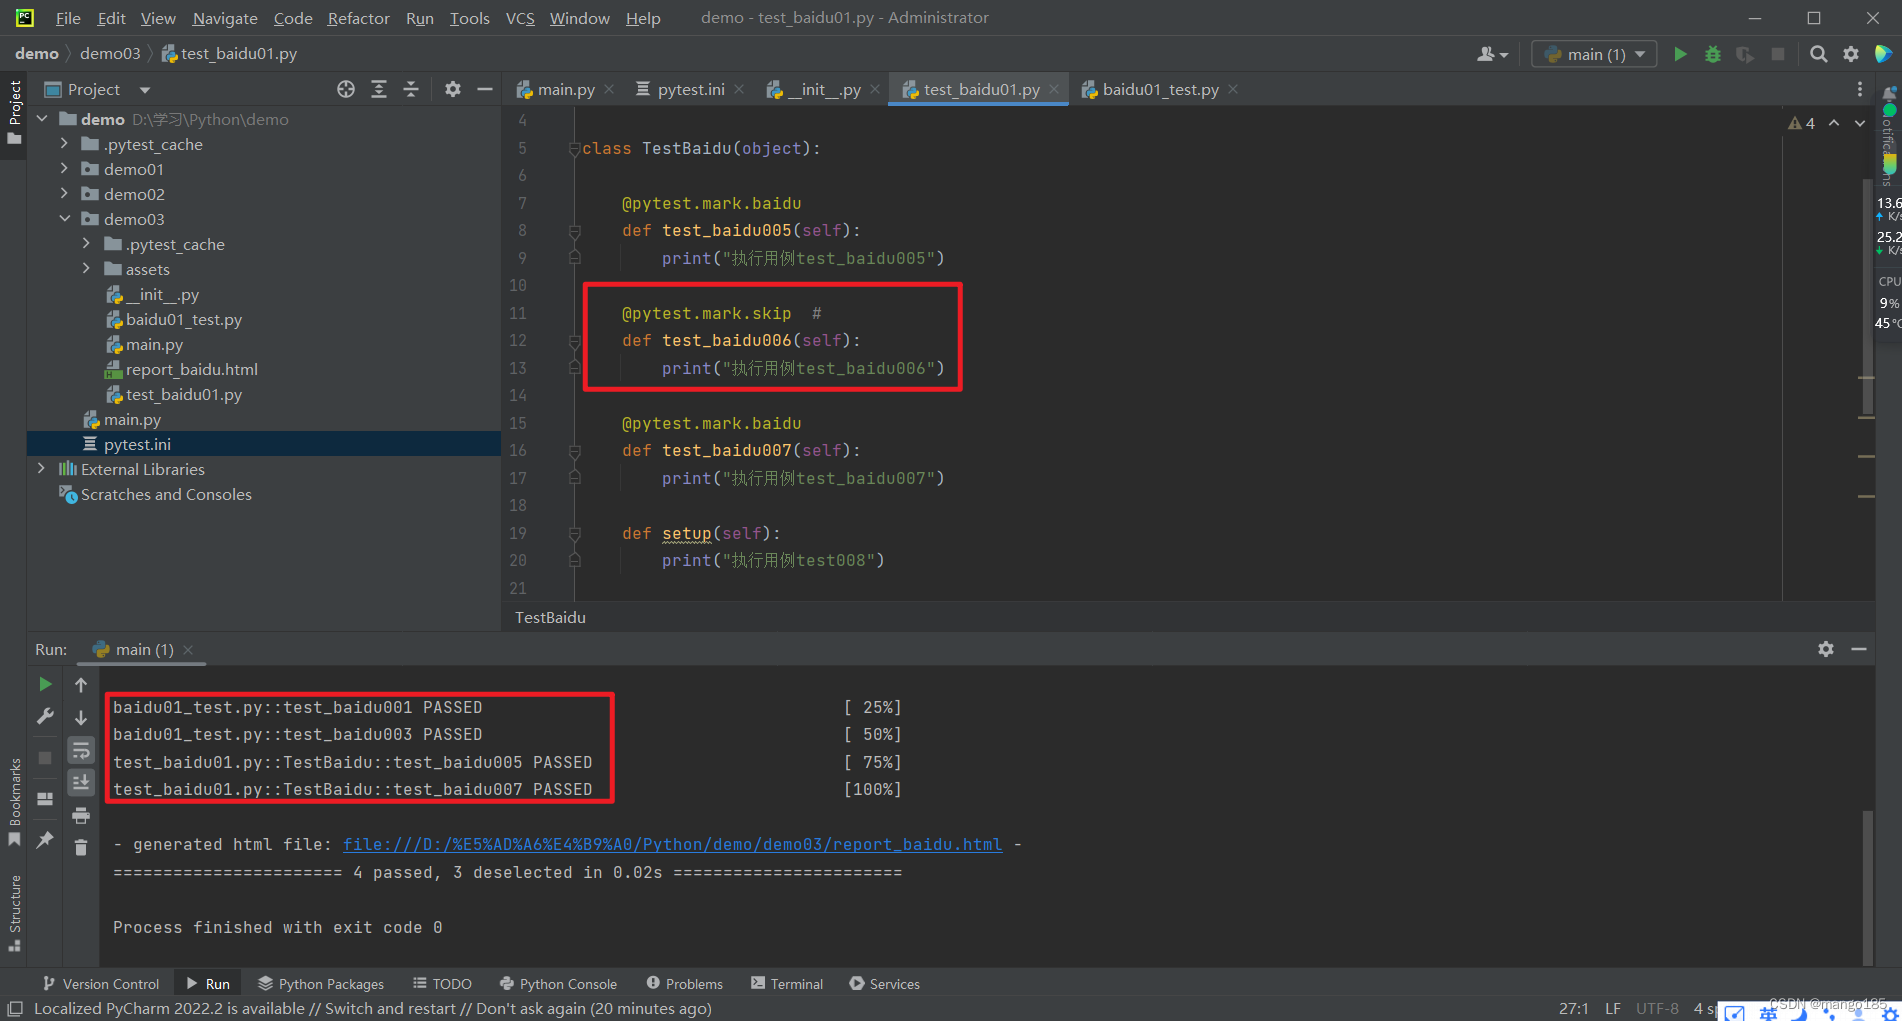
在每一个用例函数前增加装饰器@pytest.mark.skip,pytest.main([])执行时,会跳过添加了此装饰器的用例
在用例函数前增加装饰器@pytest.mark.名称,pytest.main([“-m 名称”])执行时,会执行添加了此装饰器的用例
如果提示告警:可以修改pytest文件进行自定义标签

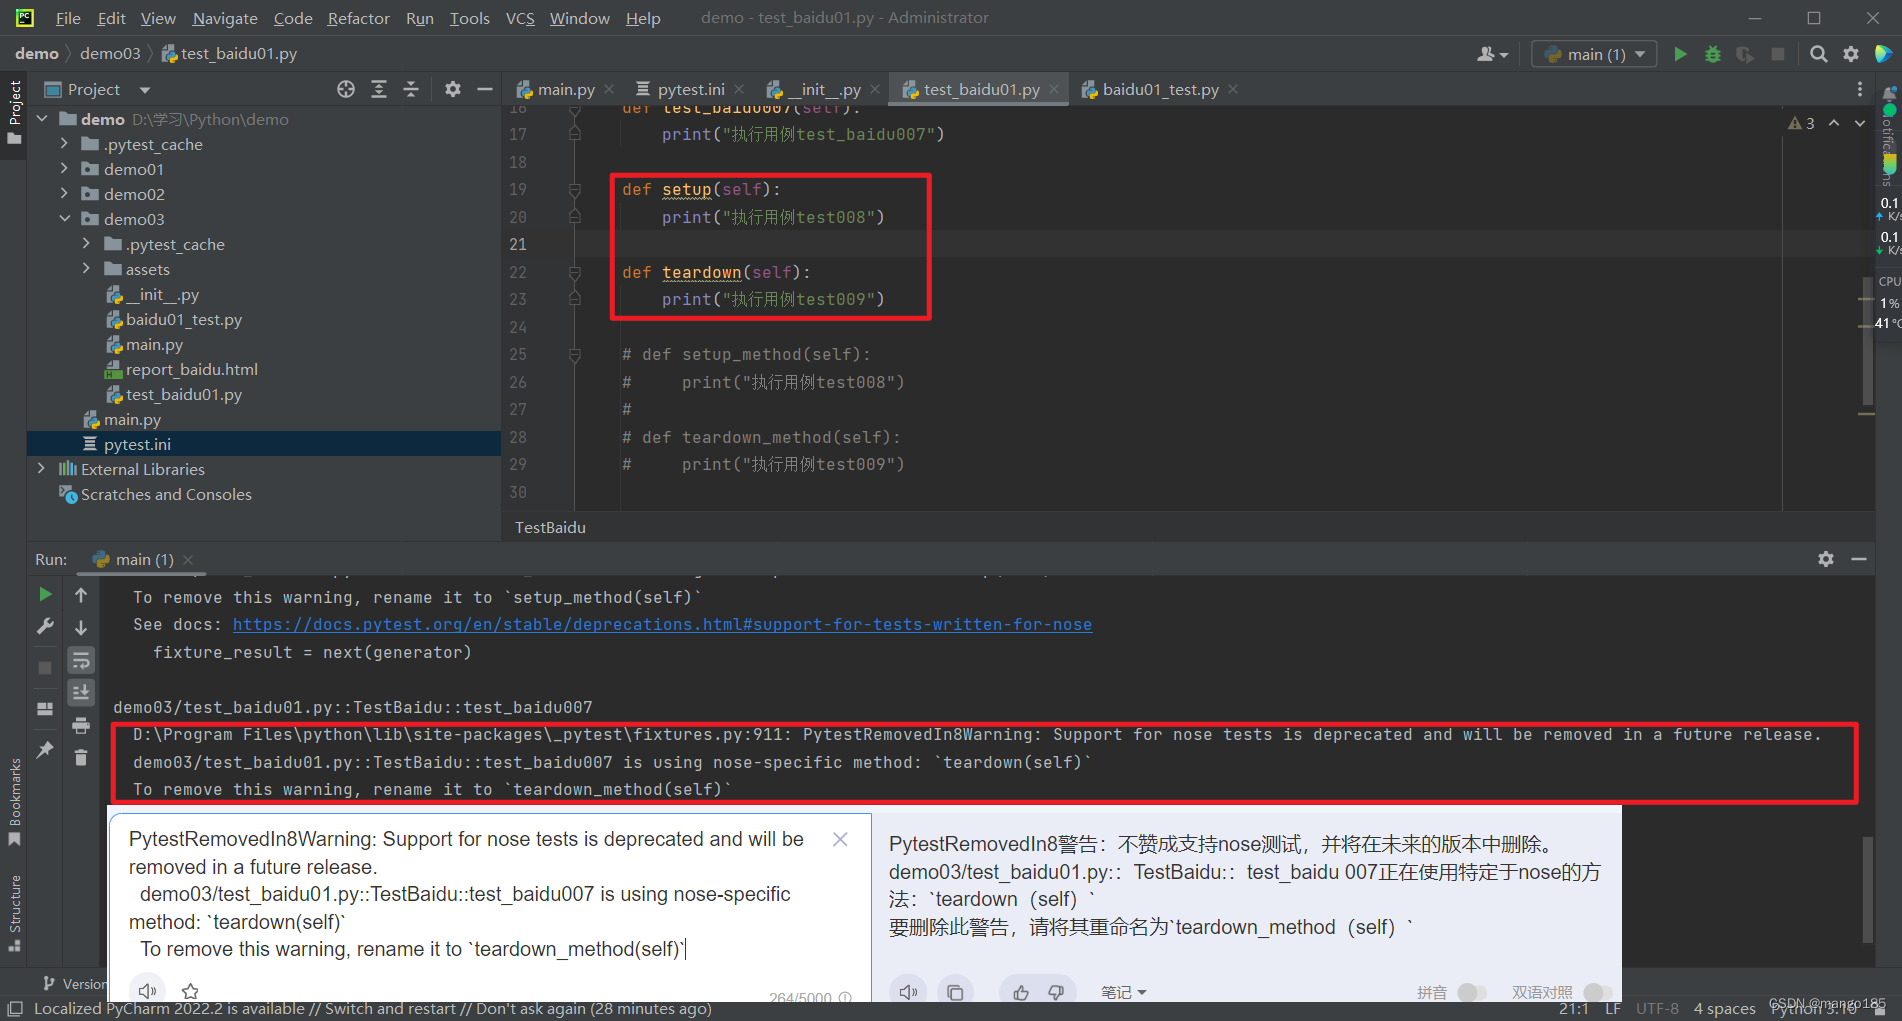
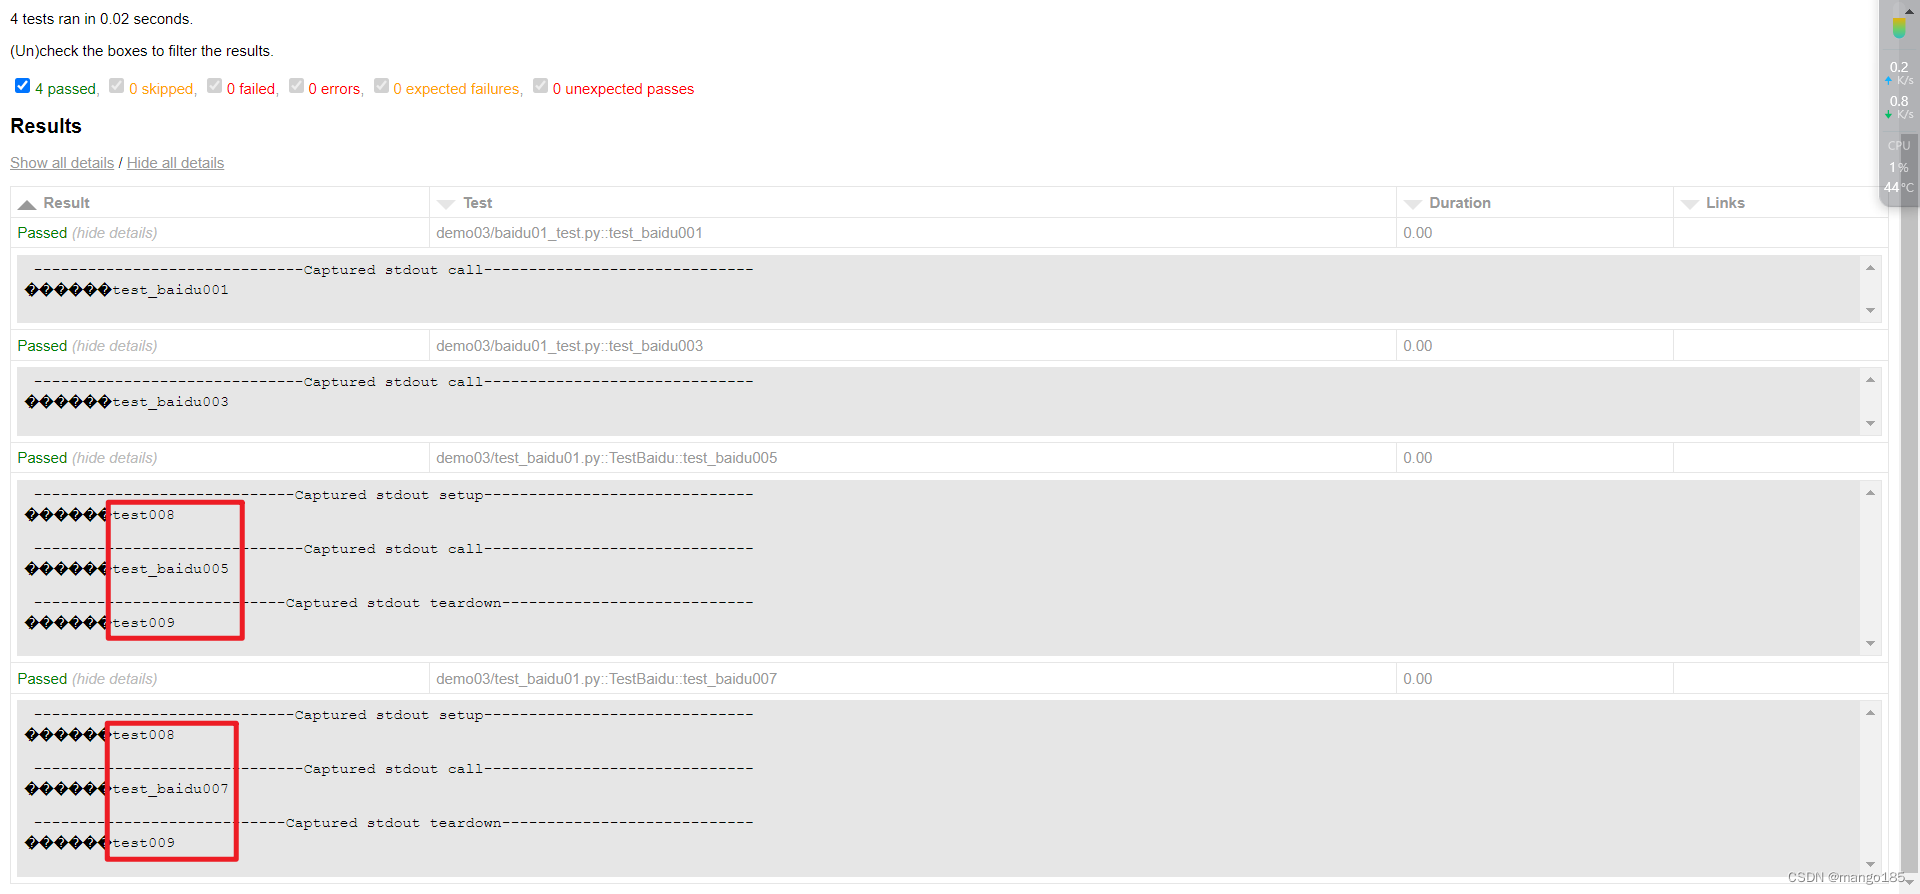
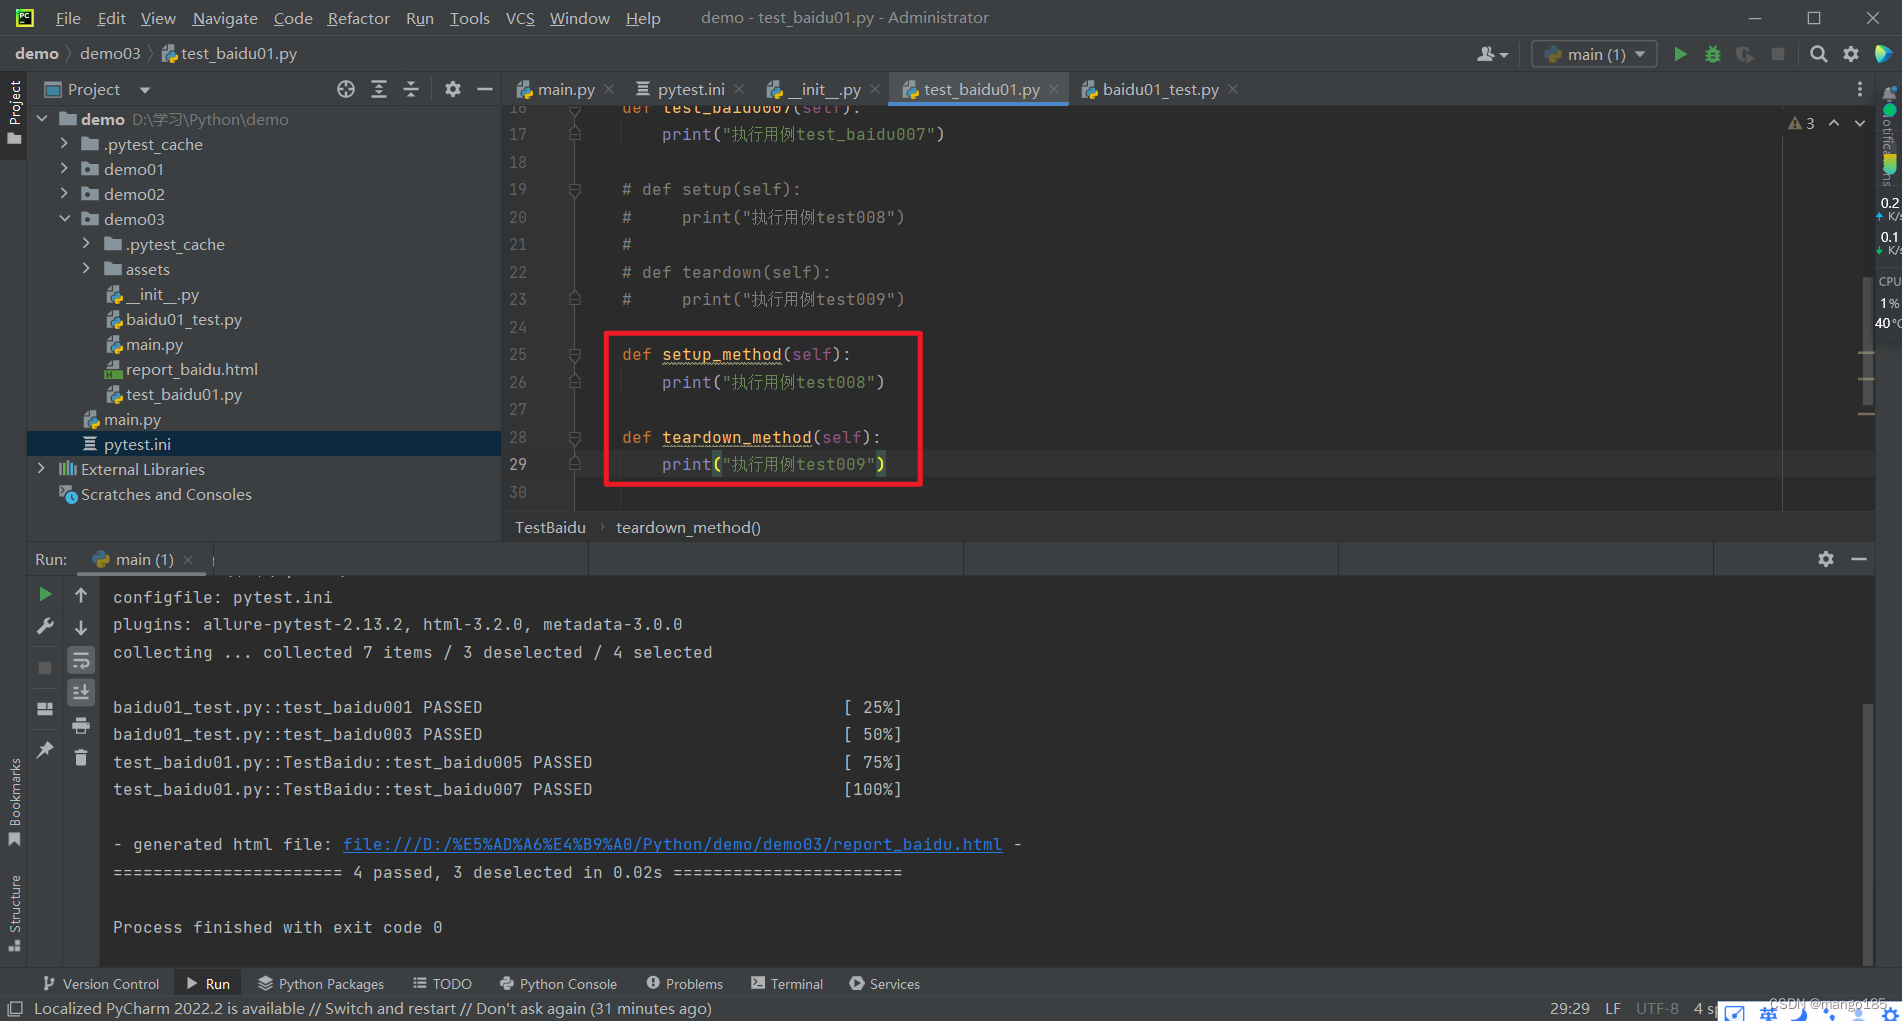
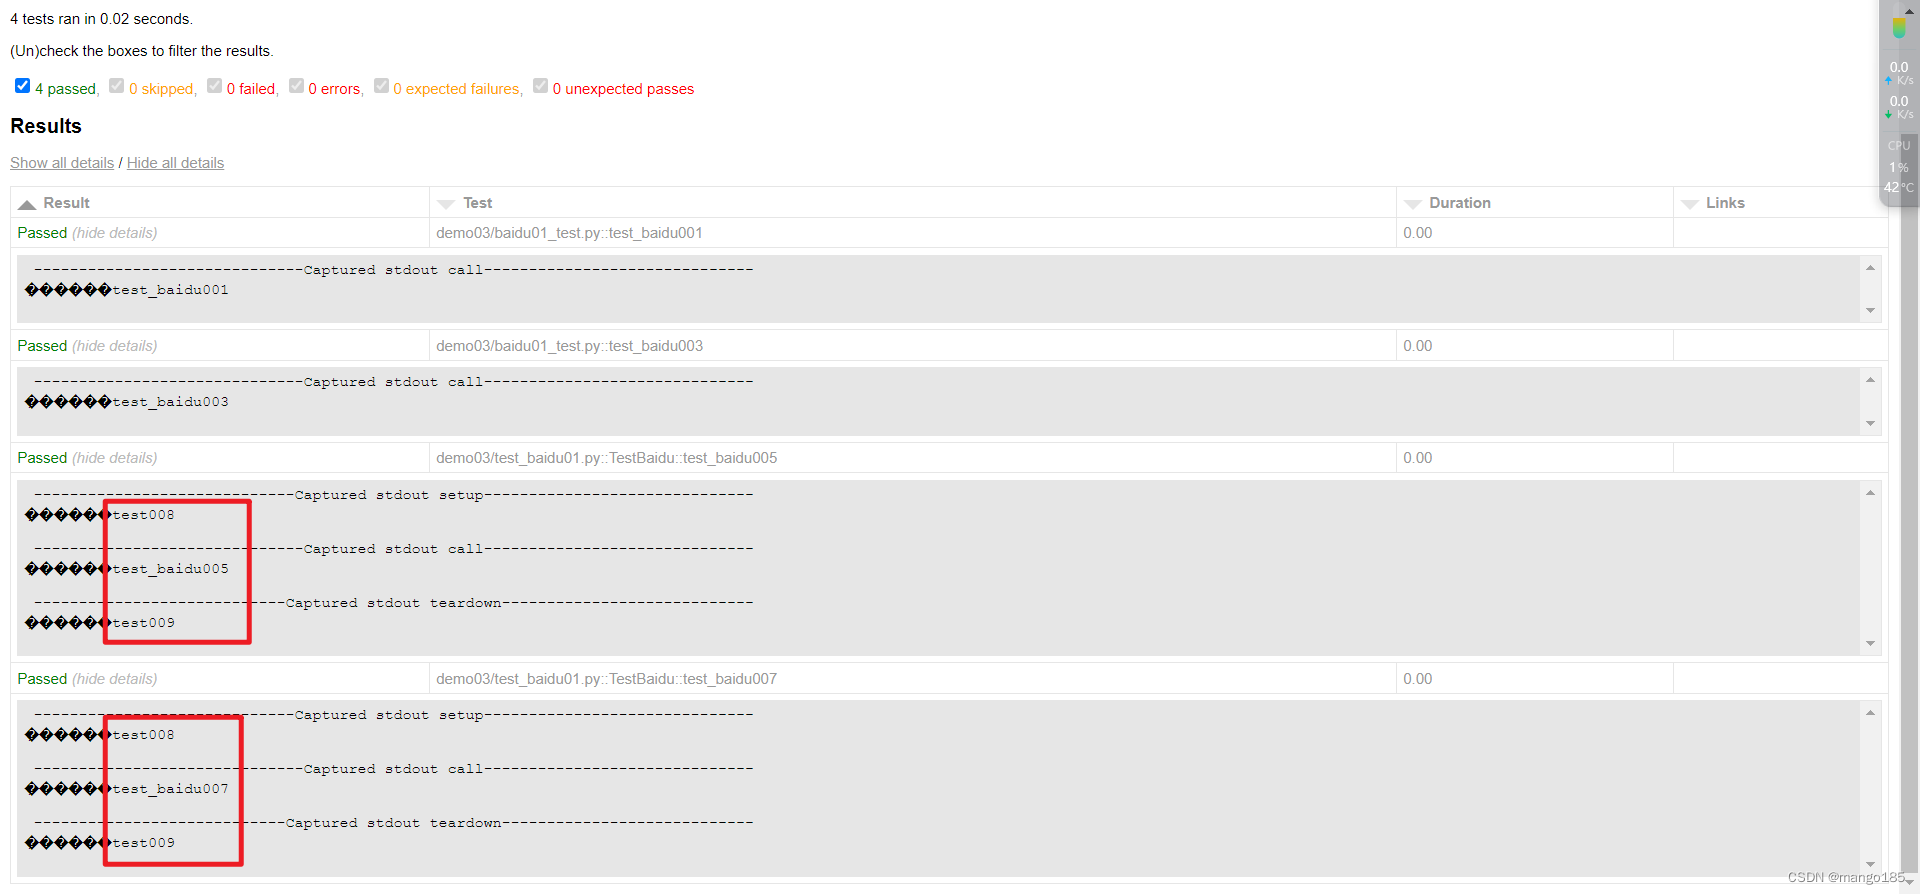
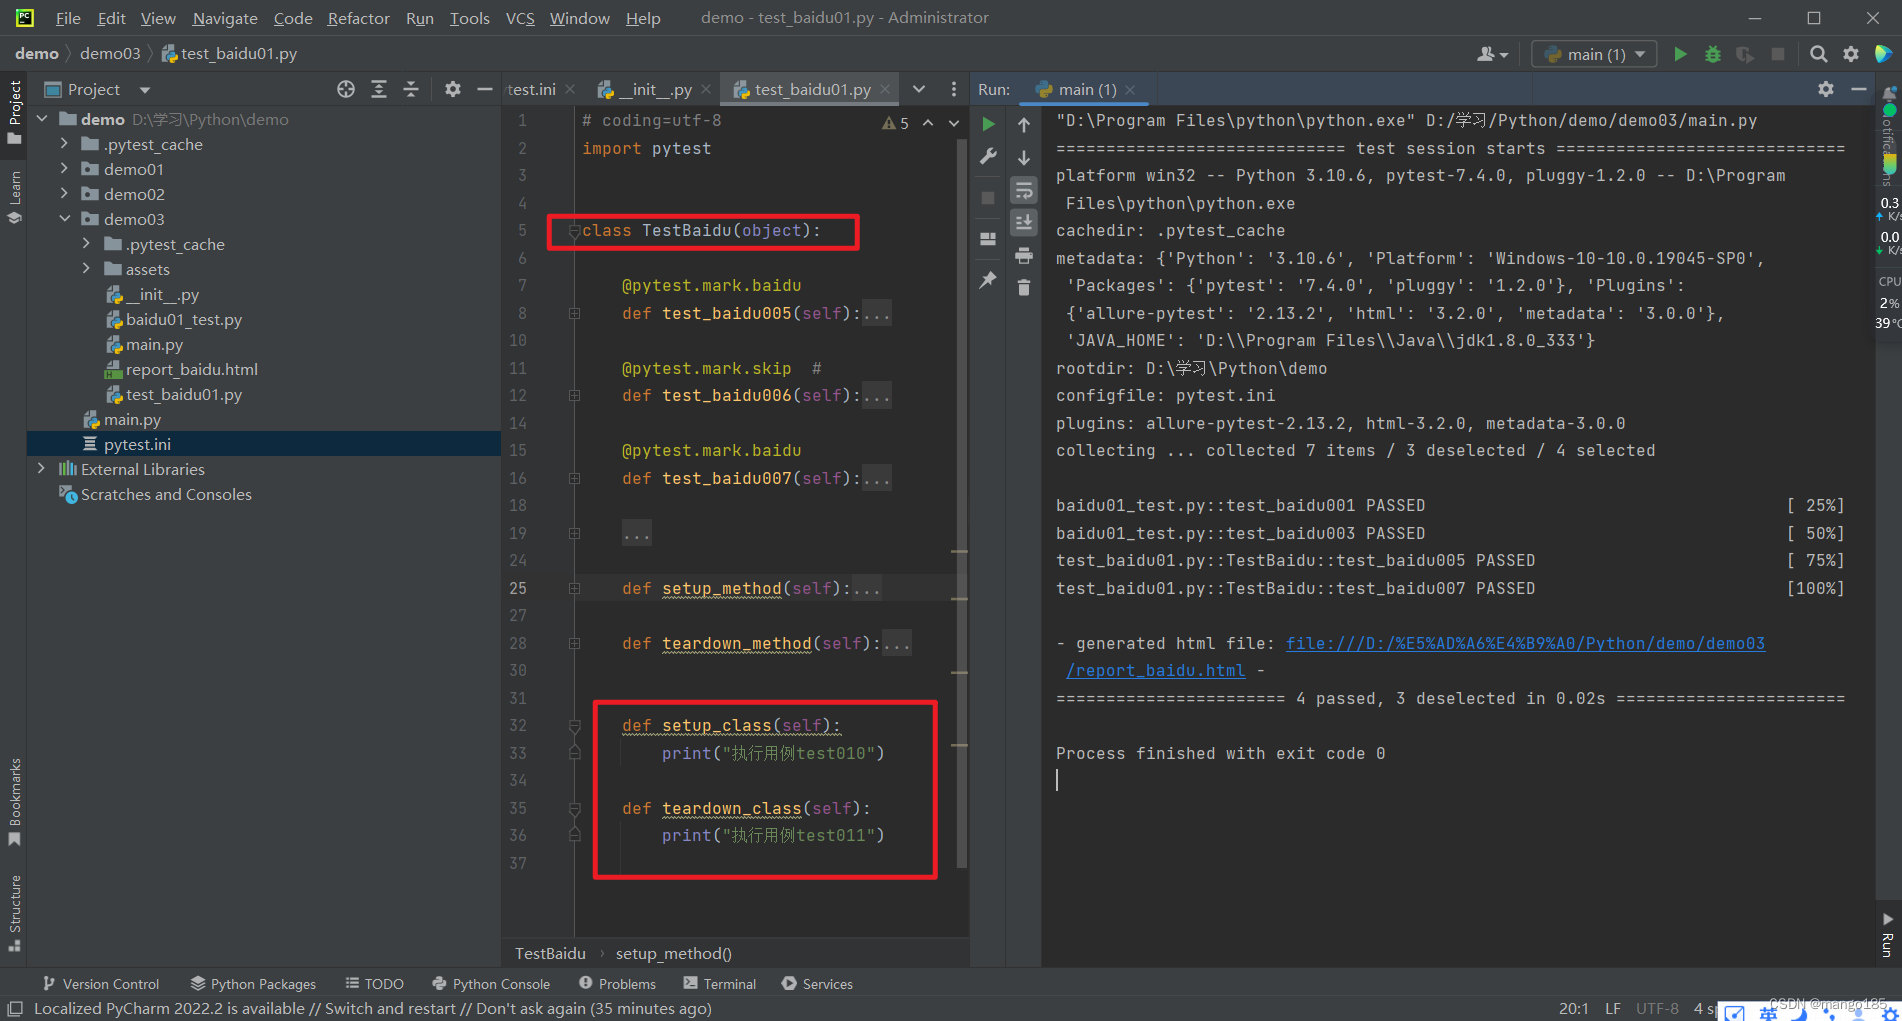
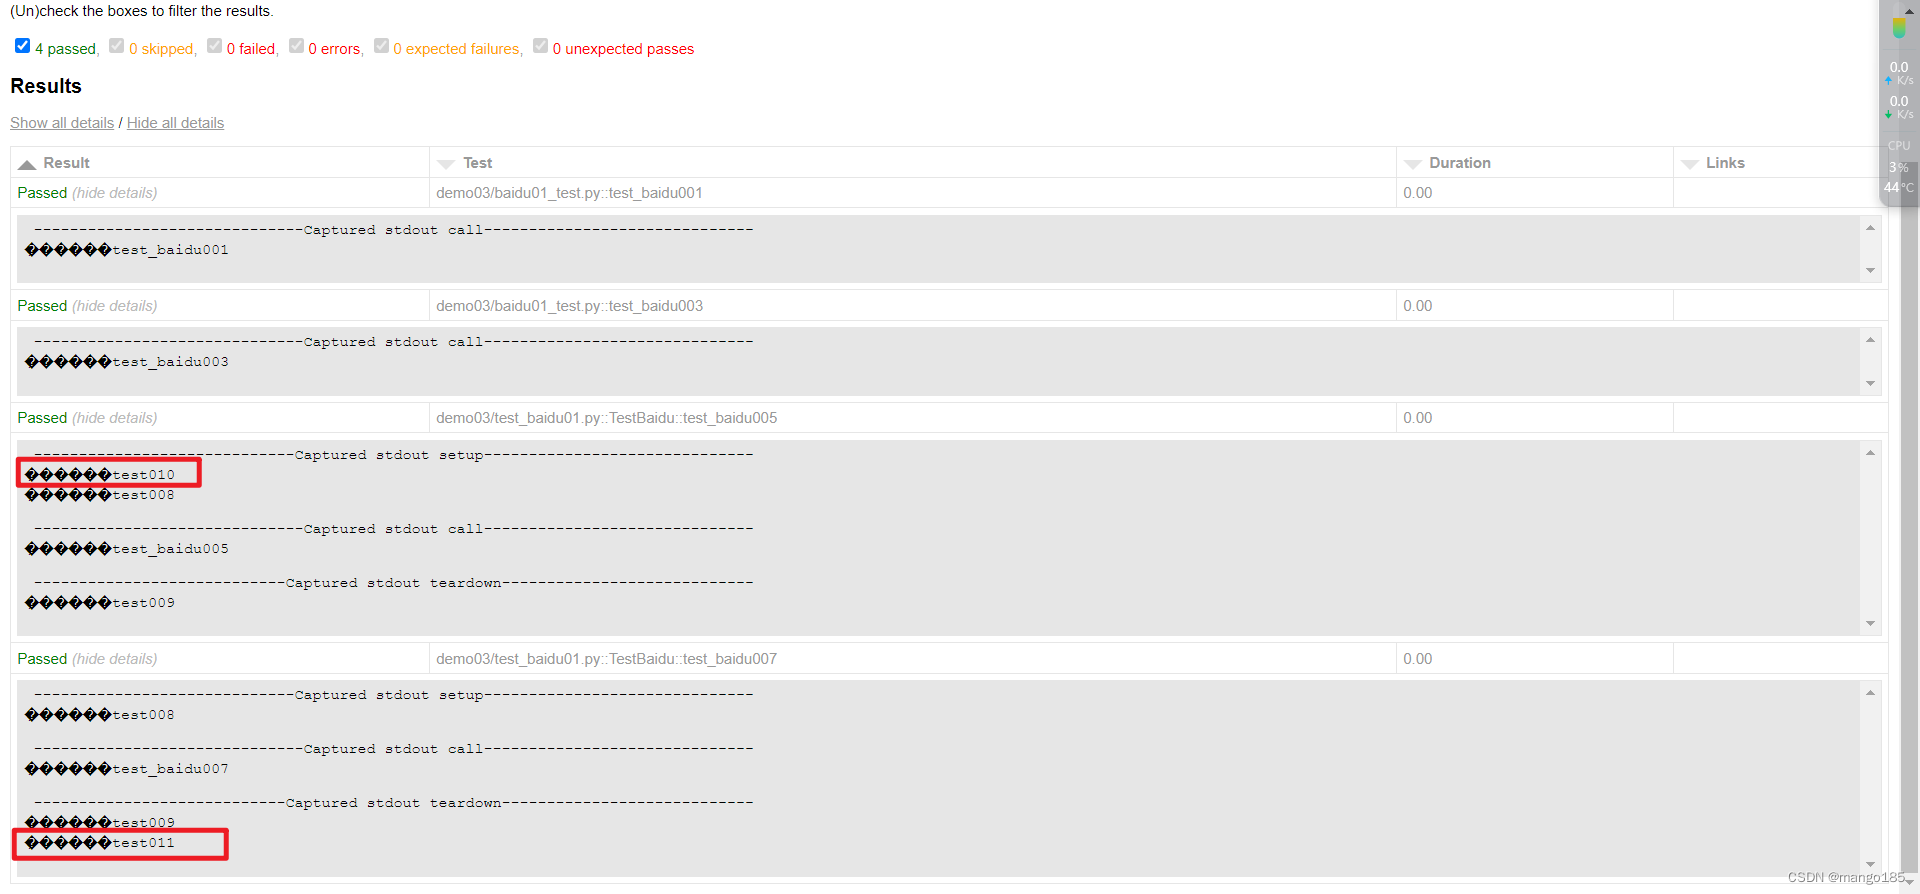
九、执行用例的前后置处理方式
方式一:pytest(类)预置条件/(类)重置环境
- 预置条件和重置环境需要成对使用
- 表示在每一个要执行的用例前都执行一次预置条件,在每一个要执行的用例执行完成后都执行一类重置环境
1 | import pytest |
返回结果:
1 | "D:\Program Files\python\python.exe" D:/学习/Python/demo/demo07/test_fixture.py |
autouse=True
1 | import pytest |
返回结果:
1 | "D:\Program Files\python\python.exe" D:/学习/Python/demo/demo07/test_fixture.py |
只针对某一个用例执行
1 | import pytest |
返回结果:
1 | "D:\Program Files\python\python.exe" D:/学习/Python/demo/demo07/test_fixture.py |
yield + 返回值
1 | import pytest |
返回结果:
1 | "D:\Program Files\python\python.exe" D:/学习/Python/demo/demo07/test_fixture.py |
作用域为class的自动调用
1 | import pytest |
返回结果:
1 | "D:\Program Files\python\python.exe" D:/学习/Python/demo/demo07/test_fixture.py |
作用域为class的手动调用
1 | import pytest |
返回结果:
1 | "D:\Program Files\python\python.exe" D:/学习/Python/demo/demo07/test_fixture.py |
scope=class时,yield后不传值
1 | import pytest |
返回结果:TypeError: can only concatenate str (not “function”) to str
1 | "D:\Program Files\python\python.exe" D:/学习/Python/demo/demo07/test_fixture.py |
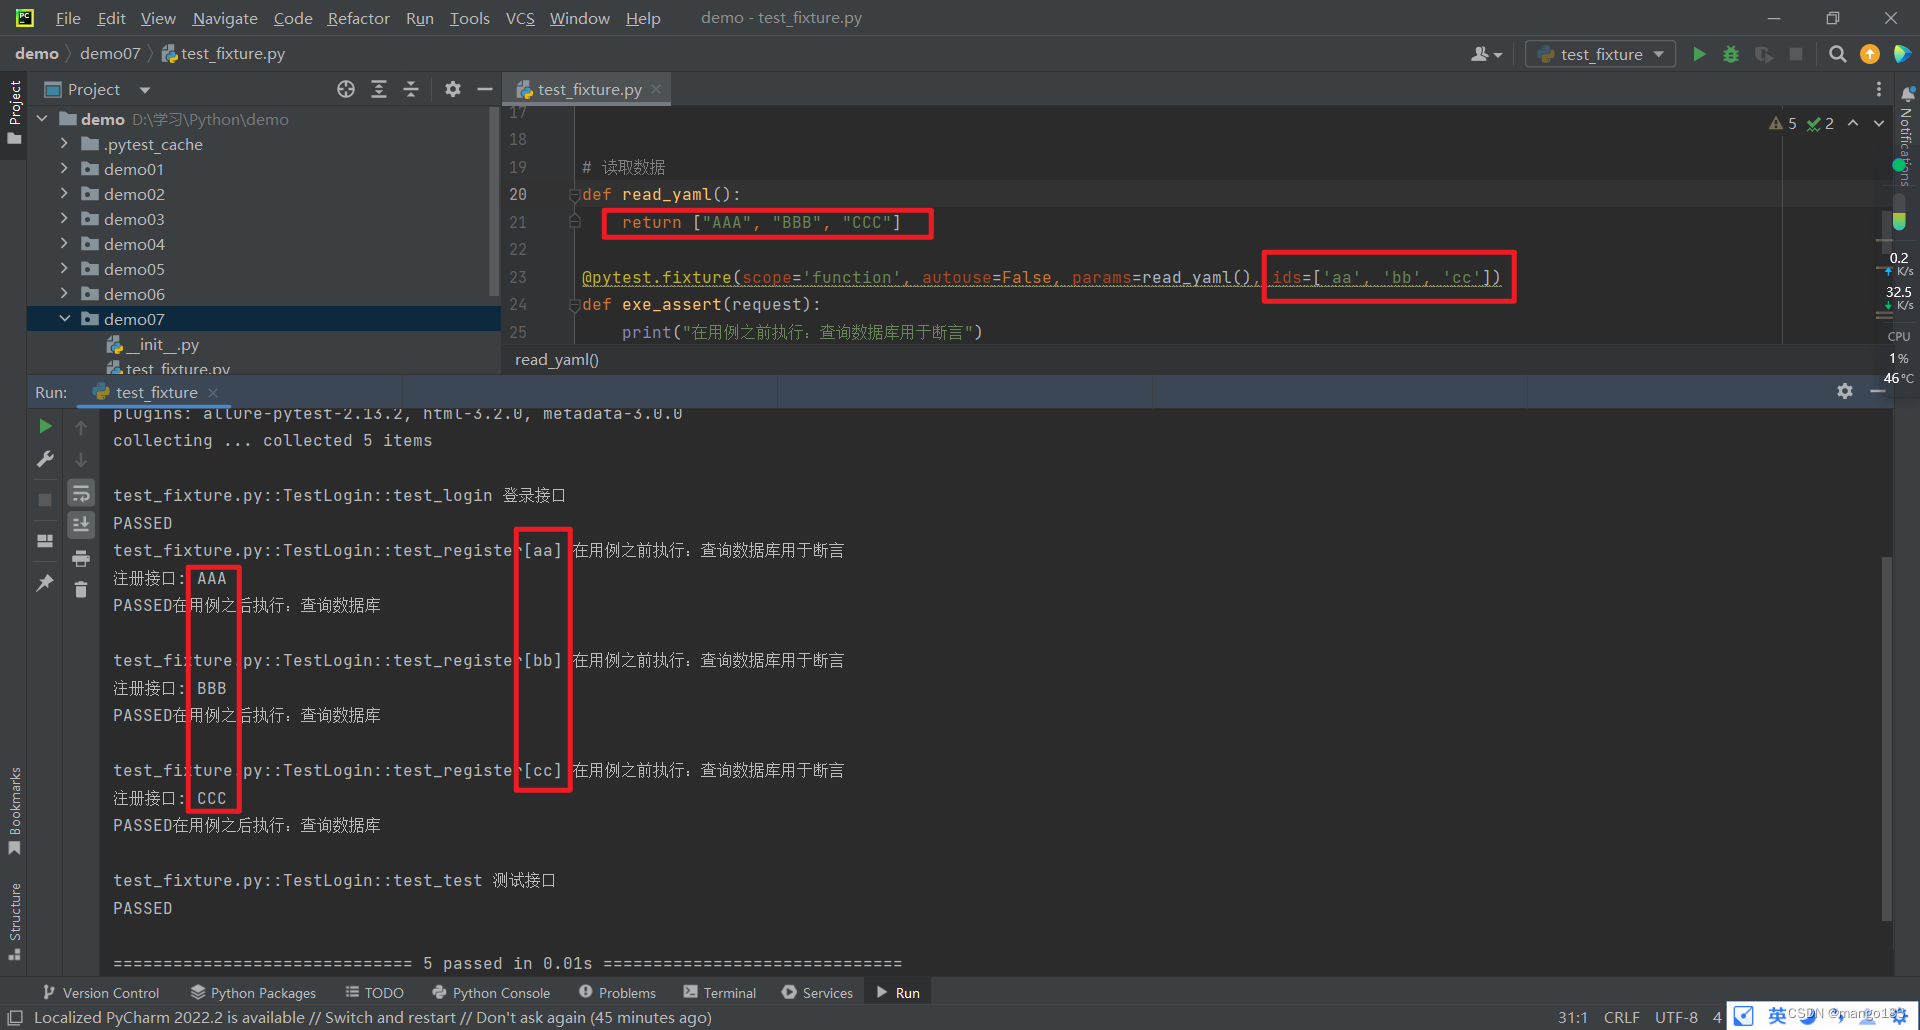
params实现数据驱动
1 | import pytest |
返回结果:
1 | "D:\Program Files\python\python.exe" D:/学习/Python/demo/demo07/test_fixture.py |
ids:可以替换params中参数的名称
1 | import pytest |
返回结果:
1 | "D:\Program Files\python\python.exe" D:/学习/Python/demo/demo07/test_fixture.py |
name:定义fixture固件别名
调用固件时需要使用name定义的别名,否则会报错
1 | import pytest |
返回结果:
1 | "D:\Program Files\python\python.exe" D:/学习/Python/demo/demo07/test_fixture.py |
可以在conftest.py文件中保存所有的固件
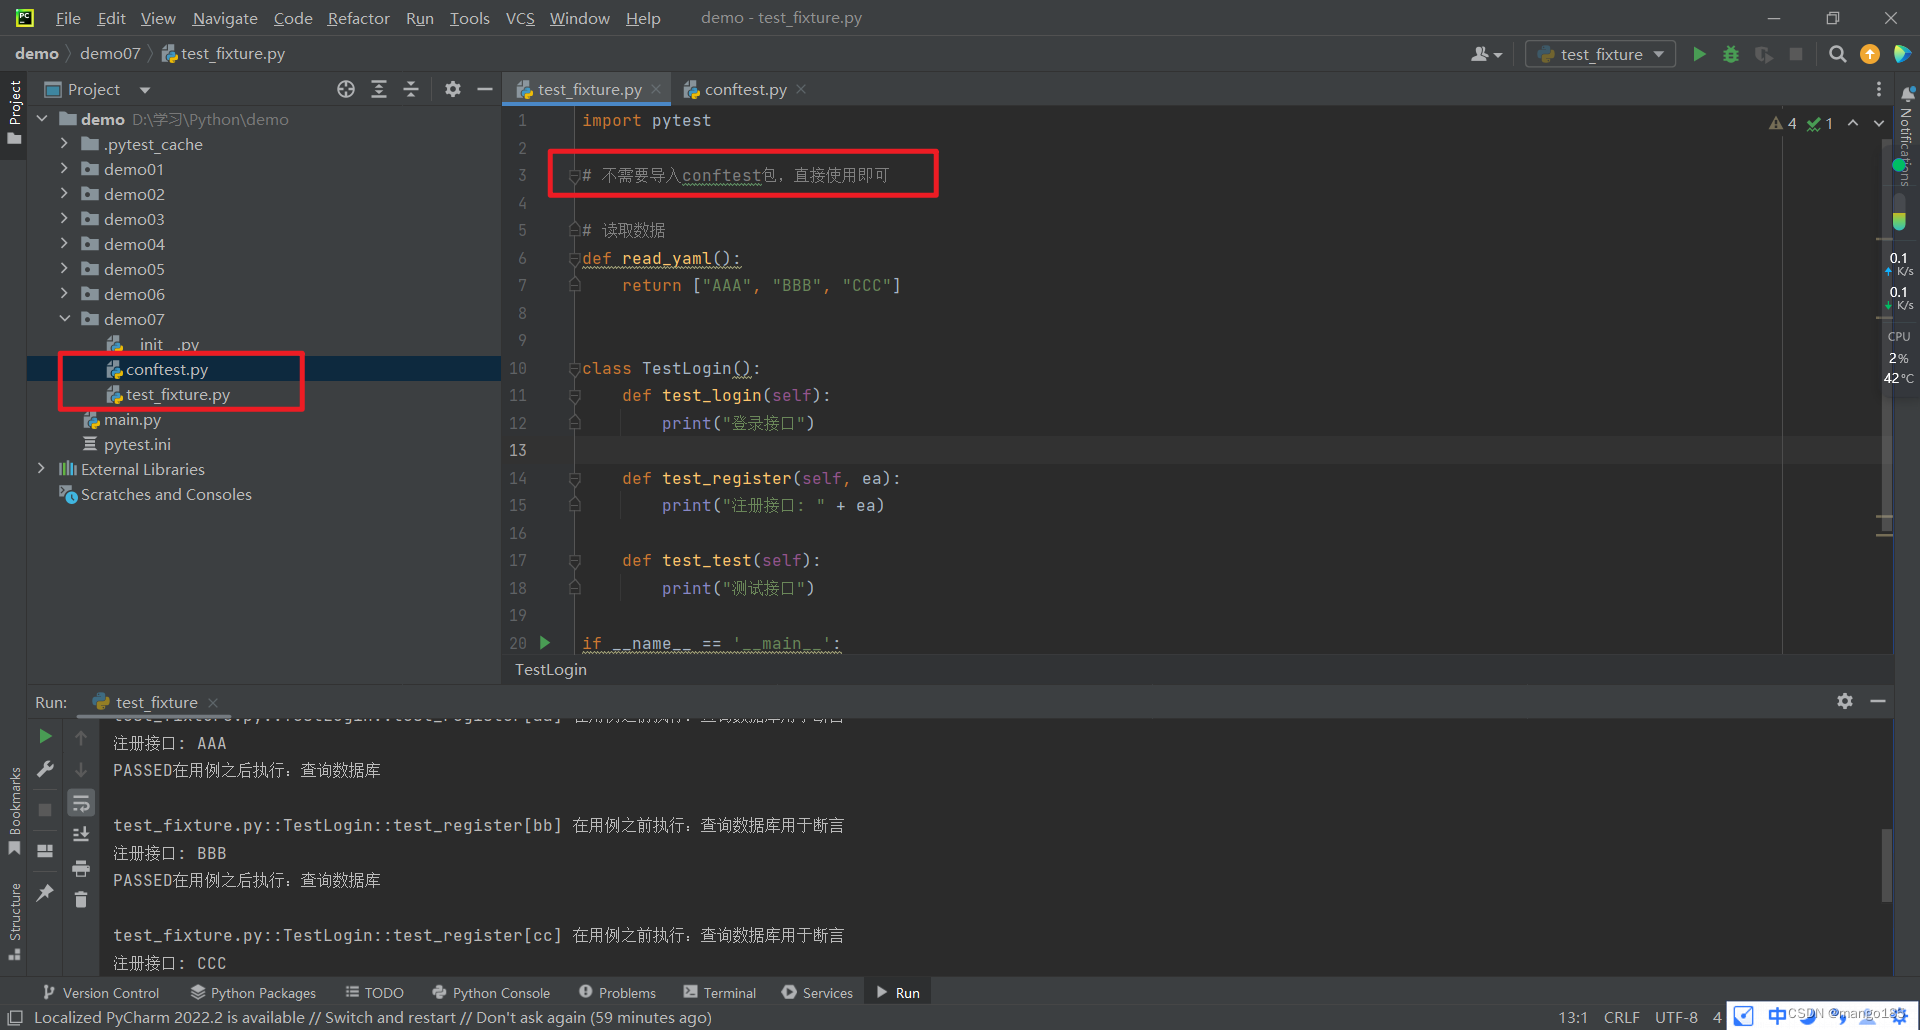
test_fixture.py
1 | import pytest |
conftest.py
1 | import pytest |
返回结果:
1 | "D:\Program Files\python\python.exe" D:/学习/Python/demo/demo07/test_fixture.py |
scope=session在整个会话(所有test开头的py文件中的用例)前后执行fixture固件中的用例
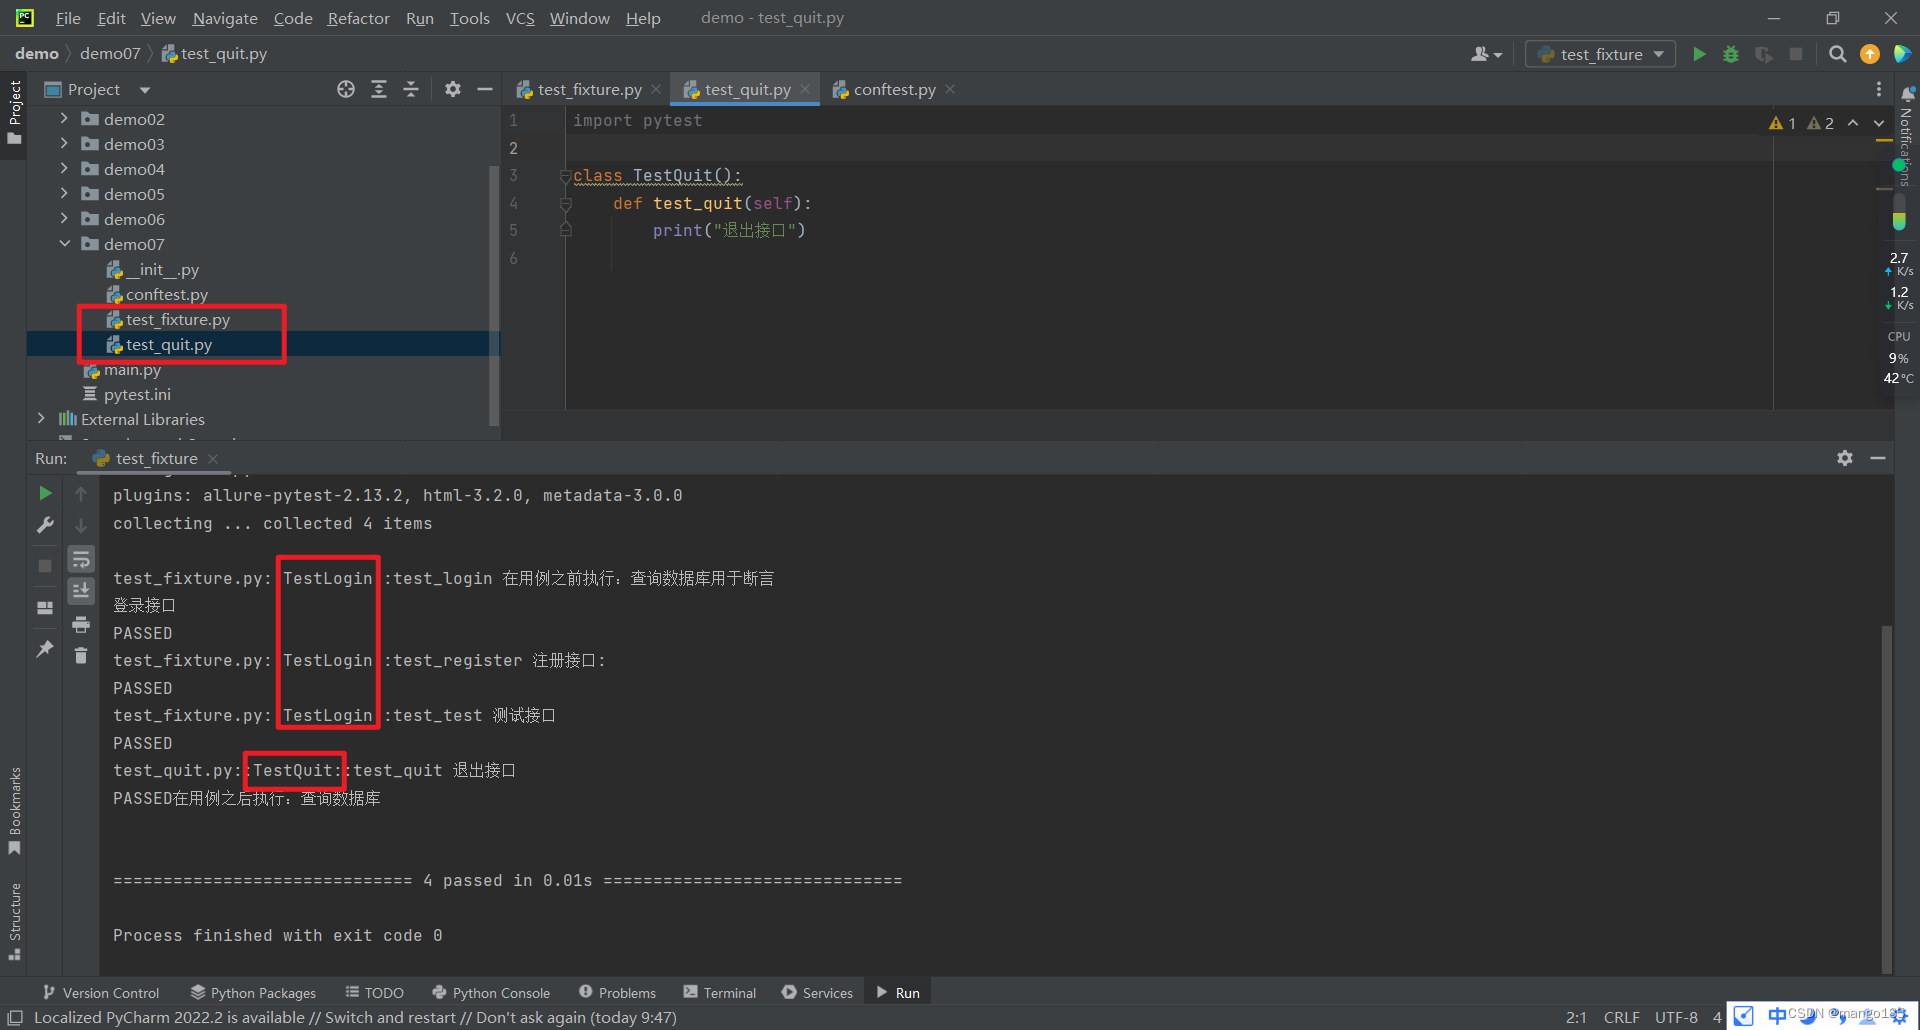
test_fixture.py
1 | import pytest |
test_quit.py
1 | import pytest |
conftest.py
1 | import pytest |
十、allure测试报告
安装allure
1 | pip install allure-pytest |
导包
1 | import allure |
固定执行命令
1 | if __name__ == '__main__': |
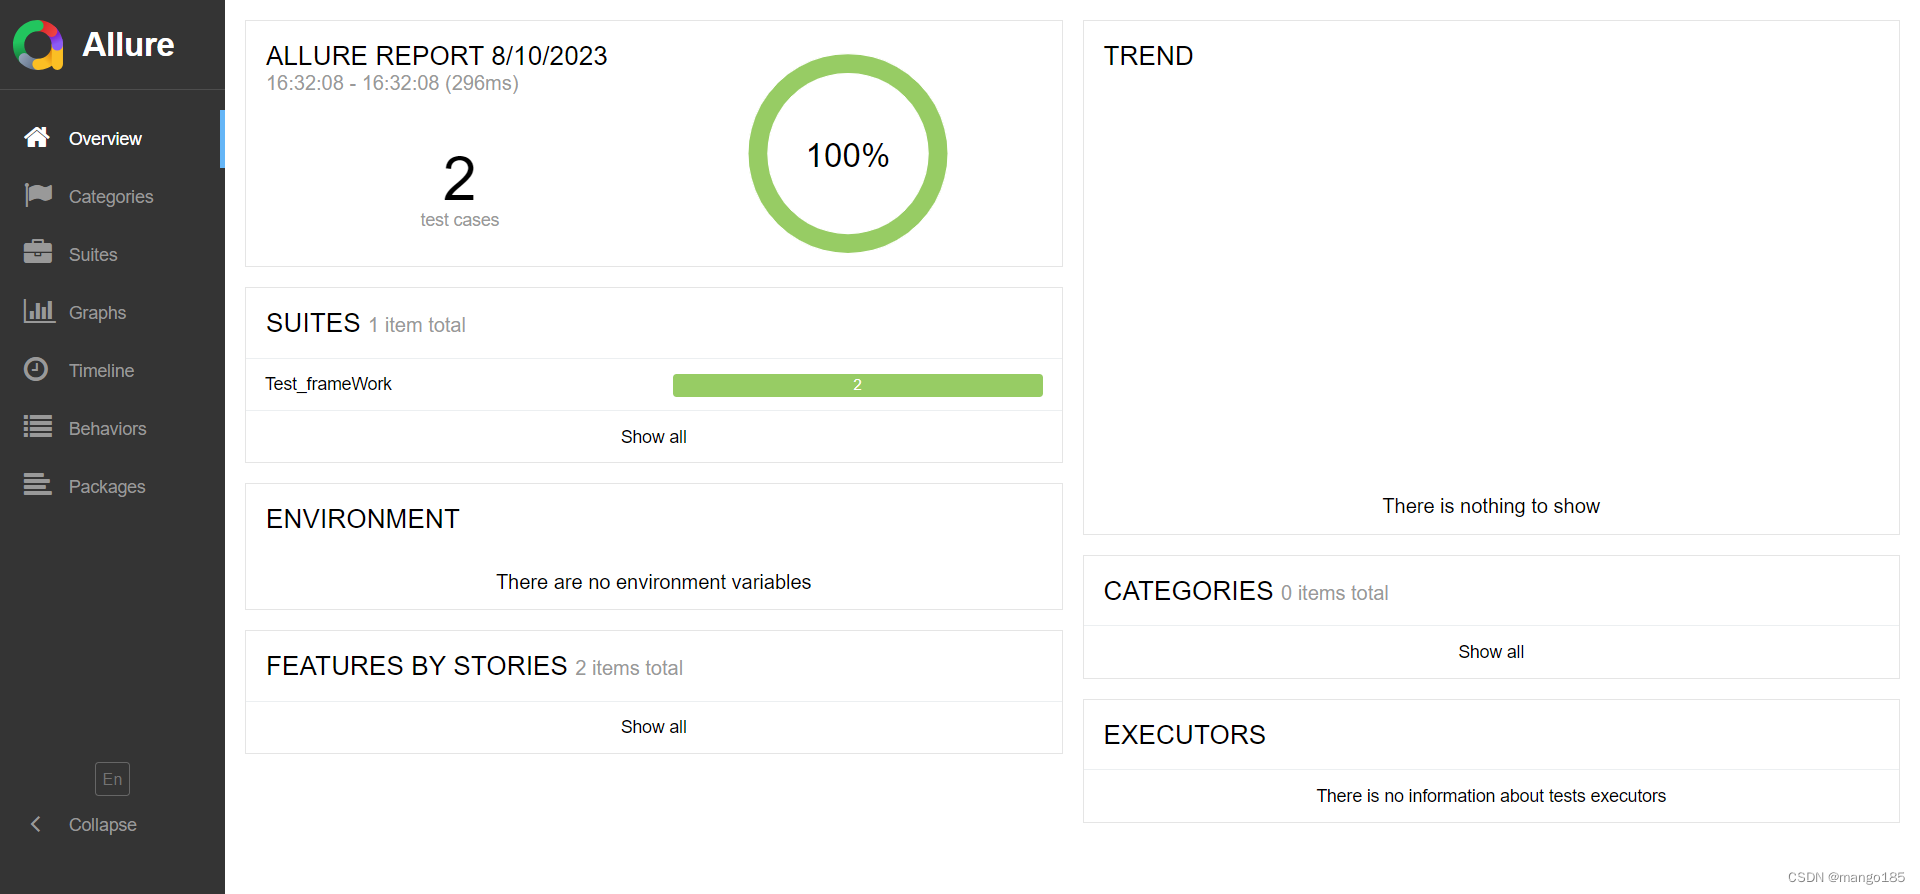
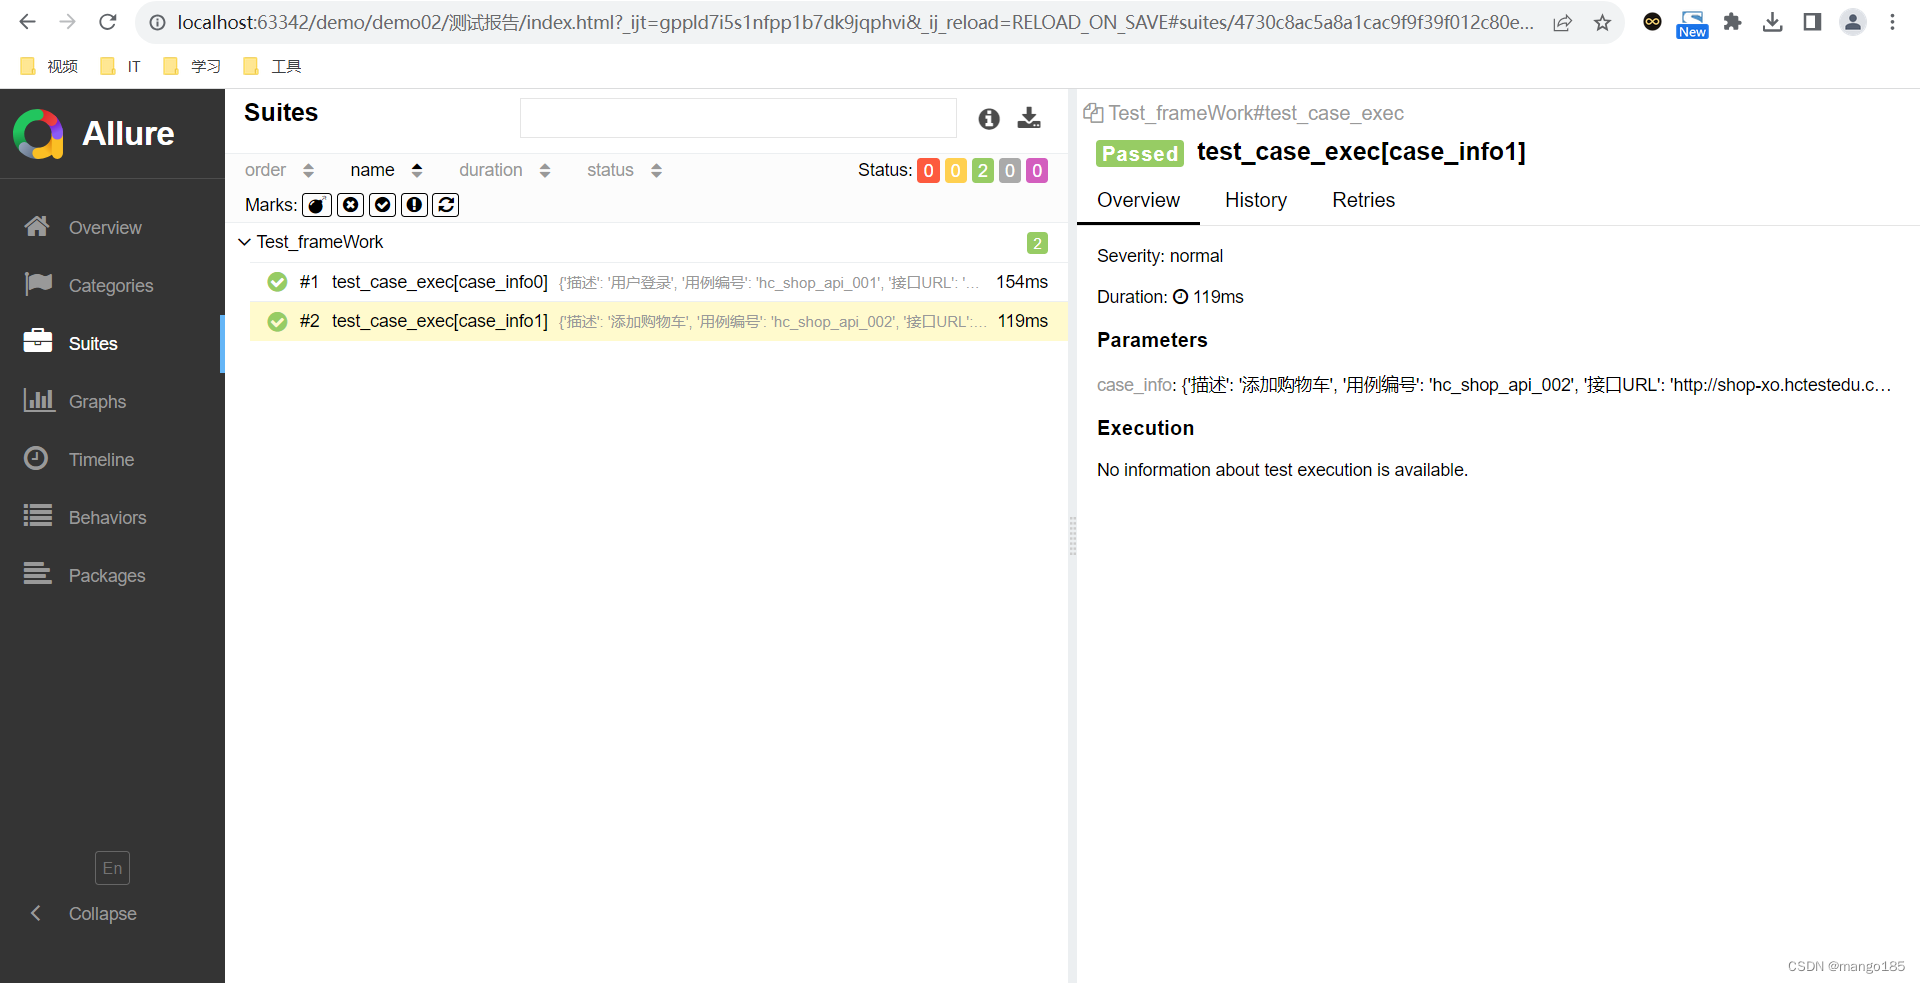
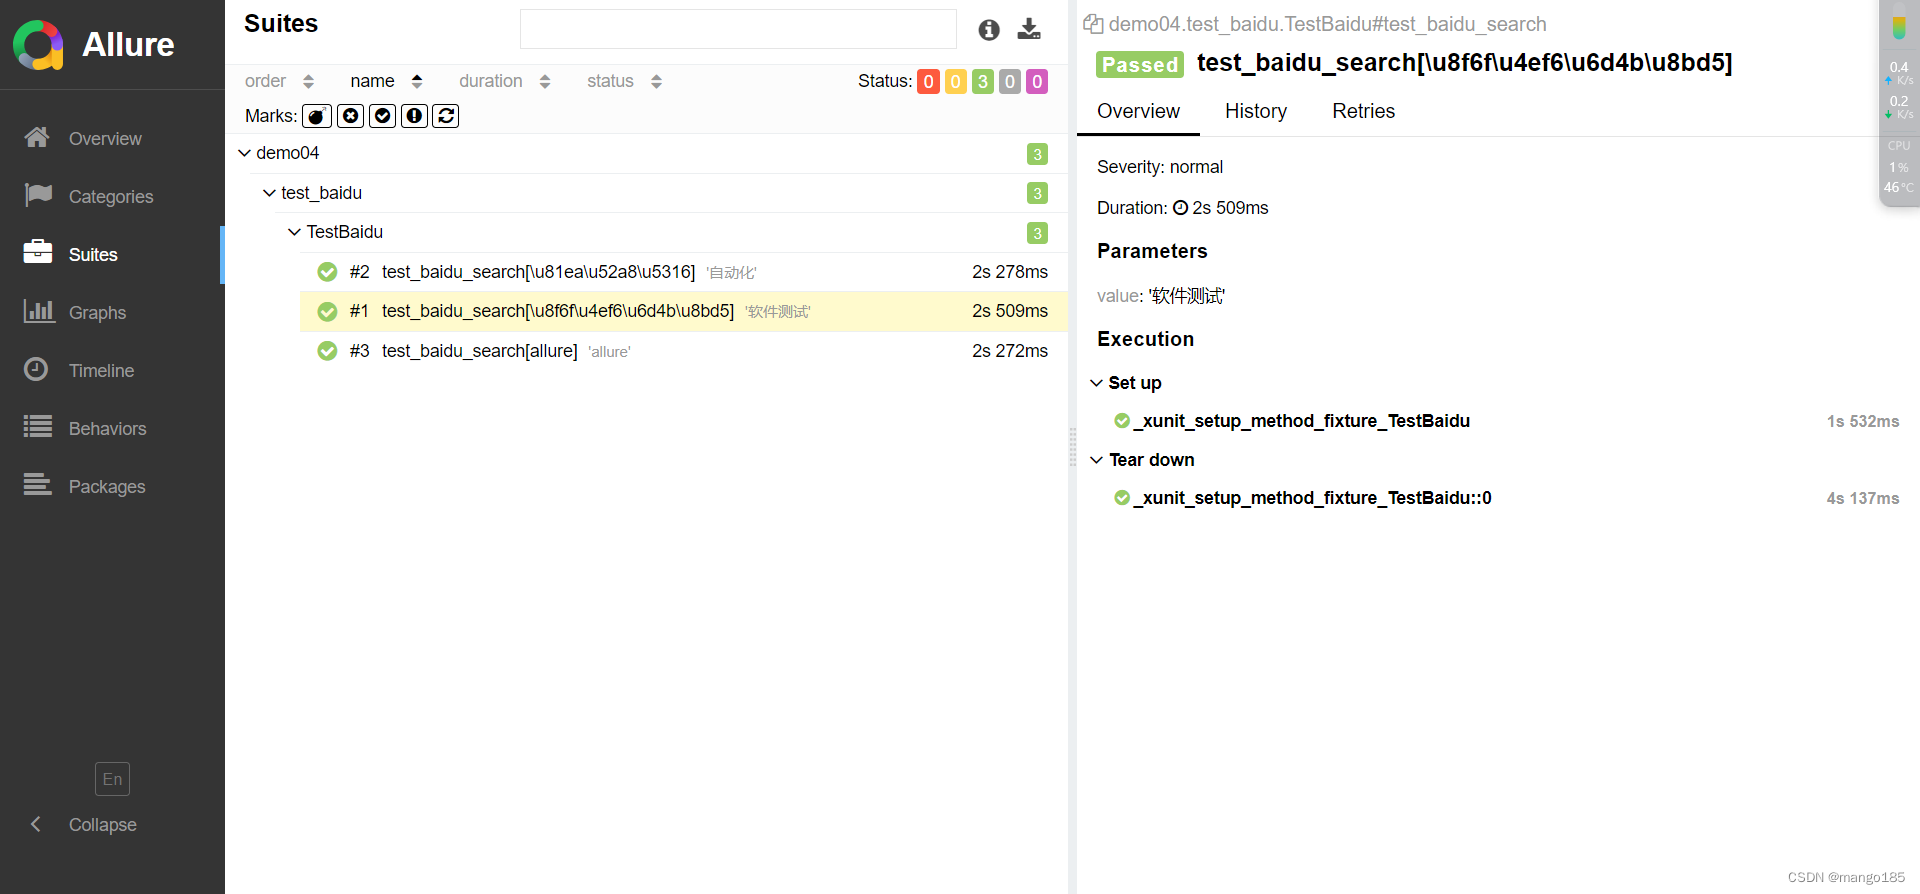
用例执行成功
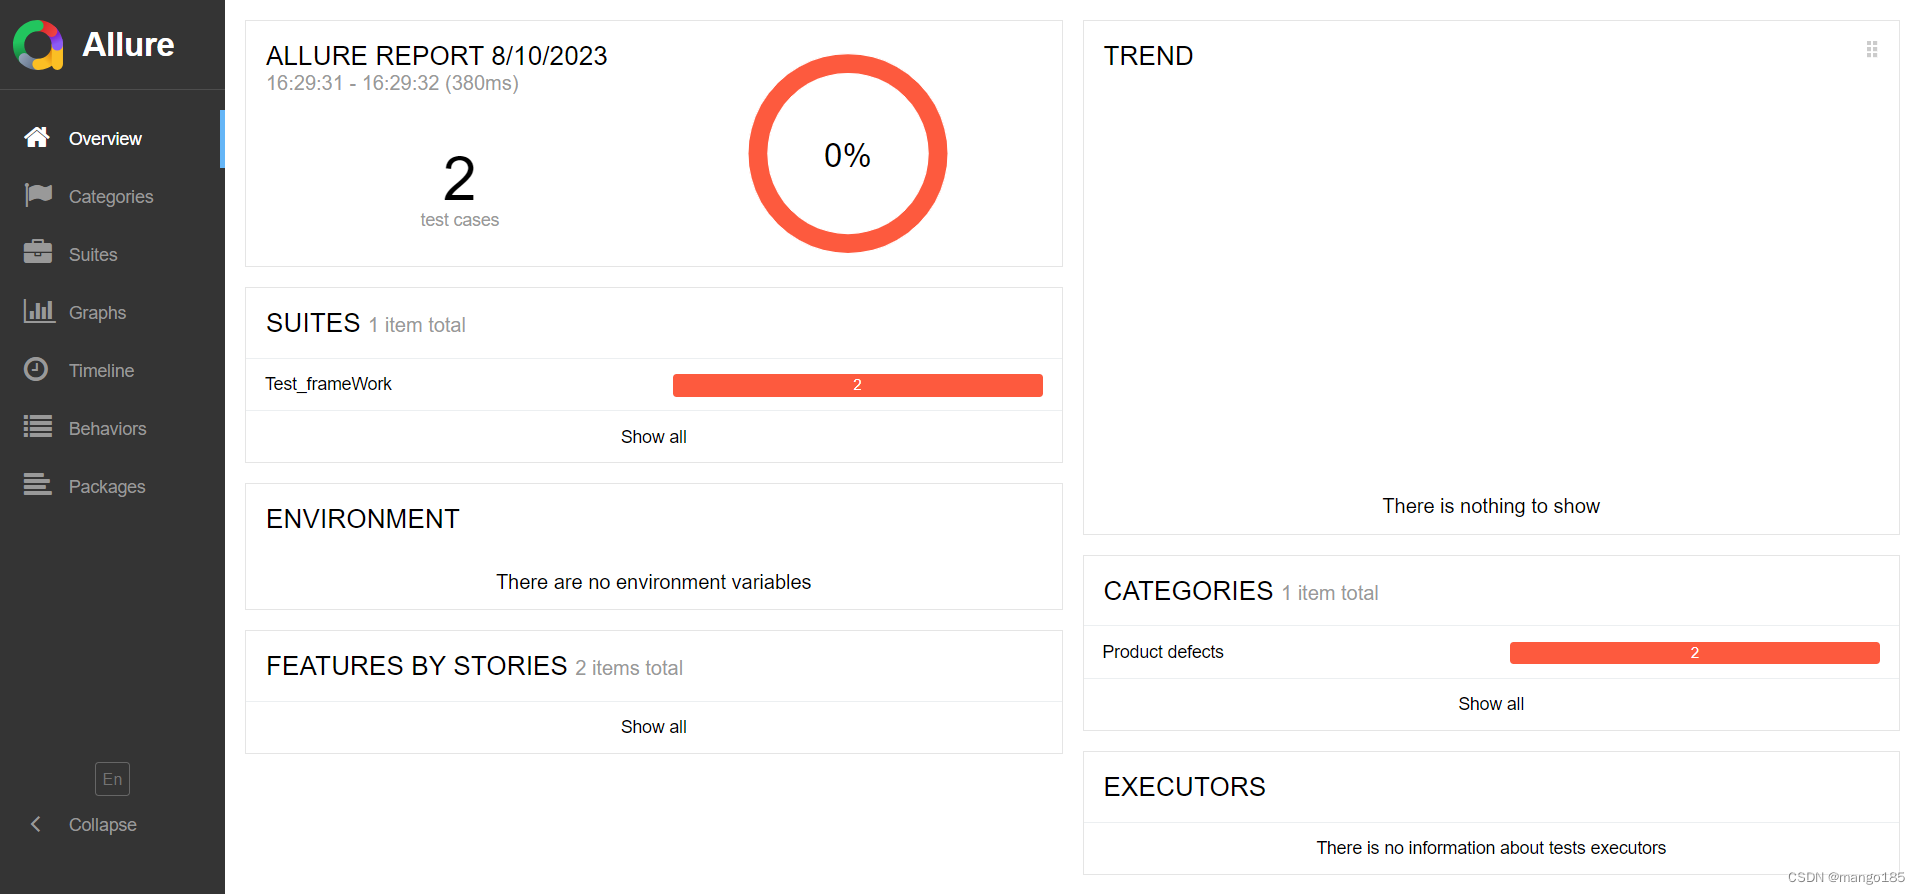
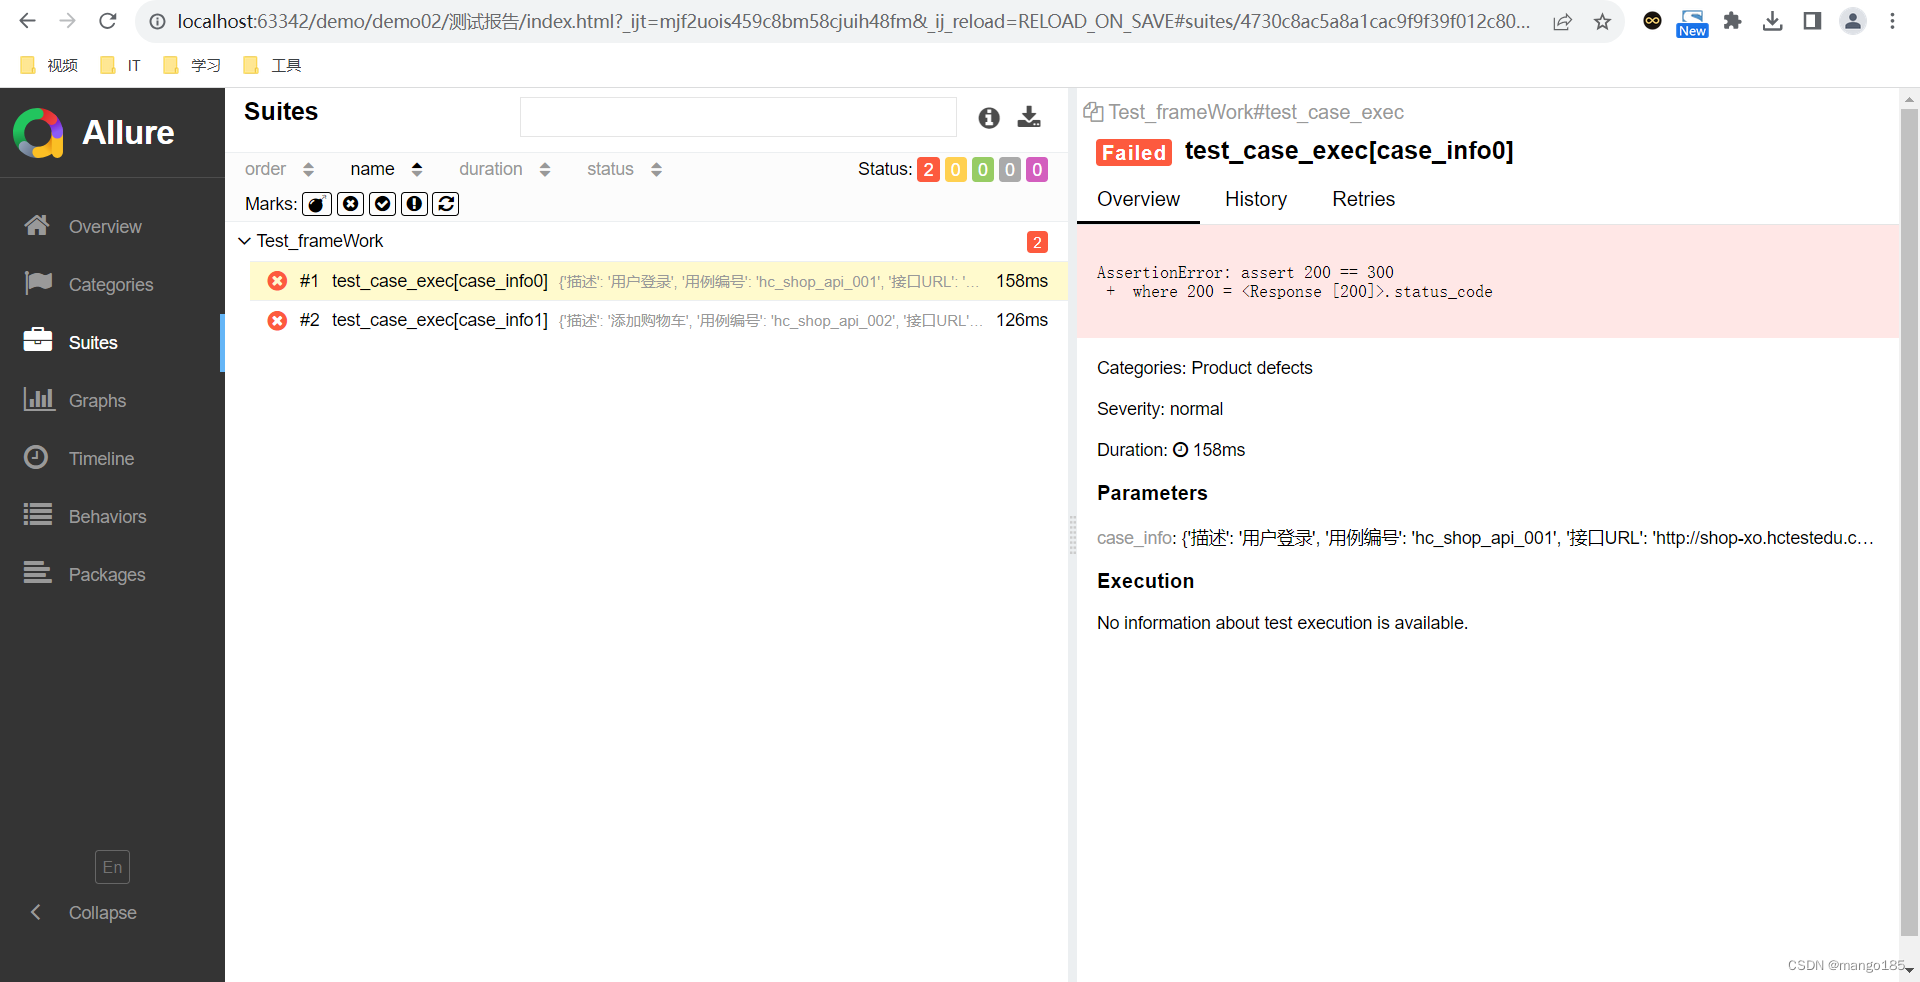
用例执行失败
定制allure测试报告
修改前
1 | import allure |
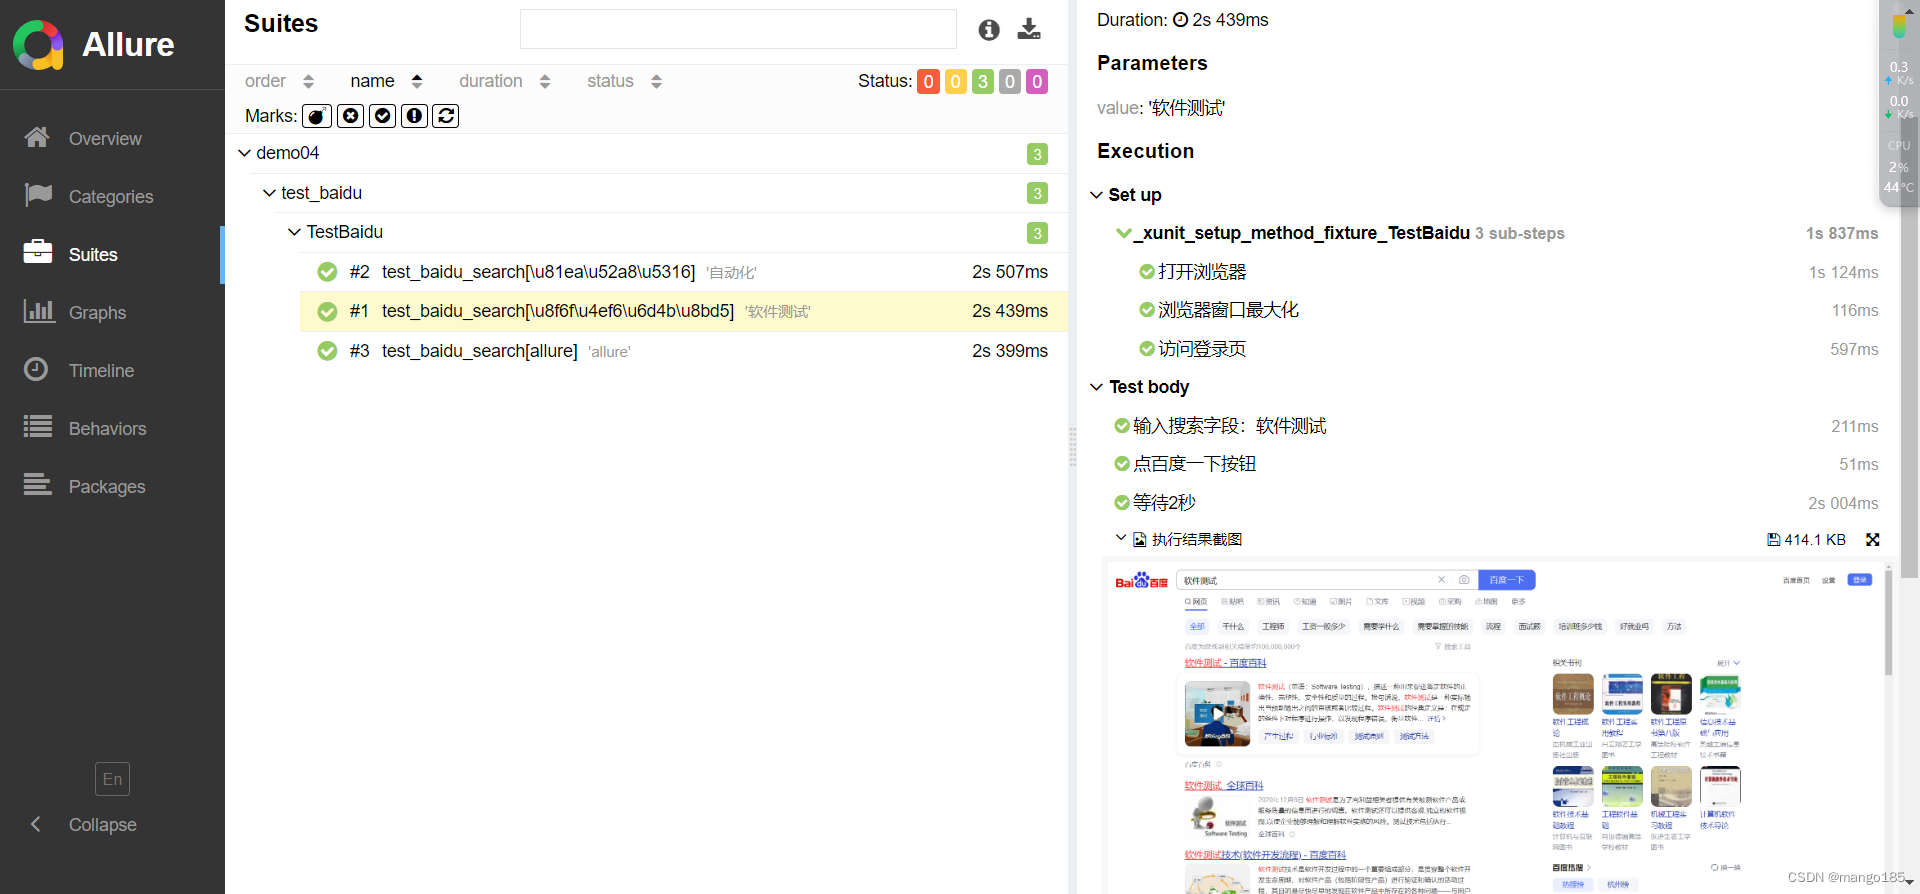
修改后:在报告中显示每一步的操作
1 | import allure |
踩坑
执行后无法生成allure json文件和测试报告HTML文件
未生成allure-results和测试报告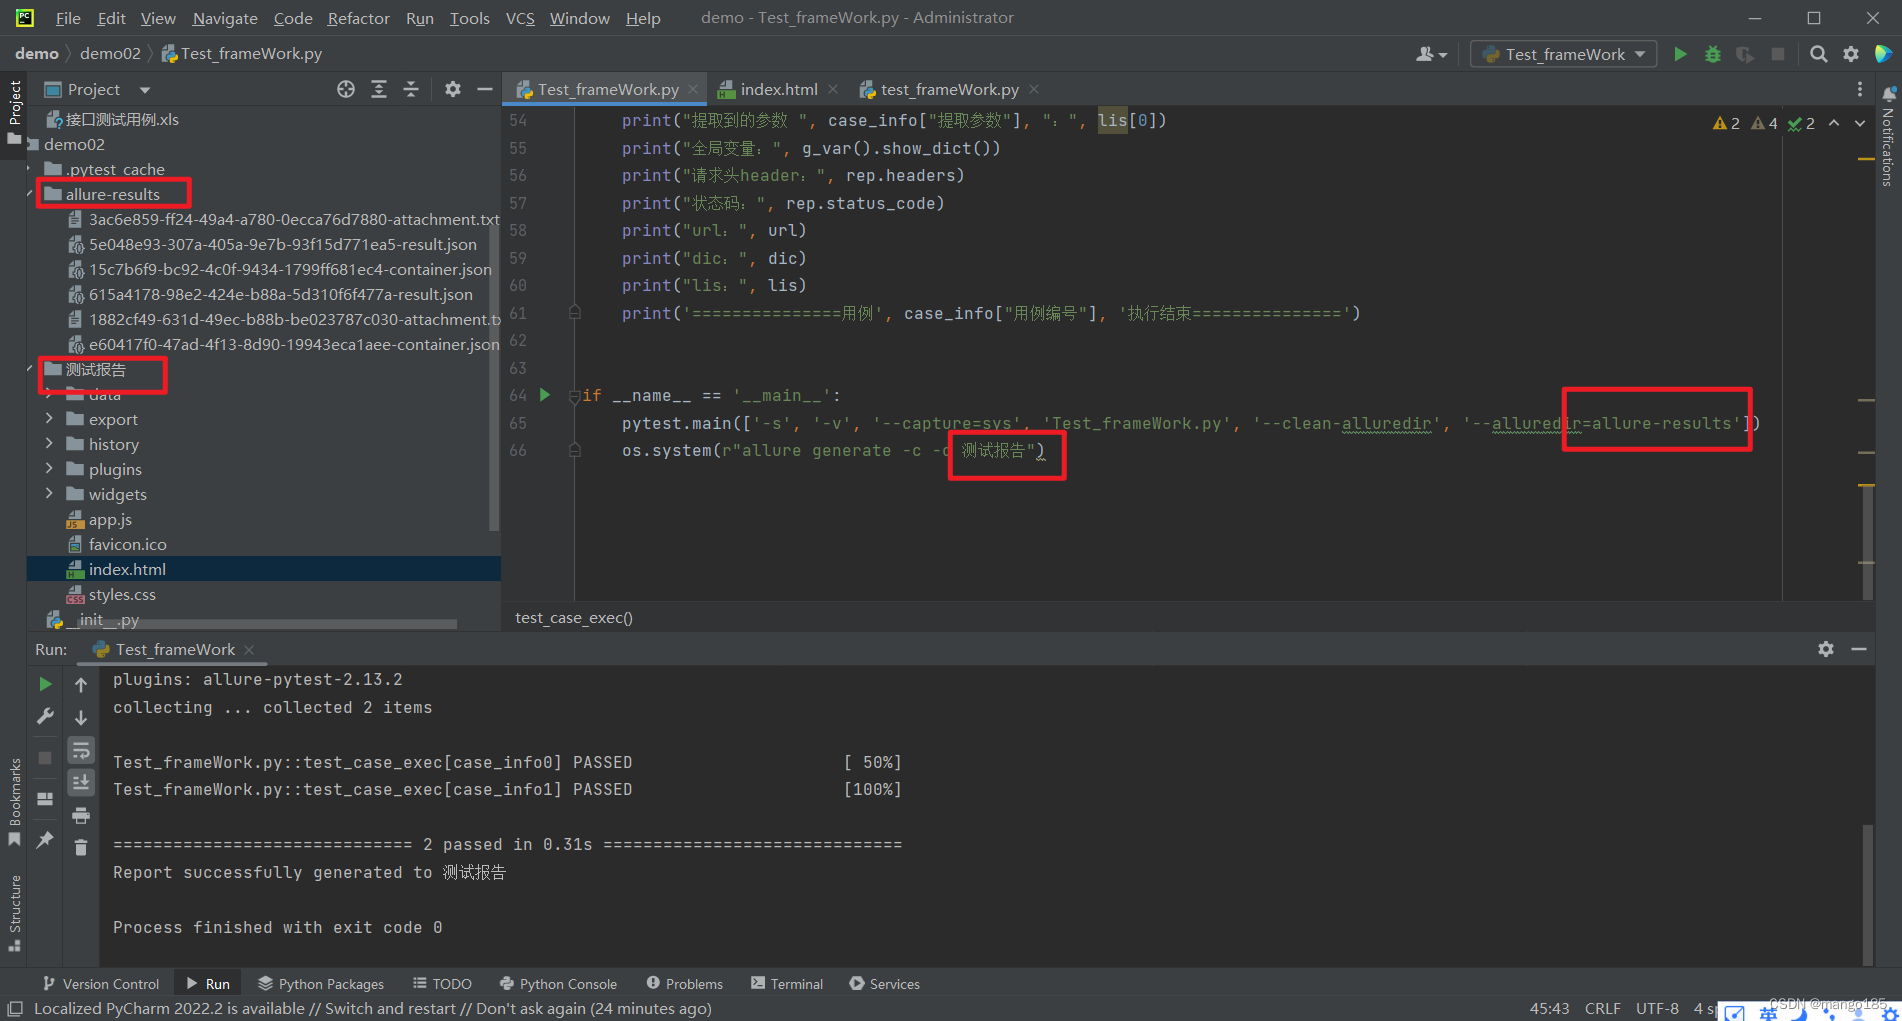
解决方法:http://quan.51testing.com/pcQuan/chat/12141
尝试在pycharm里面修改配置解决一下试试:file>setting>tools>Python integrated tools>testing>default test runner>unittests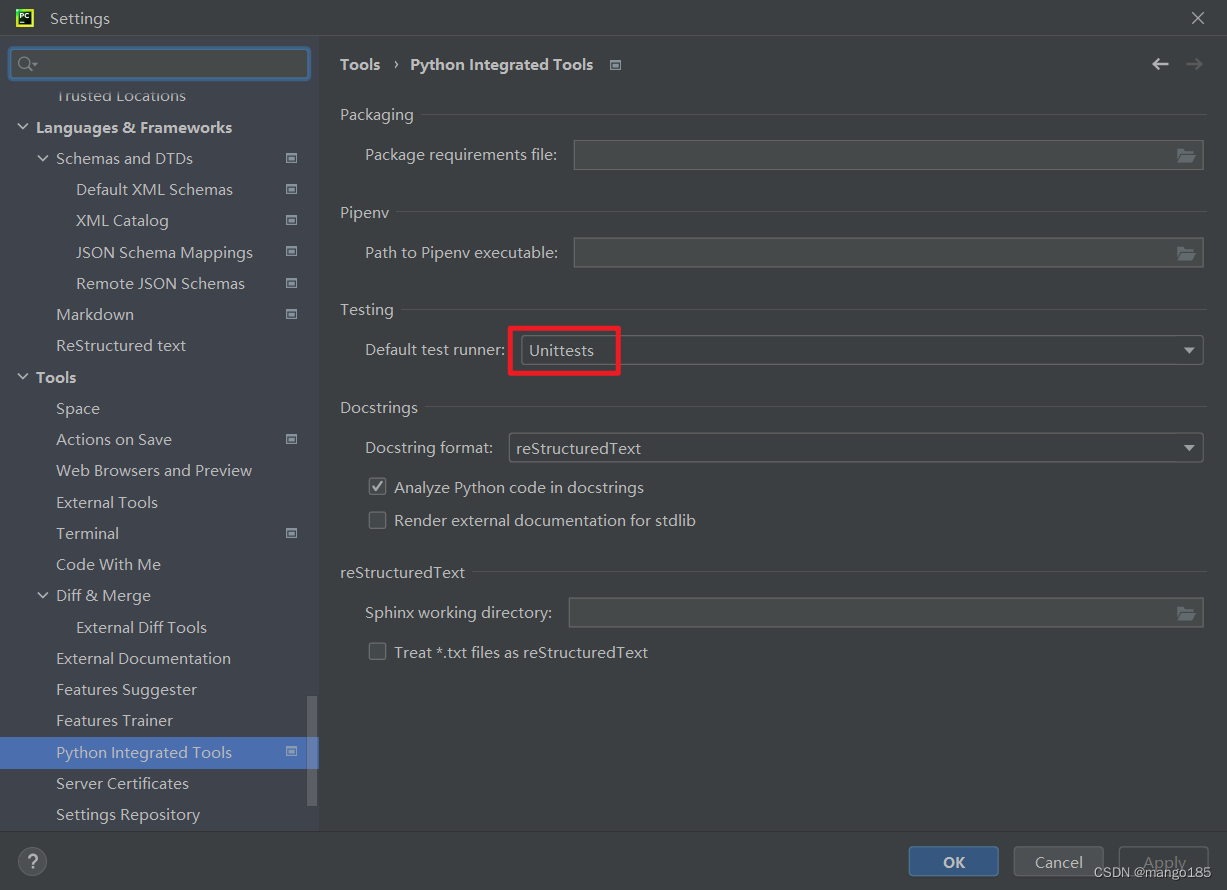
执行后只生成allure json文件,无法生成测试报告HTML文件
只生成allure-results,未生成测试报告
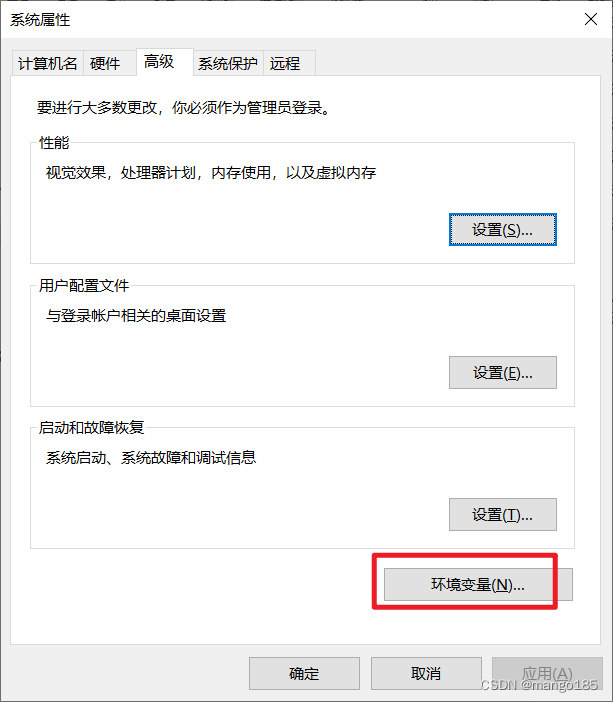
解决方法:需要配置环境变量
https://blog.csdn.net/m0_61438798/article/details/120692294
https://zhuanlan.zhihu.com/p/158795117
Allure 下载最新版本:https://github.com/allure-framework/allure2/releases
下载完成之后,解压,进入 \allure-2.13.0\bin 目录执行 allure.bat 。
配置环境变量: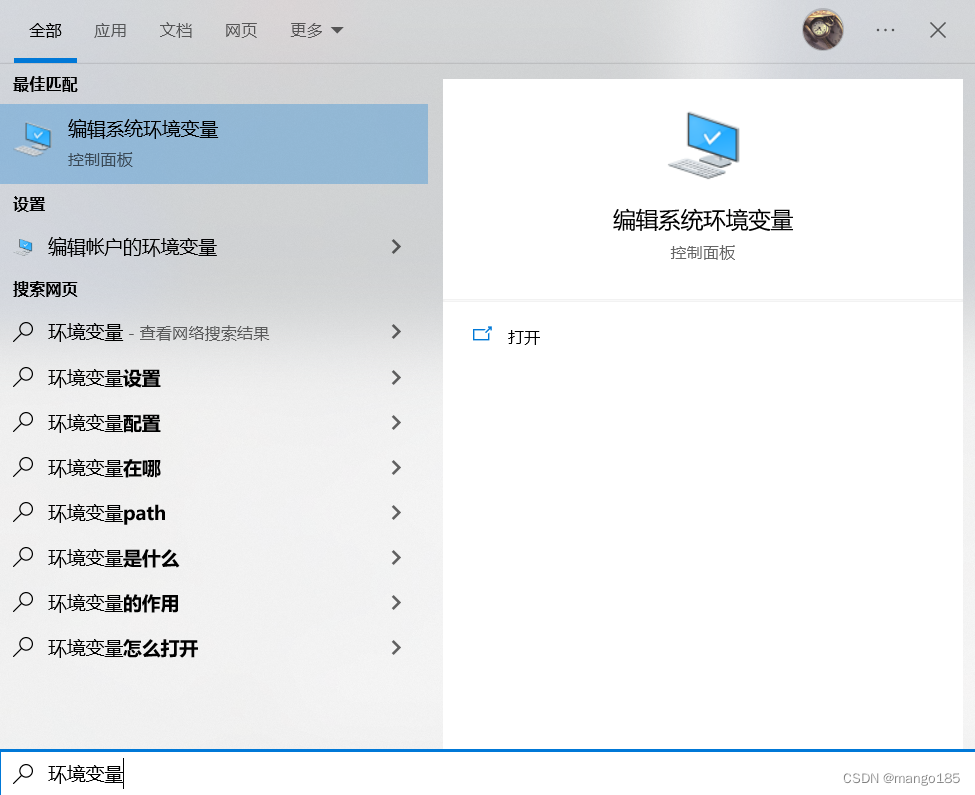
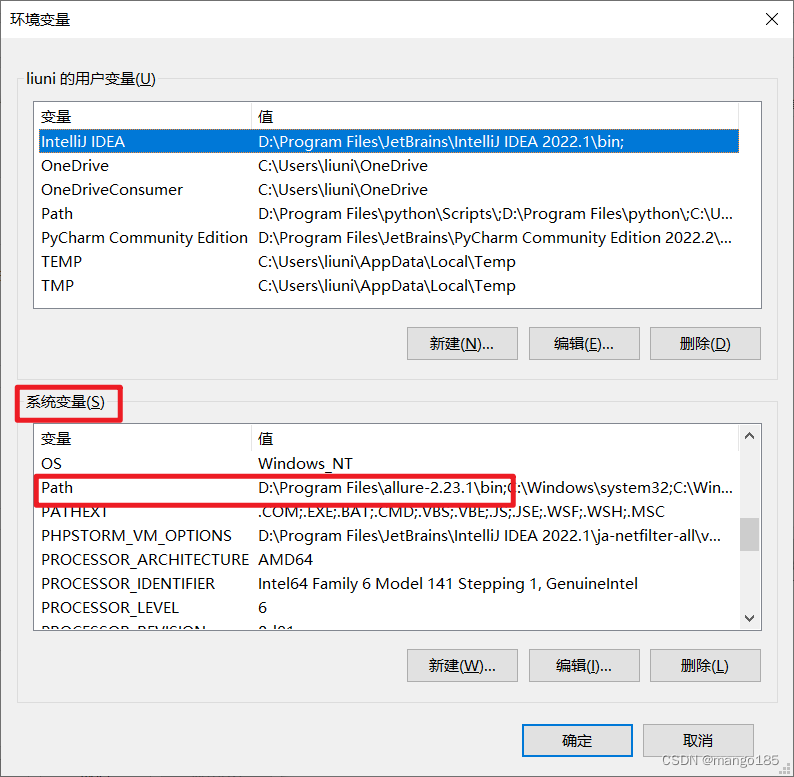
环境变量配置完成后在cmd可以执行allure命令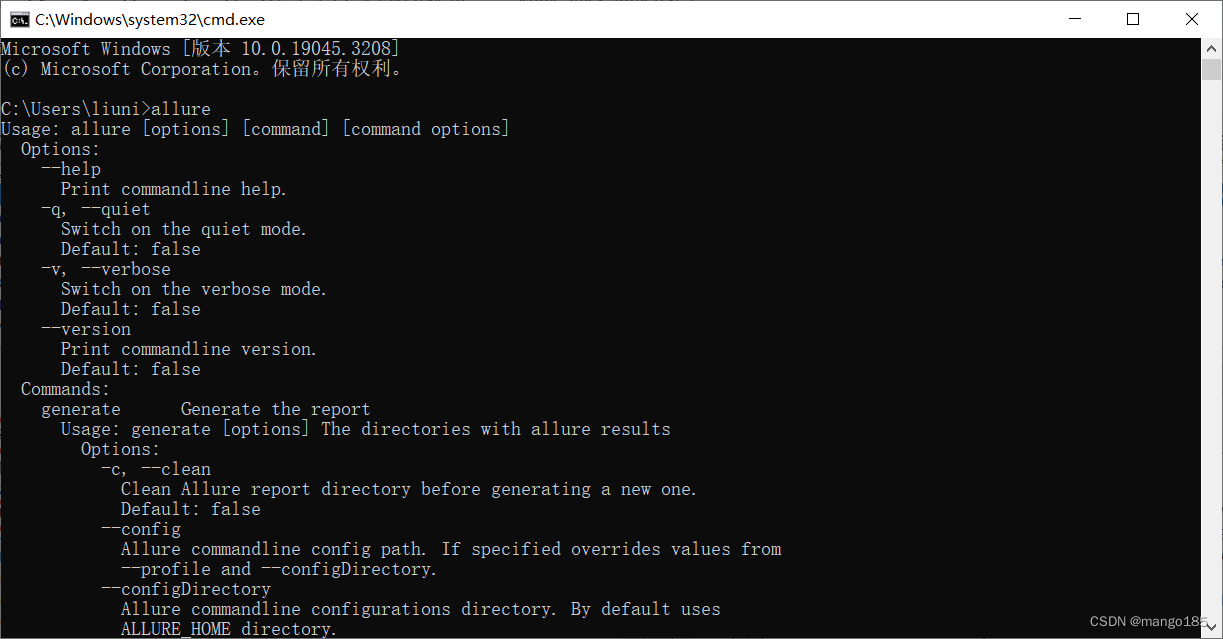
出现乱码
‘allure’ �����ڲ����ⲿ���Ҳ���ǿ����еij���
���������ļ���
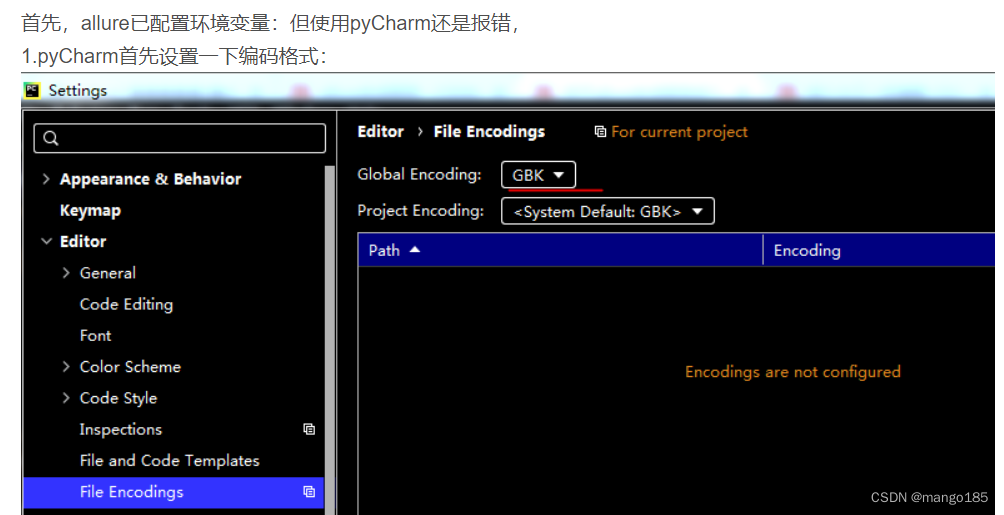
解决:修改pycharm编码格式
https://blog.csdn.net/qq_41721166/article/details/112433177
https://blog.csdn.net/WGLDXXRS/article/details/127062648
十一、接口自动化框架封装:pytest + yaml实现数据驱动
封装目的:
- 统计数据
- 异常处理
- 日志监控
应该用文件、数据库保存测试数据
其中,yaml文件保存是最简单的方式
- Excel保存的文件时字符串的类型
- yaml文件可以按照json的格式进行提取
web项目的接口都会存在cookie关联
- session对象能够自动关联cookie
- 如果不使用session,直接调requests.request(),则无法自动关联cookie
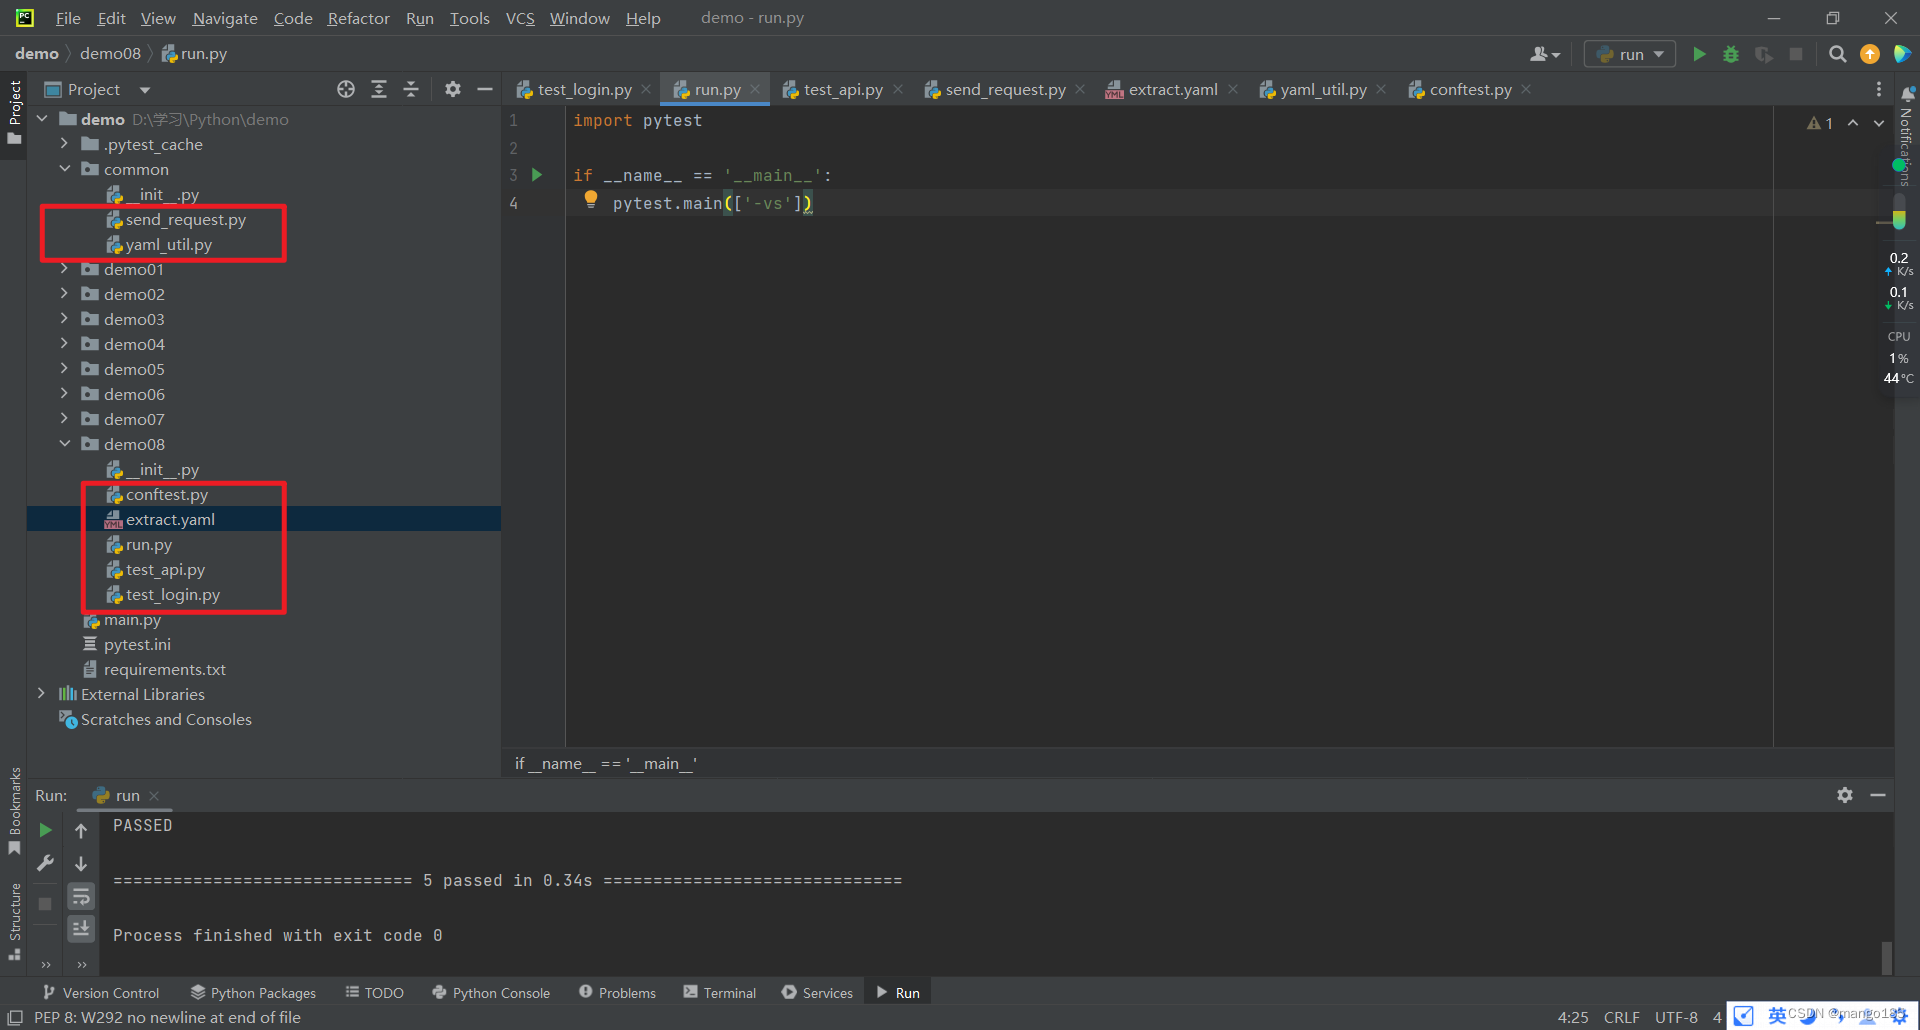
send_request.py
1 | import requests |
yaml_util.py
1 | import os |
conftest.py
1 | import pytest |
test_api.py
1 | import pytest |
test_login.py
1 | import pytest |
run.py
1 | import pytest |
extract.yaml
执行用例过程中保存的yaml文件
1 | access_token: 0cdfd24280c269e18ead448281be568a |
返回结果
1 | "D:\Program Files\python\python.exe" D:/学习/Python/demo/demo08/run.py |